
Home»Tech Guides»Compress Videos using HandBrake software
Why would you want to compress your videos?
You can easily save hundreds of gigabytes of hard drive space if you use an open-source video transcoder program, such as HandBrake, to compress your videos.
It’s completely free to use, and has a graphical interface where you can change your settings, such as how much you want to compress your video and how much you want the quality to suffer.
You could technically do video encoding by writing the coding yourself and making a .bat file from DOS, but why go that route when there are free programs with easy-to-use graphical interfaces?
Handbrake is certainly our go-to program when we want to compress videos to store on our backup NAS. If there’s a backlog, Handbrake is invaluable for reducing video sizes with minimal impact on video quality, significantly reducing the amount of time spend uploading the videos to online platforms such as YouTube.
Keep your videos backed up on your drives!
It’s often very surprising for us to see how few content creators know of Handbrake. Without compressing videos, an hour long 1080p 60 FPS video can easily take up 10 GB of hard drive space, and a 4K 60 FPS video an hour long could easily take up 40 – 50 GB.
External hard drives can be sold up to tens of terabytes at the time of writing, but hours of video can quickly add up if you do long-form commentary.
Some content creators will just upload their videos to YouTube and delete the video from their hard drive. I wouldn’t recommend this because you never know what will happen to YouTube.
Although the site has existed since 2006 and seems to be the second-most visited site each year next to Google.com, wouldn’t it be safer to have a backup of your own videos?
As well, it’s handy to keep your videos on your hard drive because you can easily make countdowns and do reactions of your older videos.
Moreover, you can re-watch your old videos to see if there are any problems, and you can critique them yourself to find out how you can self-improve.
Your videos would be useful to have on-hand, if you go to a business meeting for a sponsorship opportunity, for example, you could always show it to a client, depending on the kinds of content your business produces.
If you wanted to keep all your videos on an external hard drive, it would no doubt be easier if you compressed them first.
Compress your videos to upload them faster!
Another good reason for compressing your videos is if you have Internet bandwidth limitations. Many regions usually don’t have data caps on Internet usage as long as you pay for their non-cheapest plan, but again, it depends on your exact region sadly.
If you do live in a region where there is a data upload cap, using HandBrake will reduce the amount of disk space you’re uploading.
Perhaps you live in a region where Internet upload speeds are slow. For some people, uploading just a single video to YouTube could take multiple days, and if something happens such as the computer freezing, the browser freezing, or even the power going out, you need to redo the entire uploading process.
Handbrake can easily put an end to those potential issues!
Using Handbrake Step by Step
You can download it from: https://handbrake.fr/
Go to File > Open Source > File or Batch Scan, depending on whether you want to compress one video file or an entire folder of video files. It will open the video(s) into the program and you’ll see a preview of your compressed video.
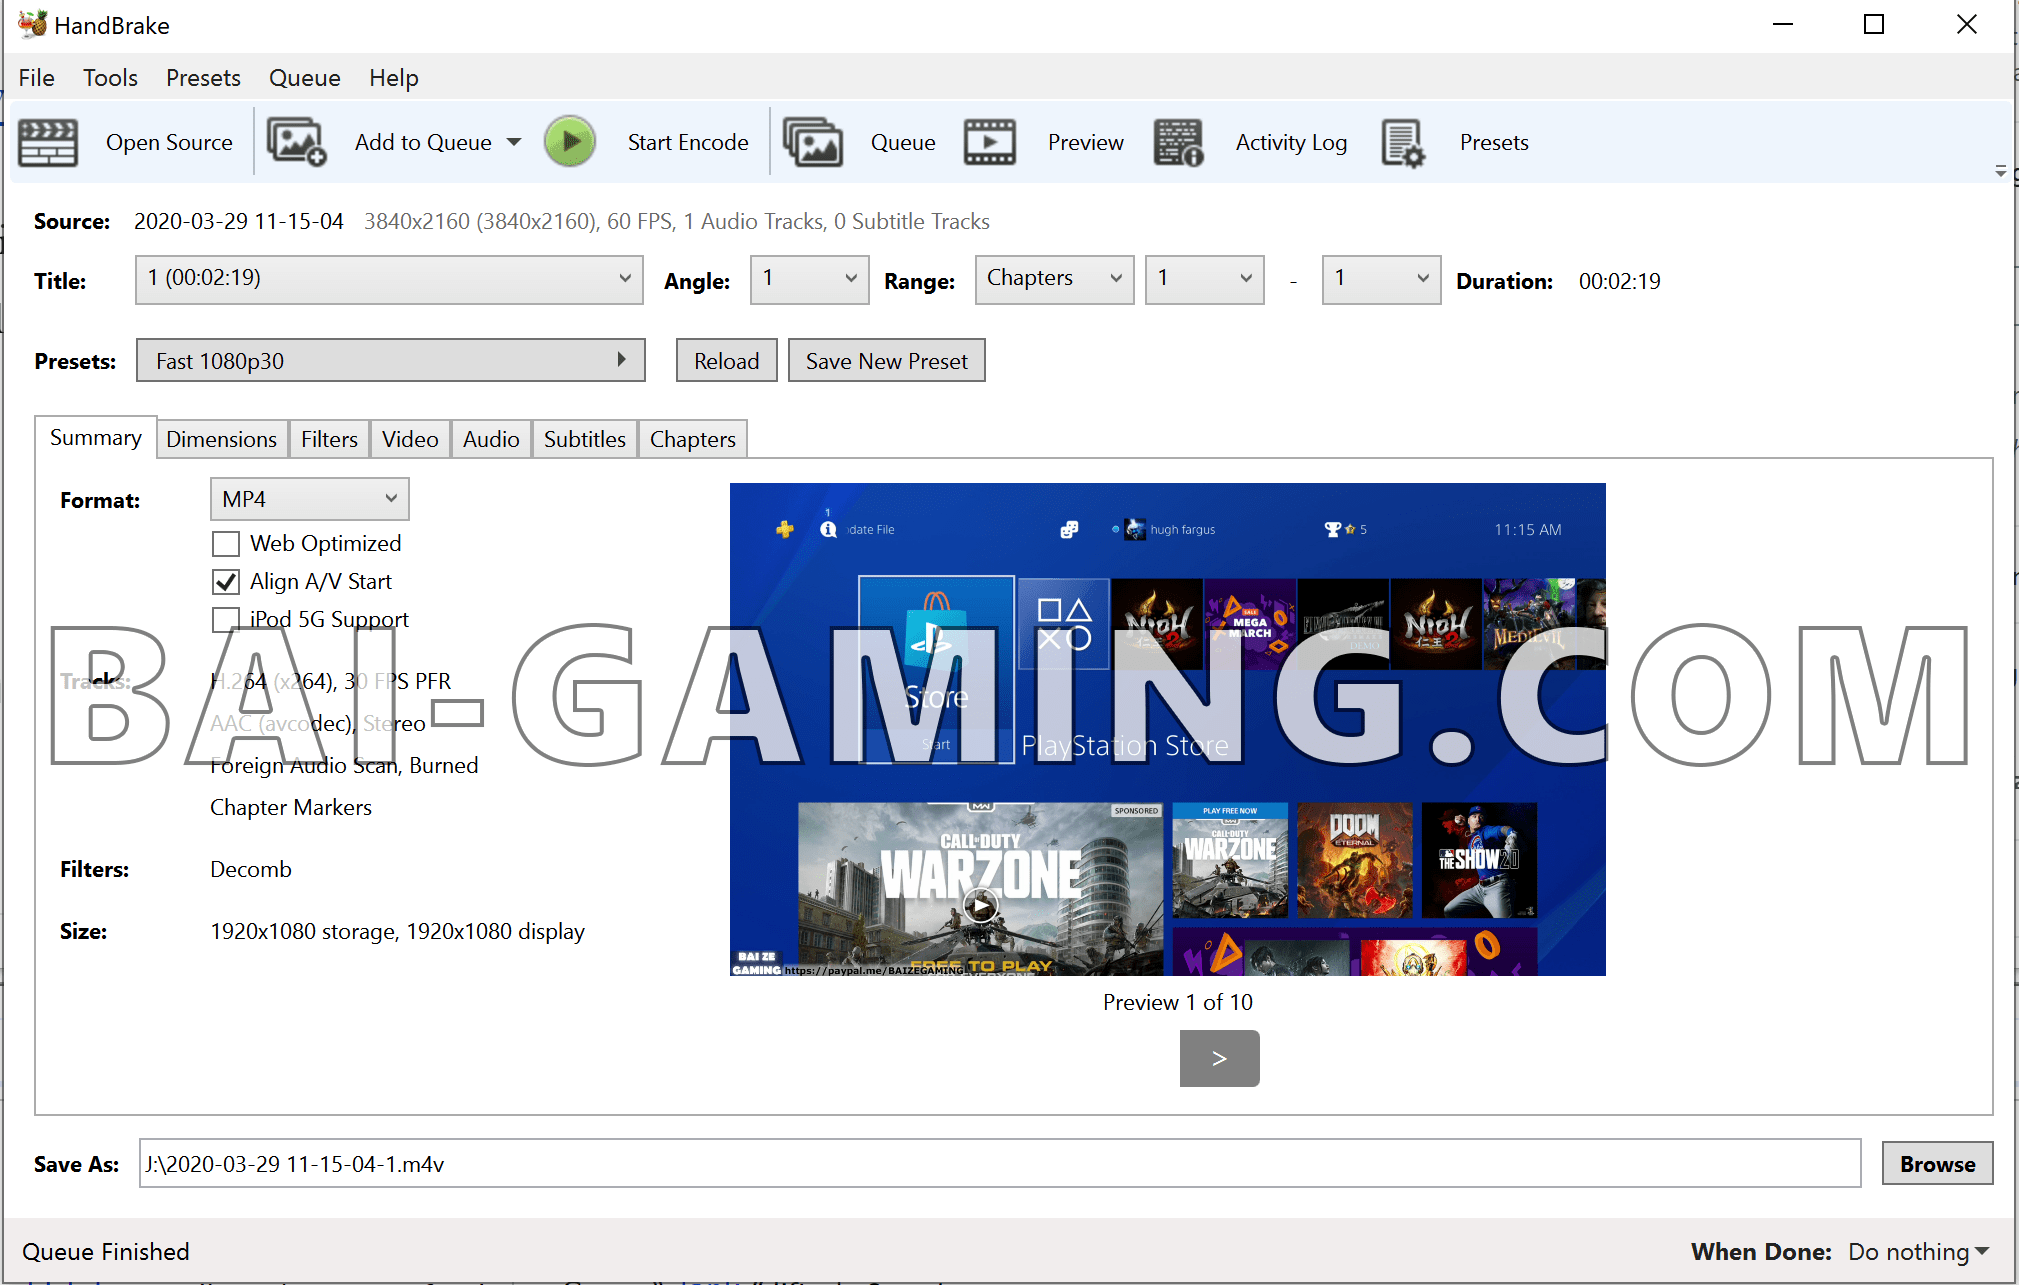
You can set HandBrake to make copies of your original video, so you don’t need to worry about your original video being modified or destroyed. Ensure you have free file space for where your compressed videos will go.
You can also easily set HandBrake to do batches of video files. That way, you can do video compression overnight if you wanted to play CPU-intensive video games on your computer during the day.
The art of balancing, do you want to spend significantly more time compressing to get a tiny video filesize?
It must be noted that if you’re really trying to maximize video compression, you will max out your CPU usage and it will also take longer to compress the video. There will always be a tradeoff.
You will need to experiment with your own videos in a few ways, namely: the kind of sizes you want to expect for your outputted compressed videos, the time you’re willing to spend compressing your videos, and how many videos you’re dealing with.
For instance, you could perhaps cut your video filesize in half in just an hour, but maybe if you spend 4 hours you can cut your video filesize into a third of its original filesize. These numbers are not to scale, but eventually there is diminishing returns to how much you can reasonably compress video filesize.
It is a delicate balancing act, and although HandBrake is usually good at compressing your videos well with a barely noticeable impact on video quality, you should experiment a little because it will vary based on what kind of videos you’re looking to compress and the quality you’re expecting to have from the compressed video.
If you’re change the settings too drastically, you can very well end up with bad results, BUT, it’s not the end of the world because HandBrake makes copies of your original videos.
That’s why we want encourage users to play around a bit because the exact settings may not necessarily work for everyone, and in fact, you really have to play around with the settings for each type of video.
Back on track, specify HandBrake’s preferences
With all this out of the way, first thing to do is go to Tools > Preferences and change your preferences.
We’ll start with the General tab, you can set it to check for automatic updates, which we recommend.
You can tell your computer to shut down after the batch of compressions are complete, we leave it blank because we leave our computers on 24/7 with a surge protector that can run on battery in the event of power outage.
An important setting is the path to the VLC Player, install it from https://www.videolan.org/vlc/index.html if you haven’t because it easily lets you see a preview of your compressed video file, which is extremely handy to tell if you’re on the right track or if you screwed up badly.
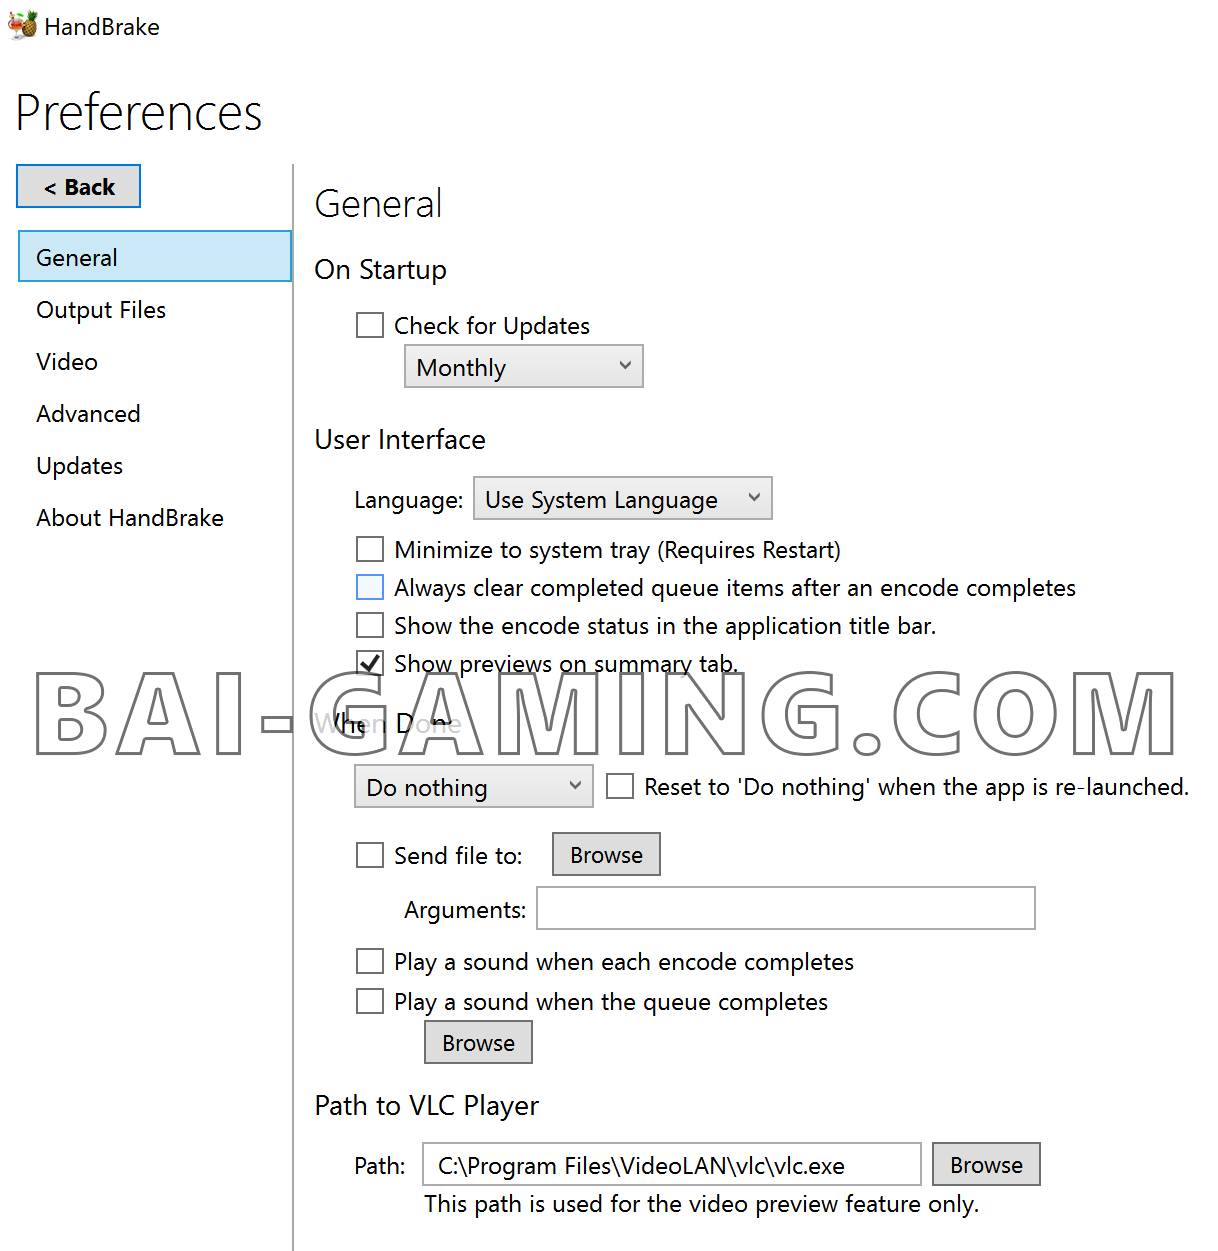
You can go through the other tabs as well. The next tab, output files is very important, you can choose to automatically name output files and choose where they’re saved.
The advanced tab is important, it has a setting to prevent your computer/hard drive from falling asleep while doing video compression.
You can restart Handbrake as well now to make sure these changes are saved.
That’s enough for the preferences, you can go back to the main window.
Know what kind of video resolution you need
The Summary tab will explain to you your video compression output settings. You can choose the format you want the output to be, and you can leave Align A/V Start checked. Dimensions will have your video resolution, usually either 1920 x 1080 (1080p) or 3840 x 2160 (4K).
It’s up to you if you want to compress your 4K videos down, or if you want them to have the same resolution.
Ir is among consensus that YouTube videos in 2020 need to be at least 1080p in resolution due to how much competition there is.
Your video do not have to be in 4K resolution yet, but that could change in a few years.
The only popular YouTube videos with 720p or lower resolutions tend to be older videos from the early years of YouTube and sometimes soundtracks and songs.
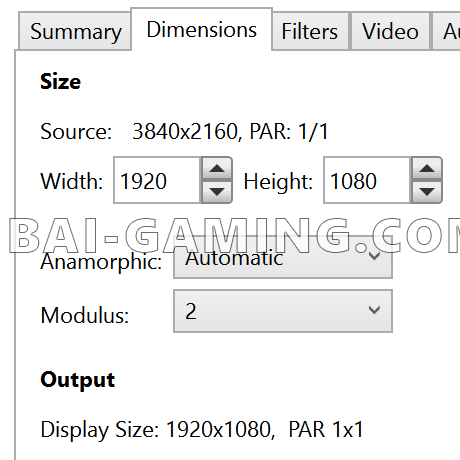
We usually leave filters alone for the scope of this video.
Choosing between a variable or constant framerate
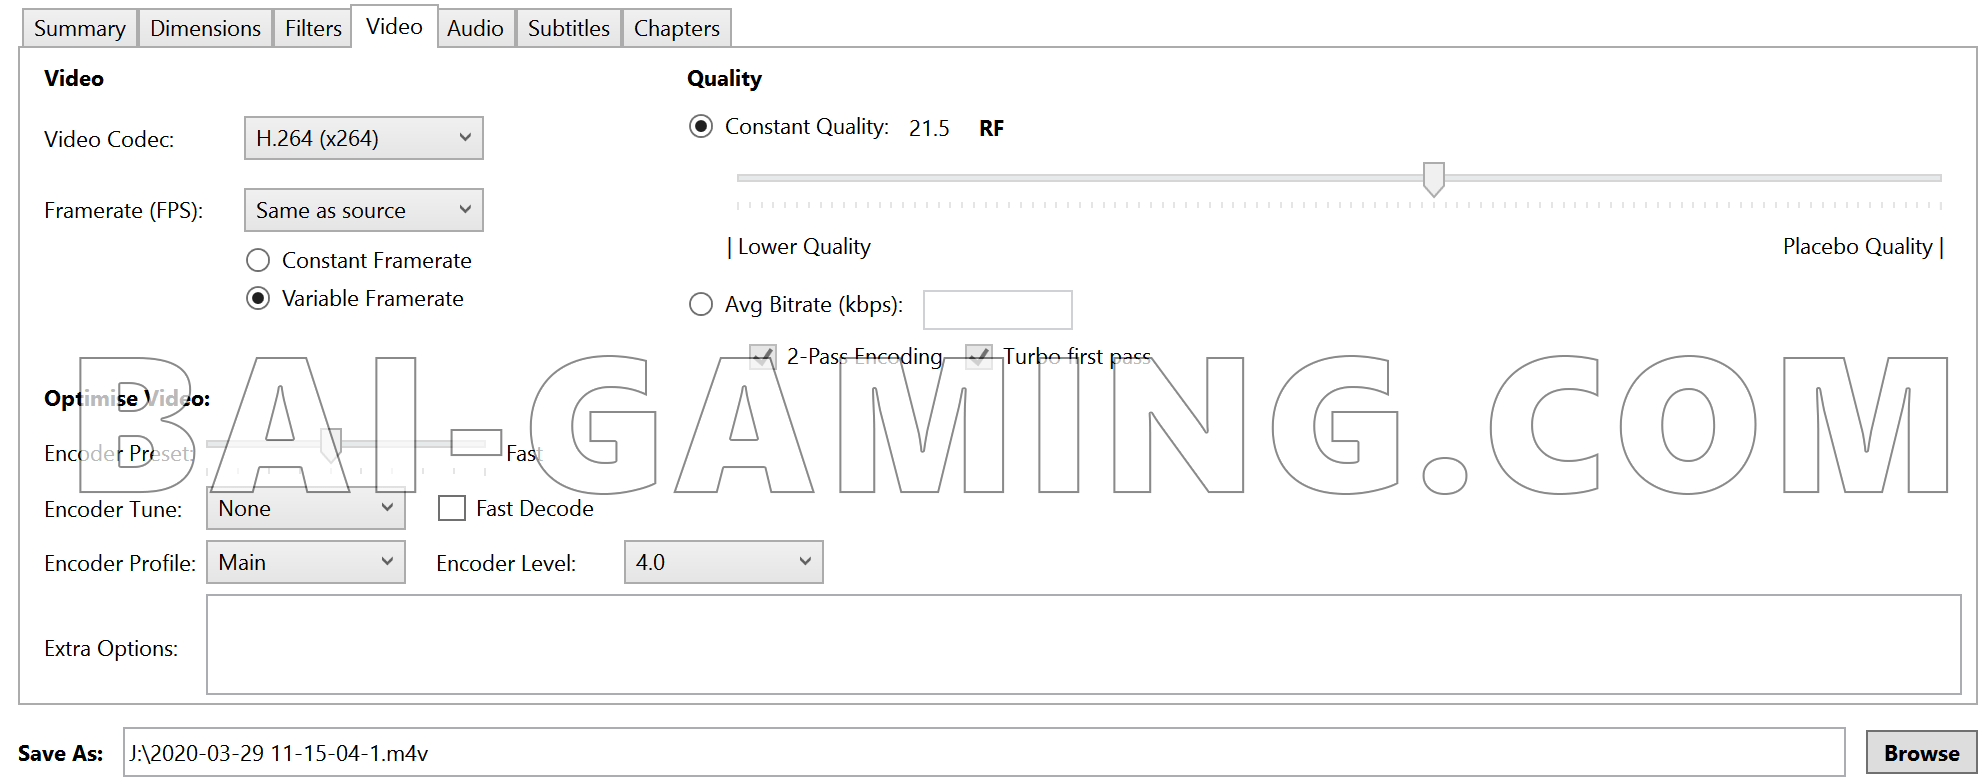
The video tab is extremely important. You will need to select a video codec, we typically use H.264 x264 and use the .mp4 or .m4v filetype. We leave the framerate the same as source, and choose variable framerate.
We choose variable framerate in this case because our team usually records video game footage through a video capture device called the Elgato Pro 4K.
The issue with our videos is that the Elgato will drop a few frames, maybe a dozen or two in an hour long video for us typically.
We know that if you choose constant framerate in this context, it desyncs the audio, which means that at the end of an hour-long gameplay video, the mouth movements for a character will be severely off from the sounds of their voice!
So by purposely selecting the output to have variable framerate, we keep in the inconsistent framerate so my audio won’t desync from the video!
This is a big problem found with content creators using Elgato capture cards and you will find dozens of posts on forums regarding this issue, and this is the solution!
You may think to yourself, “But BAI, you’re keeping a variable framerate, won’t your video remain choppy?!”, and to that we’d respond with a resounding “Yes!”, BUT, as we said we only have a few dozen, maybe 50 frames dropped from an hour long 60 FPS video!
60 frames per second times 3 600 seconds in an hour equals 216 000 frames in that video! Dropping 50 frames in a 216 000 frame video is a droplet in an ocean!
But by switching to a constant framerate, it desyncs the audio by 50 frames which is dreadful, imagine a character’s mouth animation is visually off from their voice audio by 50 frames, that’s almost a second of audio desync!
Bear in mind, this is only in the context and scope of what I work on, but if you do video game footage, I do recommend to select a variable framerate, or you may end up desyncing your video because your capture device or your game itself might dip in frames for just a second or two for your whole video, and you don’t want to get your whole video ruined by an audio desync that could’ve been avoided.
If you don’t know what framerate to use, right click your video file and find the properties. I would keep it the same as the source to avoid problems. Framerates are either 29.97, 30, 59.94, or 60.
You do NOT want to change a 30 FPS source video to 60 FPS, you need to capture it from the source at that framerate, you try to be cheap and increase your FPS like that, you’re going to get a lot of strange fades and in-between frames, it’s not worth it, it causes a lot of “visual ghosting”, you can research more regarding that phenomenon.
Some cameras use a framerate that’s a decimal, it’s a carry-over from the old days. Live action camera footage doesn’t really have frame drops like video game footage, you can actually select “constant framerate” without worry of audio desync.
Audio desync is usually an Elgato problem, so consider setting a variable framerate if you do video game footage capture through Elgato.
Worst case, HandBrake makes a copy of your video, so if the output is bad, choose the other option.
Quality and speed settings
Encoder Present should be set to the slowest possible value you can tolerate. If you have a large batch of videos to compress and you want to have it all done overnight, consider using Slow or Medium.
There are settings slower than “slow”, but we don’t typically use them because it starts taking exponentially longer to finish compressing the videos.
If you have a computer with a good CPU, or even a group of networked computers, then consider going slower than slow.
The Quality setting is also important, you can slide the bar, left is lower quality, while the right is placebo quality, or you can enter a bitrate in kbps. The slider is tricky to work with as it is an exponential/logarithmic bar, just a notch could have ten times the result so you would need to be very careful and adjust the bar slightly.
Usually, we need to play around with it before actually running the batch compression, but the bitrate feature is very handy if you know what bitrate you want.
Remember, you can right-click your original video file to view the bitrate, a 4K video game capture video from Elgato has had 60 mbps, and we’d reduce it to 30 mbps using Handbrake, which is 30 000 kbps.
In the scope of this video, we don’t make use of the audio, subtitles, or chapters tabs. Once you have your settings, click “Add to Queue”, click the Queue itself to ensure you have all the videos you want compressed listed, and click the green arrow to “Start Encode”.
Wait a few hours or so, and boom, compressed videos that have a drastically smaller filesize with only a slight decrease in visual quality, hopefully.
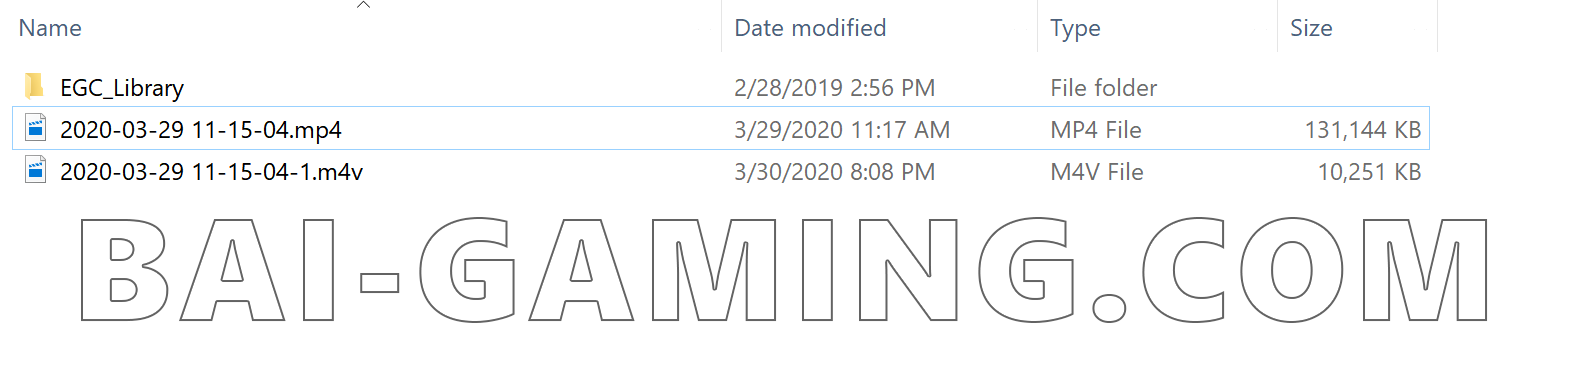
I was able to take a 3 minute sample video of a video game, with framerate 60 FPS and resolution 4K that was 131 MB into a 1080p 60 FPS video that is only 10 MB.
This is an extreme example because I took the resolution down from 4K to 1080p, but even if you didn’t do that, you could easily expect regularly compressing your video into half or a third of its original filesize if you’re keeping the same resolution and framerate.
This example also illustrates how disk-consuming 4K resolution videos can be!
Click here to return to our Tech Guides page.