Essential Tips and Tricks – The First Berserker: Khazan
Here is a list of essential tips and tricks you should know when beginning The First Berserker: Khazan to get through the game easily. The game doesn’t always explain all of its nuances so we’ll summarize essential tips that took us dozens of hours to find. We will NOT be mentioning any spoilers!
How Gear works

- The Gear in Khazan is like that in Nioh. You will get hundreds of randomized equipment from enemy & boss drops, all with different kinds of effects, levels and stats.
- It’s better not to upgrade equipment at first if you can help it because if you progress the story you’ll be able to find higher-level equipment with higher stats that will outclass your old equipment rather quickly. It’s not even worth repeating the same mission to grind either, just keep progressing the story forward to get better loot.
- Your equipment will have rarities as well, but higher-level common equipment later on will beat old equipment with higher rarities.
- You can only hold a total of 500 gear items at once, so you will need to get rid of them eventually.
- The best way to get rid of old equipment is to dismantle it. You unlock the ability to dismantle old equipment when you unlock and complete the Blacksmith’s quest. Dismantling equipment provides resources to craft new equipment and makes the most sense.
- I would save crafting gear sets for the end-game. Certain sets require grinding for rare materials so it’s easier to do when you’re high-leveled to defeat elite enemies and bosses easily and also have access to all the stages.
- As well, when you craft gear it matches your current character level (crafted gear level is your character level), so you don’t want it to get outclassed by doing story missions that provide higher leveled equipment. Save it for endgame when you’re a high level or possibly maxed level character. (This has been adjusted in the recent patch! Crafted gear will be above your character level now and the formula has been adjusted.)
- The equipment carried over from the demo is somewhat glitched because they have a higher stat scaling than the equipment in the actual base game, I’m not sure if it’s a bug or oversight but I ended up just putting them in storage because they felt cheap.
- But if you want to be cheap then keep the equipment carried over from the demo and use it, it can last to the endgame due to their higher scaling factor even if they’re very low-leveled.
- The demo weapons seem to have B+ scaling whereas all the weapons in the regular game have B or C scaling factors.
Complete the most important sidequests early on
- Talk to the NPCs in The Crevice (the hub area) and do their side quests (called bonus missions) as soon as possible! Certain bonus missions unlock very essential features such as collectible jarlings and the forge so prioritize the following ones.
- For example, the quest Jar Enthusiasts in Area 1 unlocks the collectible “jarlings” (usually 1 collectible jar that you break in each level that contain creatures in them, similar to Nioh’s Kodama collectibles) you can find in each level, which you can then cash in for rewards.
- But if you never do this side quest, you’ll never unlock the ability to find the jars in levels even though it has a “0/1 jarling” icon on the mission select screen.
- Make sure to do this one as soon as it unlocks so that you can find jarlings while doing missions, otherwise you’ll have to repeat old missions and have to scour through the level looking for them. You might as well knock them out while you play through the game.
- One small caveat is that if you find all jarlings in the game the shop that gives out rewards disappears, so cash in your rewards in advance before finding them all. It looks like a bug because the “shop” menu option disappears but the NPC is still there, it’s not like there’s a lore reason for this happening.
- The bonus mission Blacksmith’s Heirloom near the end of Area 1 unlocks the ability to use the blacksmith, to create new equipment sets or dismantle equipment into resources.
- The dismantling feature is important because you have a gear inventory limit that you’ll very quickly reach and you might as well dismantle equipment into forge materials rather than just discard them for nothing.
- The bonus mission Kaleido in the beginning of Area 2 unlocks the ability to alter your equipment’s attributes and upgrade your equipment.
- It’s a good feature to have, but I didn’t upgrade equipment until end-game unless I was really struggling at a boss. It’s still a good feature to have for when you need it in case of a roadblock.
- In the late-game make sure to do the bonus side missions Atlante the Precise (Wastus Canyon) and The Vow (Great Temple Underground Ruins) because they’re optional missions that have a collectible permanent upgrades for your healing consumable (Netherworld Energy).
- You will want the maximum amount of healing (8 Netherworld Energies) because most later bosses have multiple phases you have to do in one shot.
Make sure to get rewards for your Red Soulstones
- Make sure to destroy Red Soulstones (the red destructible crystals found throughout all the levels) found in all of the levels. To obtain rewards for your Red Soulstones just talk to the NPC Daphrona, she’s found from progressing the main story of the game and automatically goes to The Crevice after doing the mission you encounter her in.
- When upgrading, you can choose between either your health potions healing more or increasing the amount of Lacrima (experience) from enemies but it’s strongly suggested to take more healing early on.
- This is because you can always just grind for more Lacrima by repeating missions and simply defeating more enemies, but your healing cannot be improved by any other way. The toughest part of this game are the boss fights, where you’ll want to heal more.
- It’s very easy to upgrade your health to the point where the healing potions don’t heal as much anymore, so you need the healing upgrade as soon as possible.
- You’ll eventually be able to get the other reward you didn’t choose but it’s not until much later in the game when you hand in a lot more Red Soulstones. Save yourself stress and always choose for your potions to heal more!
Make sure to get rewards for Vengeance Points

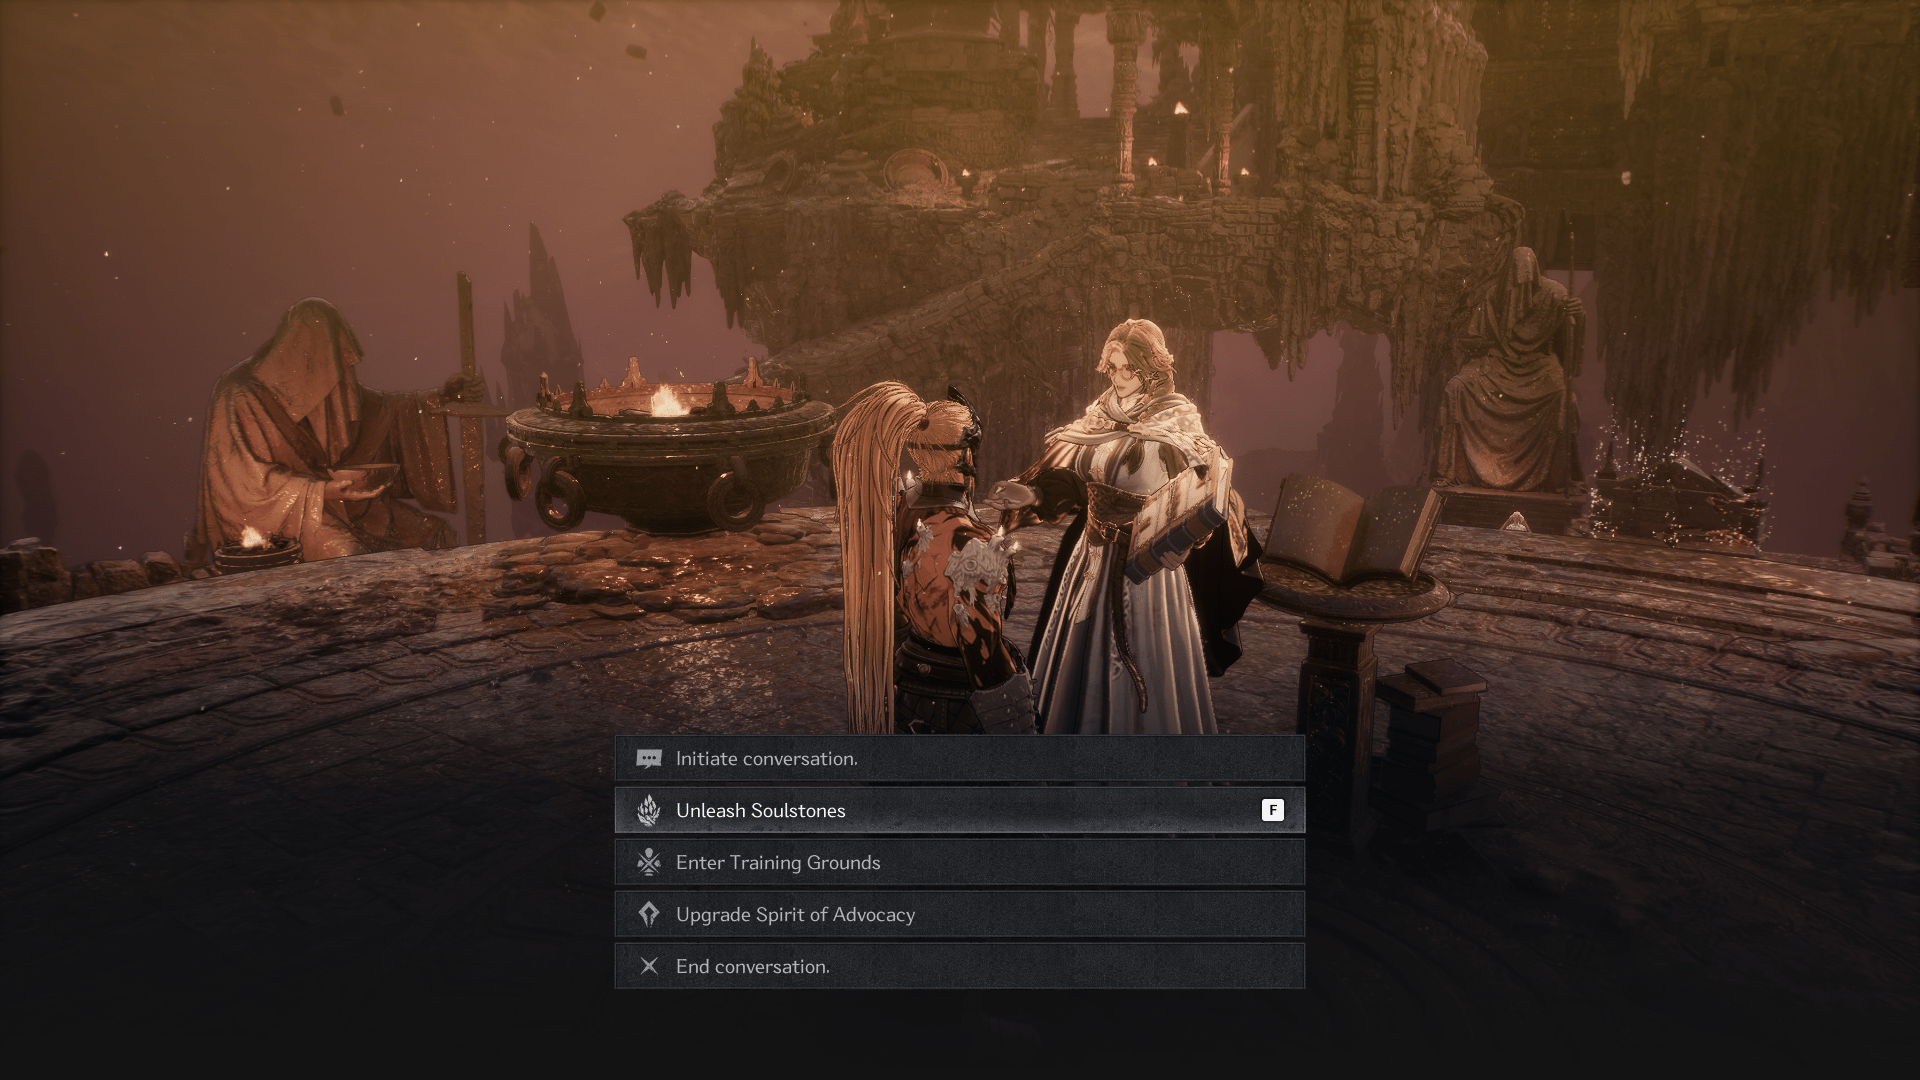
- At any Blade Nexus (bonfire) make sure to go into the “Khazan’s Memories” option. It looks like it just leads to lore but you can actually spend your Vengeance Points to get upgrades here!
- Choose to “Upgrade Stats” after selecting Khazan’s Memories. We can’t show the exact screen because it lists all of the missions which are spoilers but you essentially trade in the collectibles you find across the missions here.
- In order to use it you do need to actually go through the menus for each mission and it adds the collectibles as points to trade in.
- These upgrades include options to increase your damage, stamina damage and damage multiplier.
Get Jarling Rewards
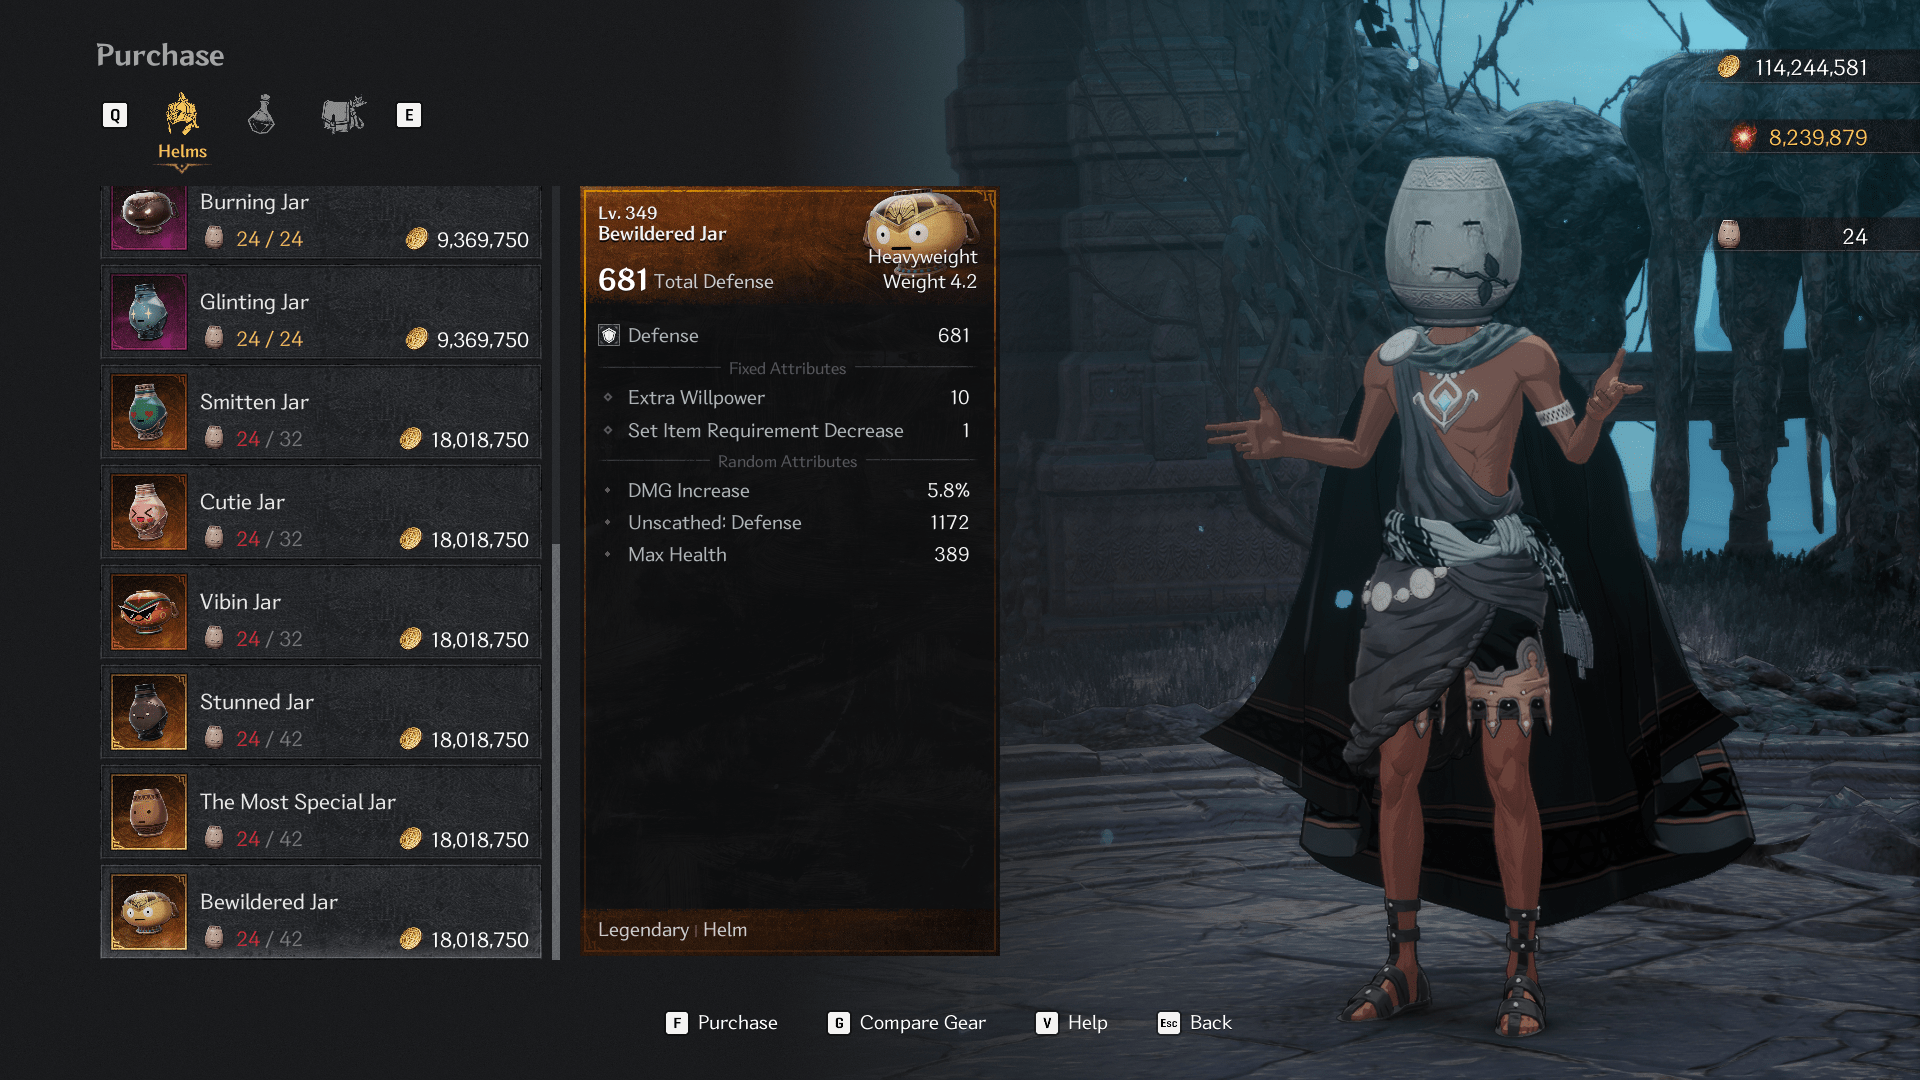
- Make sure to get rewards for finding Jarlings from the NPC in The Crevice. The higher-tier helmets have really amazing bonuses and also decrease your “item set requirement” by 1, meaning that the jar helmet will still count toward your item set requirements (you don’t have to wear your normally matching helmet).
Sidequests do NOT expire (until the ending)
- You should do the side quests (bonus missions) to unlock crucial features as well as for extra equipment drops, rewards and to level up as mentioned above, but you don’t have to do them immediately if you don’t want to.
- This game has sidequests like Nioh, in the sense that nothing is missable. You can do the NPC sidequests whenever you like without punishment, but you should do them before the final boss or even the final area’s final mission to be safe.
- If you want to progress the main story, you can do it as the bonus missions never expire until the end-game.
- The last mission of the last region has a choice that affects the ending and you need collectibles in order to access all the choices, so you’re fine any time up until that point to do side quests at your own pace.
- If you want to, you can knock out repetitive bonus missions when you’re a higher level, which can be recommended as some bonus missions have re-skins of bosses that you might find annoying to deal with (the boss with the flamethrower for instance). That way you can just breeze through them.
- All missions have a very handy level recommendation as well to know if you can handle the mission.
- Most optional missions have higher level recommendations compared to their main story counterparts (and harder re-skinned bosses) so I generally save them for after finishing the main story of that particular region.
You can take breaks between missions at any time
- At the bonfires (called Blade Nexus in this game) you can warp to/from them at any time (after the “introductory section” of the game).
- You can choose any Blade Nexus to warp to/from to at any time, meaning you don’t have to do a mission in one-go (unlike Nioh’s mission-based structure).
- If you want to stop doing the main story for example, you can go into a bonus mission at any time, and if you change your mind you can warp back to the any Blade Nexus you want and you don’t have to repeat the whole mission.
- You can also warp to different Blade Nexuses to quickly get collectibles you missed.
- You can also repeat missions to re-spawn elite enemies and bosses to farm for rare material drops, used for creating gear sets from the blacksmith.
- If you’re worried about an item getting lost such as not appearing on the cliff where an enemy fell from (or if you didn’t get drops at all), nothing is missable and you can farm everything indefinitely.
Keep accessories that resist ailments
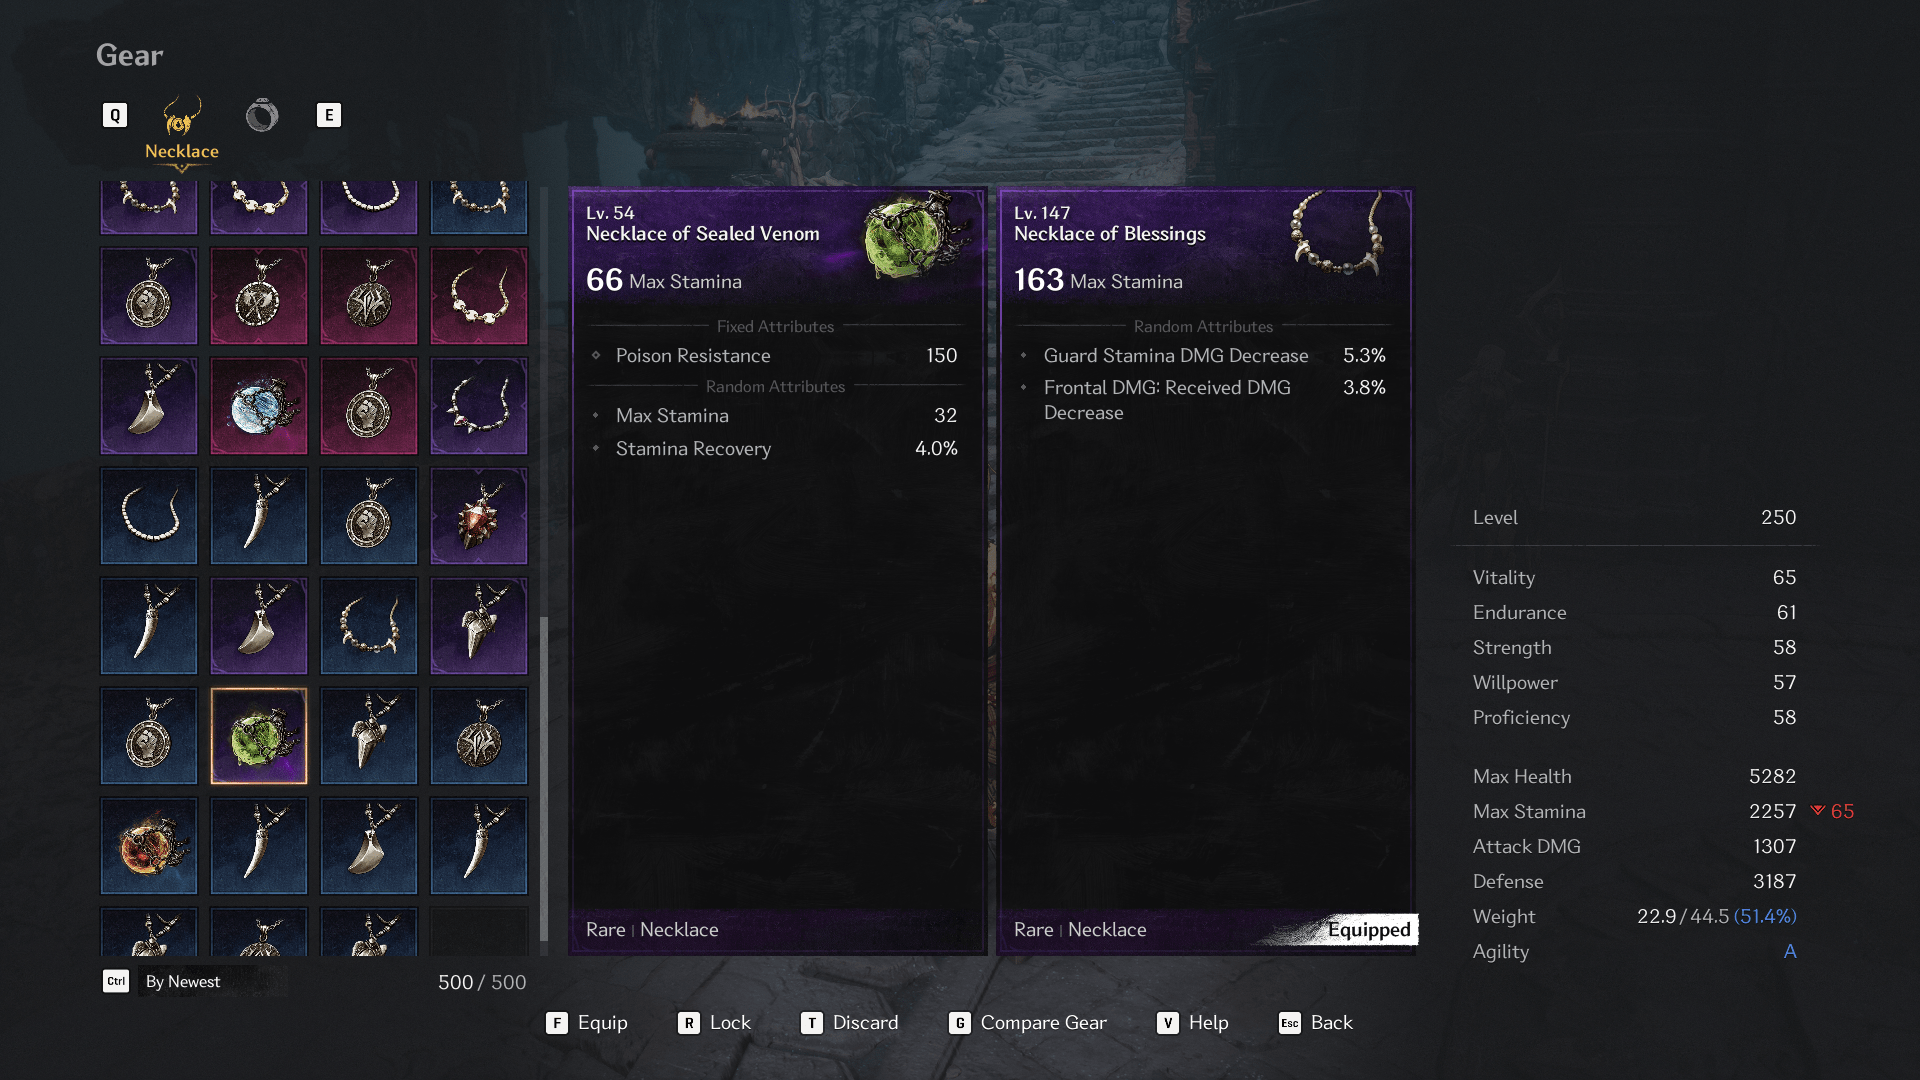
- Although gear gets outclassed quickly, keep accessories such as elemental resist accessories or ailment resist accessories.
- They’re handy because there’s a lot of bosses that are of “each element” such as an ice boss, a fire boss, a lightning boss or a poison boss to name a few. Even though the accessories may be low leveled they really help prevent ailment buildup.
- Keep an eye out for any equipment and accessories that resist the “chaos” ailment. This ailment is very prevalent in the endgame and with endgame boss fights but they’re rare, so hold on to them if you find them and consider even upgrading them too. Chaos is one of the worst ailments in the game because it reduces your maximum HP.
Get the healing upgrades as soon as possible
- Get more healing items (Netherworld Energy upgrades) soon as possible!
- You start off the game with only 3 healing consumables but this can be upgraded to a total of 8.
- Unfortunately, many of the upgrades are contained in the bonus missions, which require other objectives to unlock them as well! It feels like the developers committed a faux pas by doing this, you’d think they’d put them in the main story missions because they’re extremely important…
- In the main story you can find 3 more upgrades in the missions: Forgotten Temple (Embars Ruins), Strange Stench (Skoffa Cave), and Devoured Village (El Ravaca Village). Consider progressing the main story to get all these before pursuing optional bonus missions (except the ones that unlock essential gameplay features).
- 2 more upgrades are found in late-game optional bonus missions: Atlante the Precise (Wastus Canyon) and The Vow (Great Temple Underground Ruins).
- Atlante the Precise is easy to unlock, just talk to the NPCs in the base and you’ll get it.
- To unlock The Vow you need to find 3 collectibles (disk items) from the previous missions but you should be able to do this naturally from exploring and doing the story (the 3 disks are in the main missions Witch’s Castle, Corruptors’ Fortress & Strange Melody). After getting the 3 disks talk to the Crevice NPCs and you’ll unlock the bonus mission.
- The only note is that these two bonus missions are very late and difficult side quests to do so wait until near the end-game to do them, but still definitely do it before the final boss.
- This makes for a total of 8 healing Netherworld Energy consumables, which you should definitely have before the end-game bosses.
Grabs have a sound effect
- Grabs actually have a sound effect! The next time you see a boss trying to grab you listen closely for the sound effect. It’s easiest to dodge grabs.
Check the Common Skill Tree
- Make sure you use your skill points and to check all skill trees, especially for Common Skills. It’s fine to specialize in one of the weapon types (one of greatsword, spears, or dual wield) but don’t forget to check the fourth skill tree.
- The fourth skill tree has Common skills which is helpful no matter what kind of build you’re going for.
- One important skill is the Reflection Parry, which actually is better than a perfect block and lets you actually parry and stun the enemy (like the parry system in Dark Souls).
- It drains the enemy’s stamina significantly if not entirely! To do it hold L1 and press triangle to make your weapon connect with the enemy’s attack and if done correct it’ll parry their attack away. The timing is tricky so don’t use it until you learn a boss’s patterns.
- Check your weapon skill trees as well! Sometimes gear set bonuses will even give you unique skills that will now show up in the skill tree.
Collect as many collectibles as possible
- You should try to get as many collectibles in both the main story and the optional bonus missions.
- Without spoiling, the true ending requires finding all 15 of a certain kind of collectible spread throughout the world (similar to Code Vein and Stellar Blade), so if you want to play blind you should explore areas thoroughly, and then before entering the final mission of the final area you can check if you got all the collectibles or you can do a quick clean-up.
- The mission select screen and the Blade Nexus shows how many collectibles you found in each mission so use it to double-check.
- Not all collectibles are necessary for different endings though, only “certain ones” (15 important collectibles) so the checklist the game provides might not be entirely the most helpful. It’s good to just get as much as you can while you’re in the levels.
- Keep a backup save before entering the final mission of the final region, that way you can go back to it if you want to change the ending you want.
- It’s a choice you make to an NPC in the final mission that determines the ending you get and to make the decision you need to have acquired the 15 important collectibles in advance.
Play on Normal Difficulty and don’t use Summons
- Start the game on “Normal” difficulty and NOT “Easy”. Don’t turn the difficulty down either.
- Also, I recommend you to NOT use summons (the summons are called Spirit of Advocacy and are bad in this game, they die easily because they don’t know how to dodge many of the bosses’ attacks and they get de-summoned very quickly automatically due to time limit).
- If you use even a single summon, you won’t be able to get the trophy for not using summons in that playthrough and you’ll have to do another playthrough.
- But even if you don’t care about trophies and achievements, the summons do feel like a waste and it’s much more efficient to just do the boss fight yourself and learning the boss’s pattern.
- Make sure to avoid any bonuses to your Spirit of Advocacy stat if you’re avoiding using summons. That stat is only for increasing your summon’s power.
- The Easy mode isn’t even that much easier than the Normal difficulty and the developers have patched some bosses since release to make certain bosses easier. It’s best just to play the game normally without summons and you’ll be able to get through the game with practice.
- One more point is that if you switch to Easy, you might be able to get through the easier bosses no problem. But many of the later bosses are roadblocks especially the final boss where the difficulty doesn’t make them much easier. So it’s best to play through it on Normal to make sure you break bad habits and learn how to play the game well.
- If you play on Normal, get the true ending and never summon you can get a lot of trophies/achievements on a single playthrough (Standing Alone, The Challenger’s Journey, The Expert’s Journey, and THE FIRST BERSERKER).
- You can actually get both the Easy and Normal difficulty trophies from just playing through once on Normal difficulty (you don’t need to do another playthrough on Easy mode).
- Maybe it was different from reviewers, but from my experience playing on release day you get all the trophies no problem.
- Phantoms are NOT summons and are fine to use.
Learn when to Block, Dodge, and Parry
- Learn when to block, dodge, parry and reflection parry!
- I generally try to perfect block every attack as long as it’s not a “grab”, always dodge grabs because you can’t block them.
- Try to also dodge attacks that cause ailment built-up, such as spiders who cause poison or venom status as well as bosses who inflict the chaos status. You can perfect block these as well, but if you mess up the perfect block and regular block then the ailment bar will go up so it might be safer to dodge depending on your playstyle.
- If the status ailment bar fills up you’ll get the status ailment – like fire for example deals fire damage very few seconds as well as poison.
- The status ailments do a lot of damage in this game and are best avoided!
- Chaos is the worst, which lowers your maximum HP until it wears off.
- Counterattack happens when you see a symbol appear near your character and an enemy/boss charging up a big attack. You need to hold L1 and press Circle when the attack is about to connect with your character. Often the enemy animation is very delayed with a bit of wind-up so you have to learning the timing for each enemy and boss.
- Reflection Parry is an amazing technique to unlock using skill points and is found in the Common Skill Tree. You hold L1 and press Triangle, but like in Dark Souls your weapon needs to connect with the enemy’s attack so the timing is tricky.
- If you can pull it off it stuns the enemy and drains their stamina significantly but it’s hard.
Make sure to go to Manage Skills and activate your active skills

- Your Active Skills aren’t active by default! Make sure to go to Manage Skills in the Skill Tree to activate them. Some Active Skills are mutually exclusive, meaning if you select one and cannot select the other.
- You can also easily assign keys for each Fury Skill as well.
- Use this screen to read all terms for your build. For instance, if an equipment says it increases your “Blowback: Vengeance” damage by 5%, then read this screen to find out that it’s when you attack after doing a perfect block (dual wield build).
- Also read all the skills to learn how to do different kinds of combos.
Monsters have destructible parts
- Look out for bosses that have destructible parts! Destroying certain parts will cause them to get stunned and you can unleash a big combo on them.
- Some examples include horns, antlers, and spider claws.
- If a boss seems very tanky at first and isn’t taking much damage, try to see if they have destructible parts that are their weakness.
- It’s usually “monster” bosses that have destructible parts and not the “human” kind of bosses but always keep an eye out.
Monsters and Humans have different kinds of Stamina
- Keep an eye out for enemies’ stamina and whether they’re a human or a monster.
- If they’re a “human” kind of boss, their stamina bar will be colored blue and will automatically regenerate if they’re not hit after a while. For these kinds of bosses you have to be aggressive if you want to empty their stamina and if you see their stamina starting to re-fill you should attack them quickly to stop its regeneration.
- However, if it’s a “monster” kind of boss, their stamina bar will be colored purple and will NOT ever regenerate, meaning you can take your time to get in your attacks. This is similar to how the monsters behave in Nioh. Once you deplete their stamina and after they regain consciousness after being stunned they will recharge their stamina all at once (you can’t stop its regeneration) and also unleash a small blast. You can get a few extra hits onto the boss here but you should back away very soon after as not get hit by this blast.
- Some bosses will have switch from being human to monster when they change phases, so pay close attention and change your strategy accordingly!
Use the Phantom Form when it is unlocked to remove ailments
- You unlock the “Phantom Form” naturally through story progression. If the Phantom Form bar is filled completely you can activate it and use it, and you can deactivate it at any time to conserve the bar but you cannot activate it again until the bar is filled again.
- The Phantom Form will generally be used automatically on death if the corresponding bar is full. When it runs out you’ll return to your character with a minimal amount of health.
- If you’re very close to killing a boss and are about to die, the Phantom Form can let you survive long enough to deal the killing blow.
- One important trick is that using the phantom form actually removes all your ailments! This is extremely handy for the Chaos ailment which reduces your maximum HP but it can be used for any ailment.
- When you switch to phantom form, then back to your regular character all ailments will be gone and all ailment bars are reset to 0.
Use your Finishers from Behind
- Your finishers will do more damage when you go around the exhausted enemy and use them from behind! This can result in significantly more damage.
- Also, you have until the red circle is empty to do the finisher, so use your high damaging combos and skills until then to do maximum damage.
- You can also do these behind the enemy for extra damage.
Changing your gear appearance (Transmog) is locked to new game plus
- Unfortunately the ability to change your equipped gear appearance is locked to new game plus.
- In new game plus warp back to The Crevice and interact with the suit of armor next to the Blacksmith and you’ll be able to change your character appearance. You’ll be able to change your appearance for any gear that you found previously. If you didn’t find it then you’ll need to find it to unlock it as a customization option.
Don’t fight the Revenants of Adversity
- The Revenant of Adversity enemies are NPCs using player characters’ setup which you can fight from examining their signs across the levels.
- In general it’s not worth fighting them because you’ll use up a lot of your healing items and they’re generally very challenging foes. It’s best just to explore the level normally and complete the story first.
- You get randomized equipment from defeating them, NOT the same equipment they were carrying which is a big downside. The reward is not really good for fighting them.
- I would instead recommend fighting the elite enemies and boss fights in missions instead to get gear and rare material drops used for crafting gear. You can spawn more elite enemies and bosses by repeating missions.
What carries over and is unlocked in New Game Plus
- When you beat the game, you can choose to keep playing or if you want to do a new game plus.
- All gear is carried over
- All NPCs from your previous playthrough are now unlocked immediately in The Crevice.
- Your level, stats, skills, skill points, experience and gold are carried over. The max level limit is raised.
- Changing your gear appearance (transmogrifying equipment) is unlocked next to the blacksmith
- You don’t unlock all missions immediately – you will need to complete the story missions from the very beginning in order to unlock future story missions and later regions of the game (like you would in your first playthrough).
Recent Posts