Home»Game Guides»Saviors of Sapphire Wings – All Map Screenshots
Quick tips for exploring maps in Saviors of Sapphire Wings (Entaku no Seito English Remake)
- We have complete screenshots of ALL maps in the game in English
- If you’re stuck with a locked door, you get a special key near the end of the game to return to old dungeons to unlock these kinds of doors
- If you ever can’t continue in a certain dungeon, chances are you need to continue the main story and return back later. There’s actually a postgame where you can continue the game after beating the final boss, so there’s not really missables!
- If you’re also stuck in the story, try leveling up your friends’ bonding levels. For postgame you need to make everyone bonding level 6 at least, so you might as well try doing that for the main storyline too. However, if you notice their bonding experience is stuck at a fixed number, it means you actually need to progress the story a bit more or try doing someone else’s sidequest.
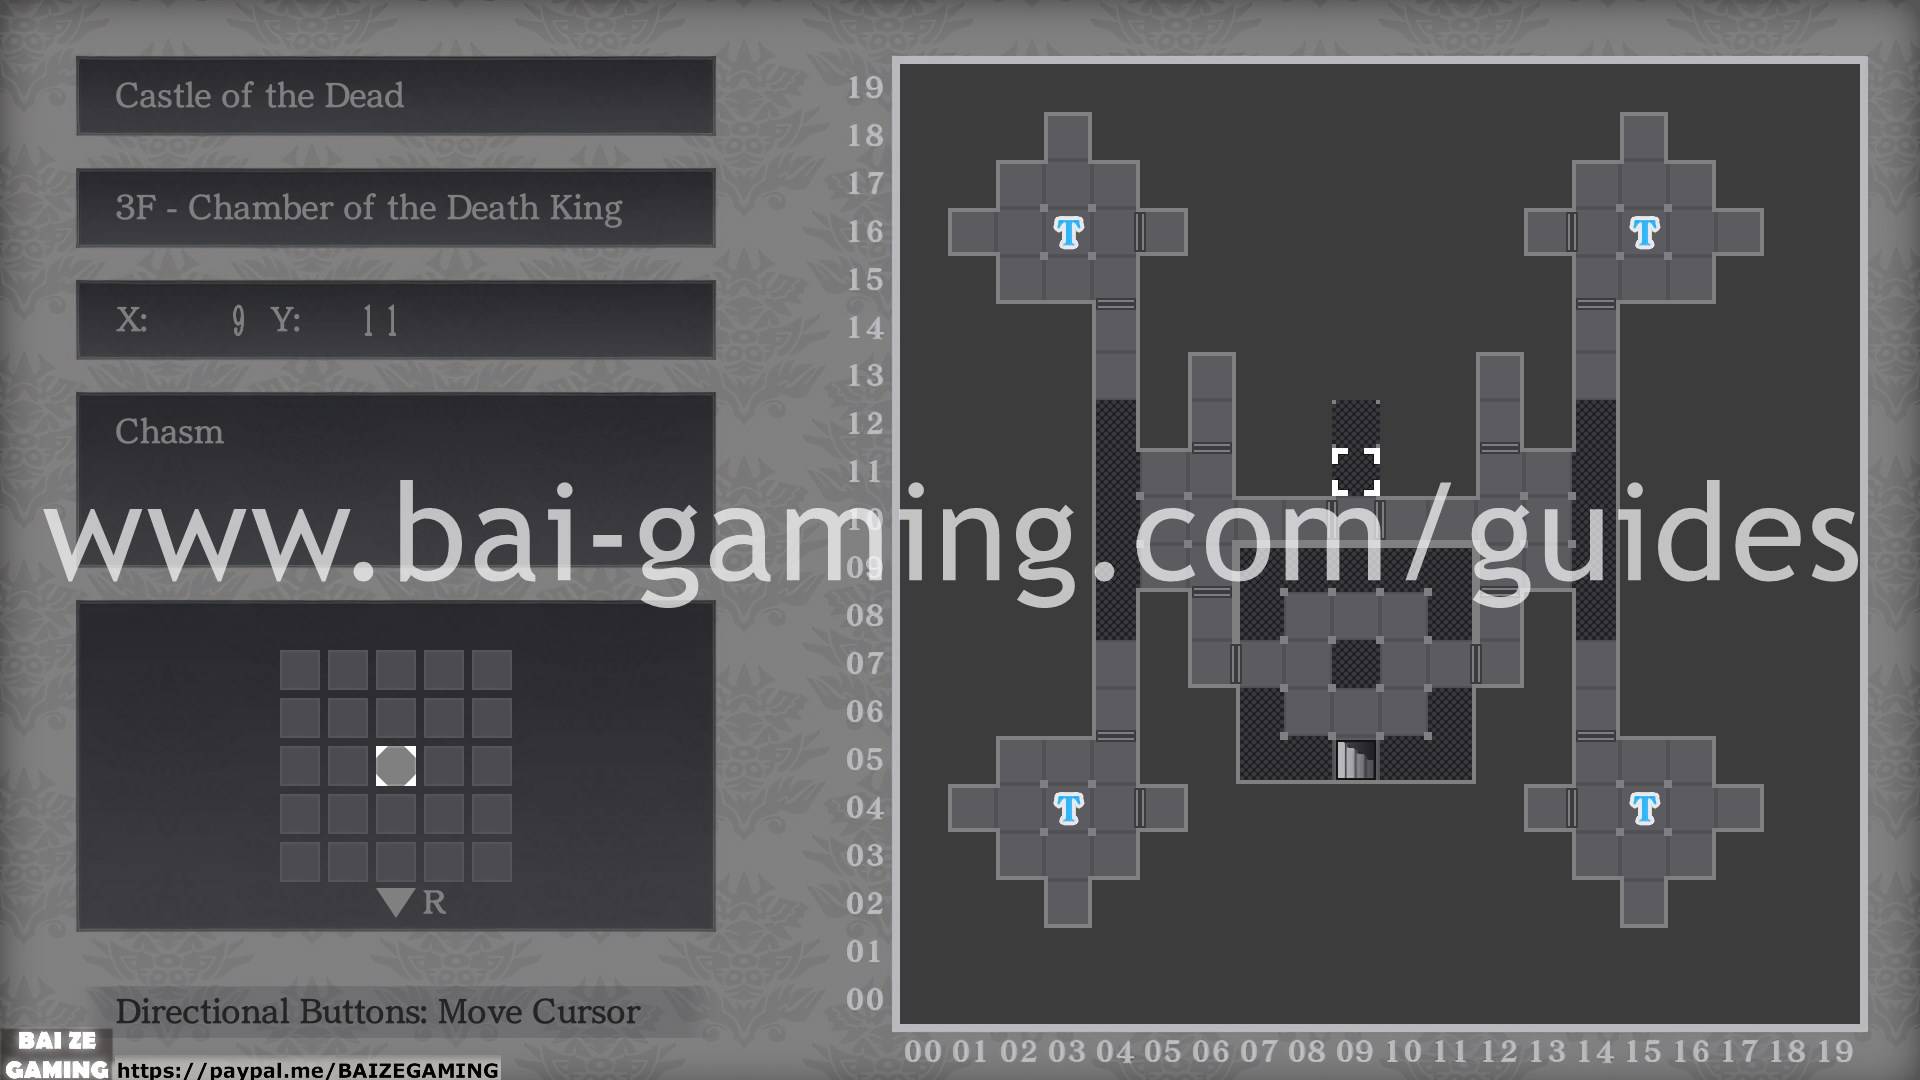
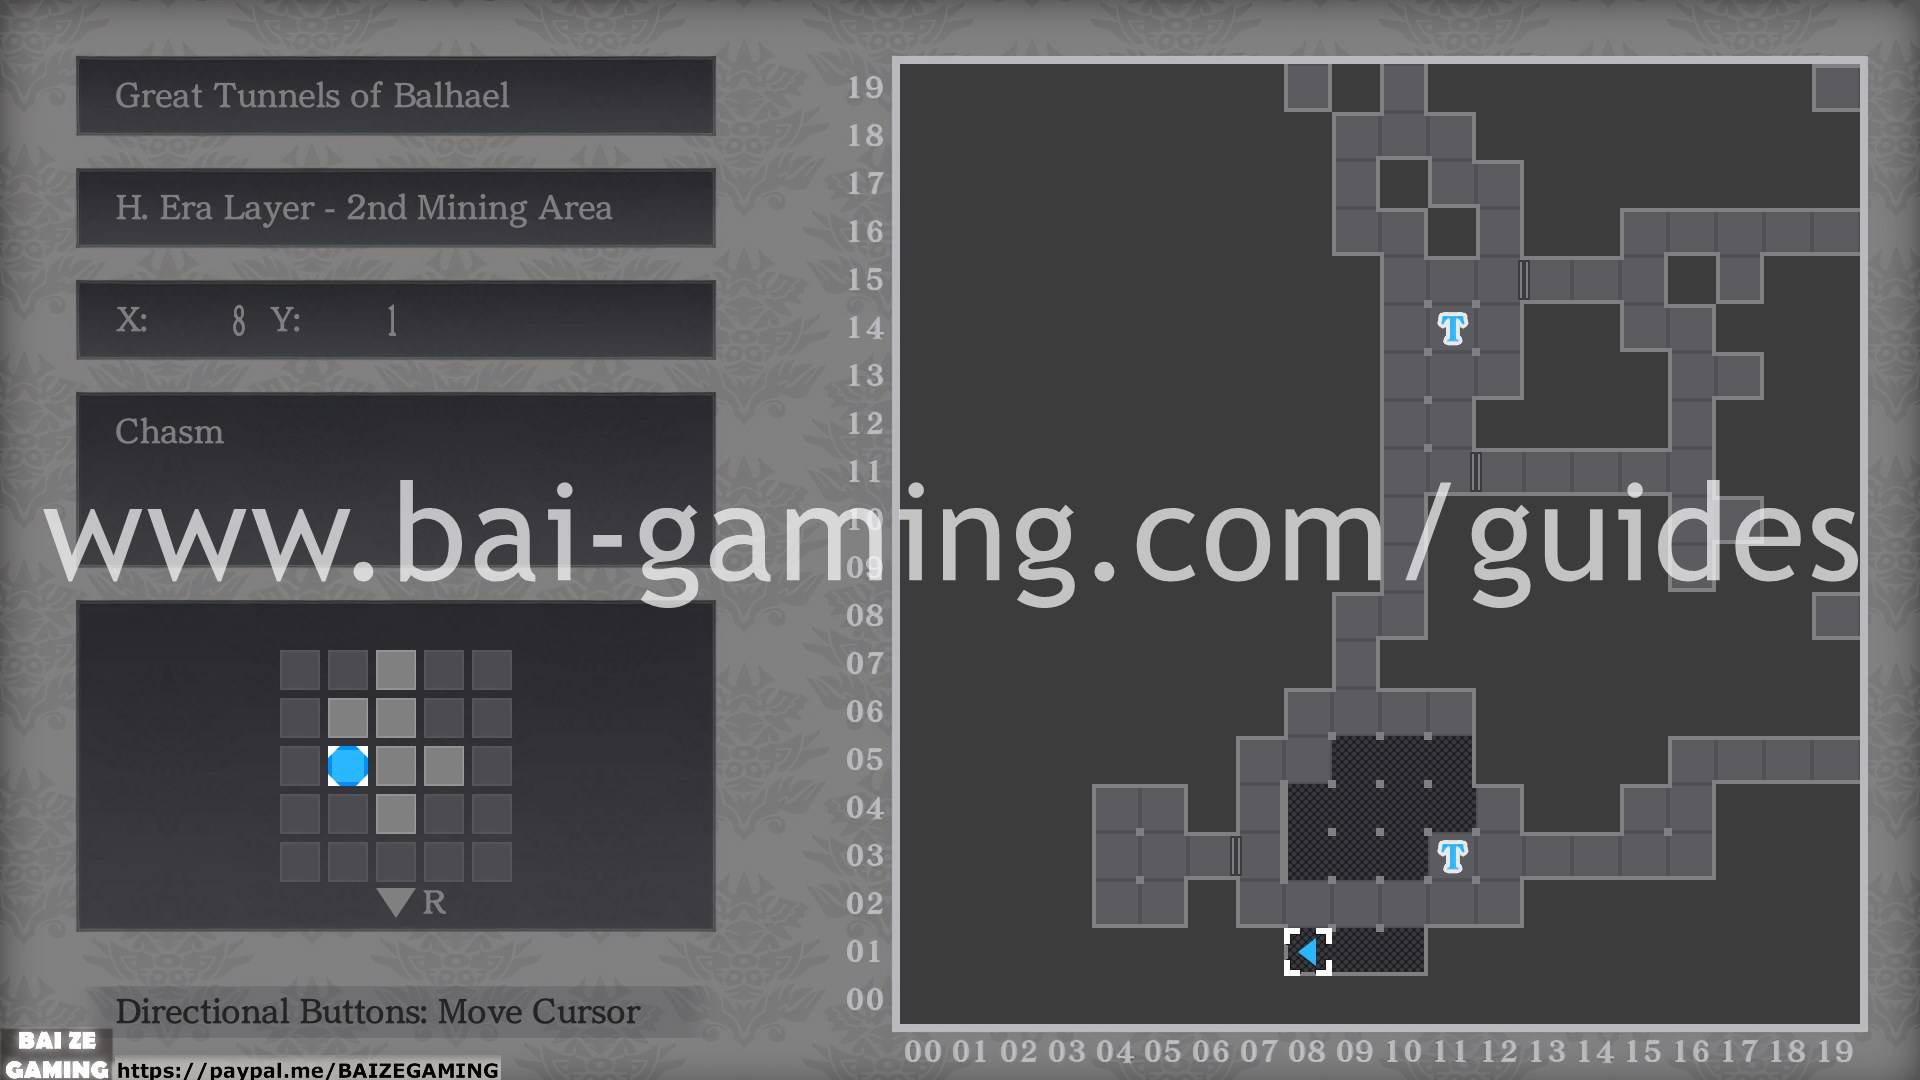
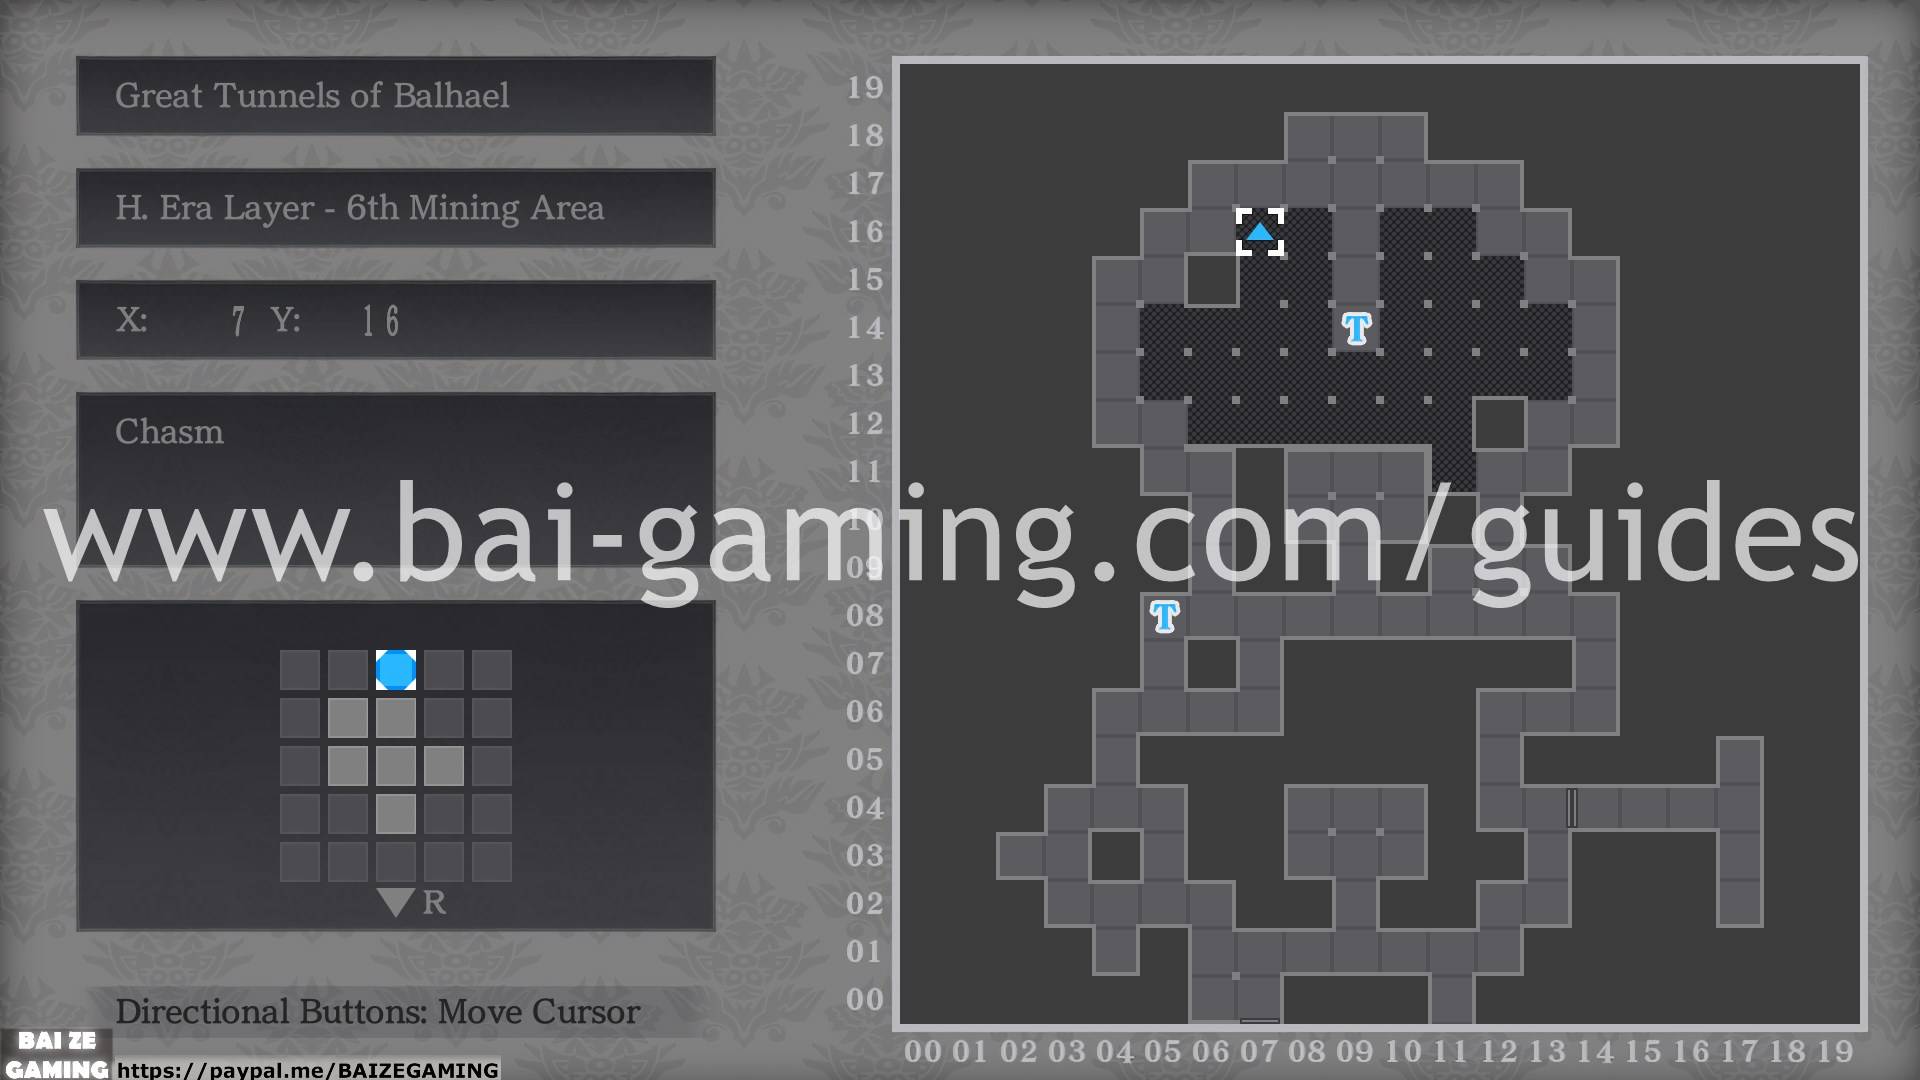
- You unlock a spell that lets you float on top of “chasms” marked by the black spots on your map, but you unlock it near the endgame above level 30+ for your wizard class. If you left the female elf with her default class, she’ll naturally learn it by the endgame, otherwise you’ll need to make someone the wizard class and level them up! You don’t ever need to worry about floating over chasms until the postgame (you can beat the main story no problem), which by then you’ll have leveled enough to unlock the spell.
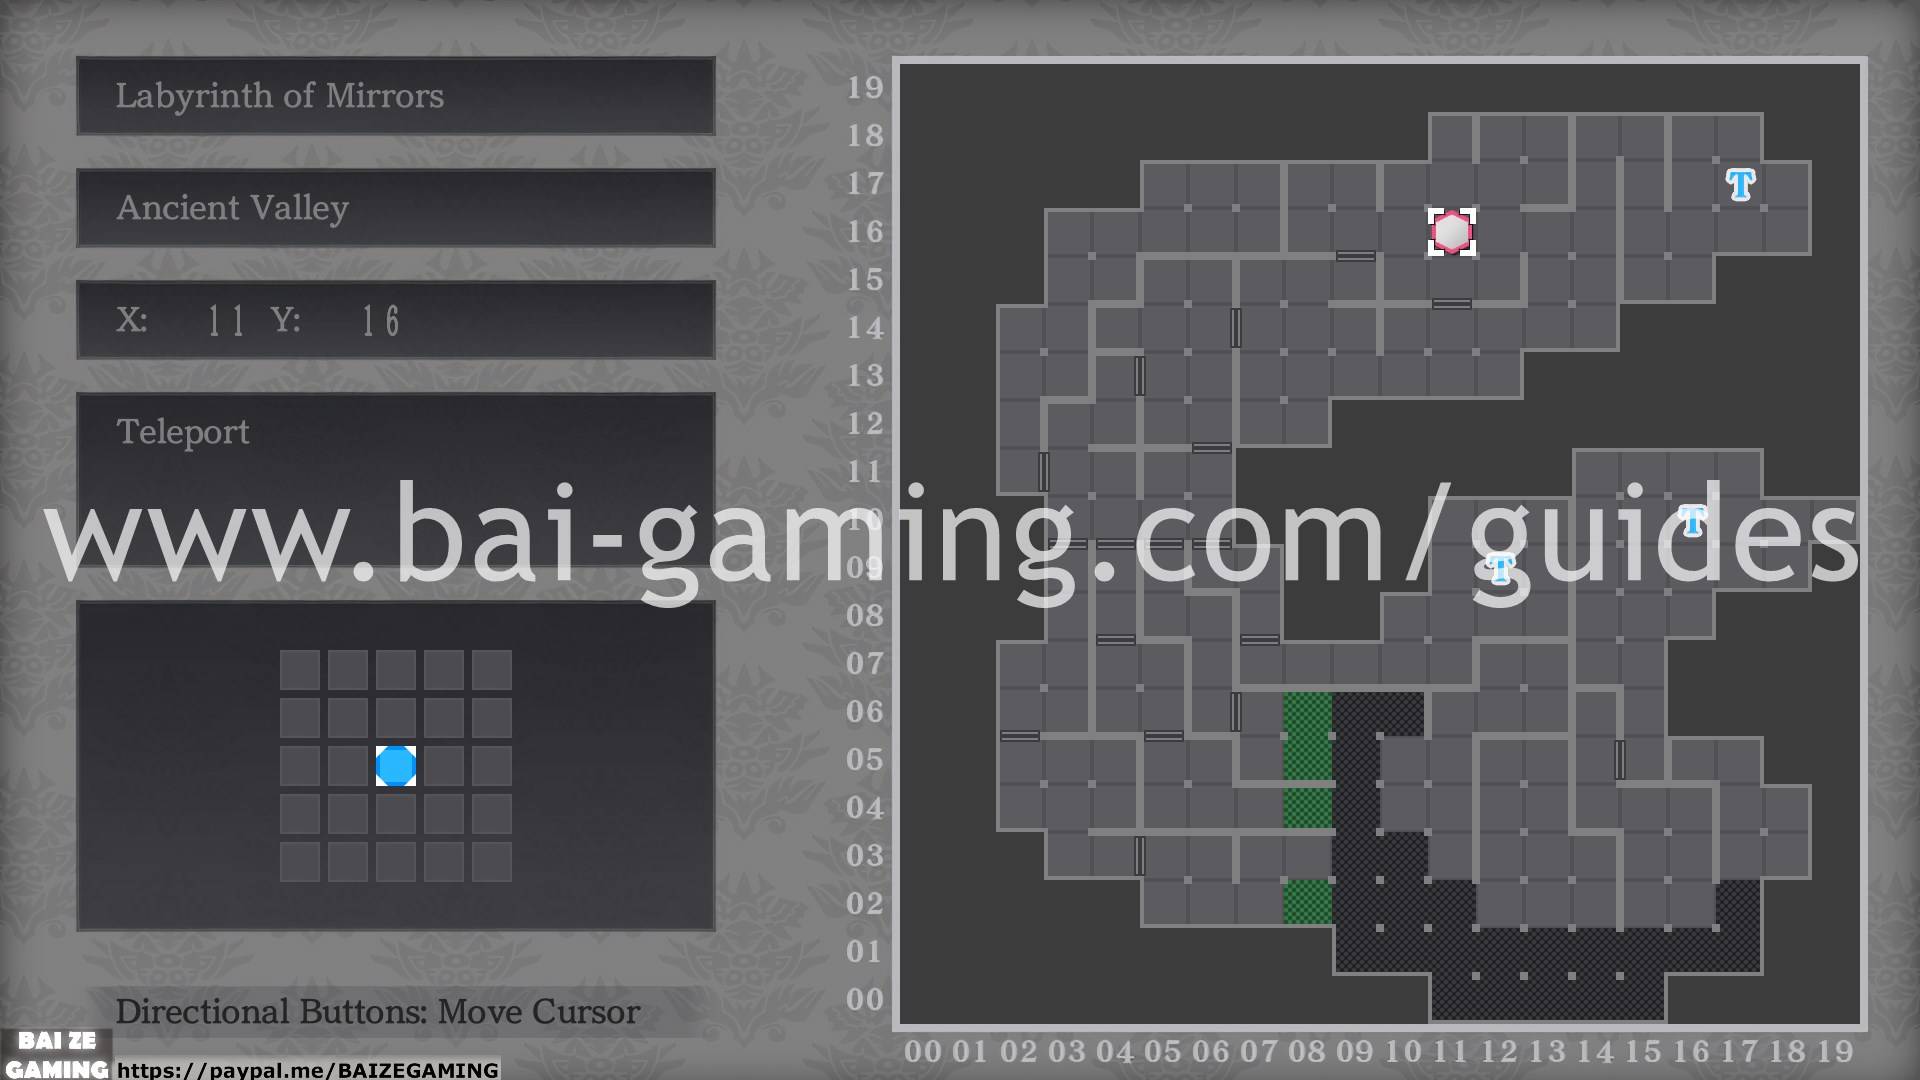
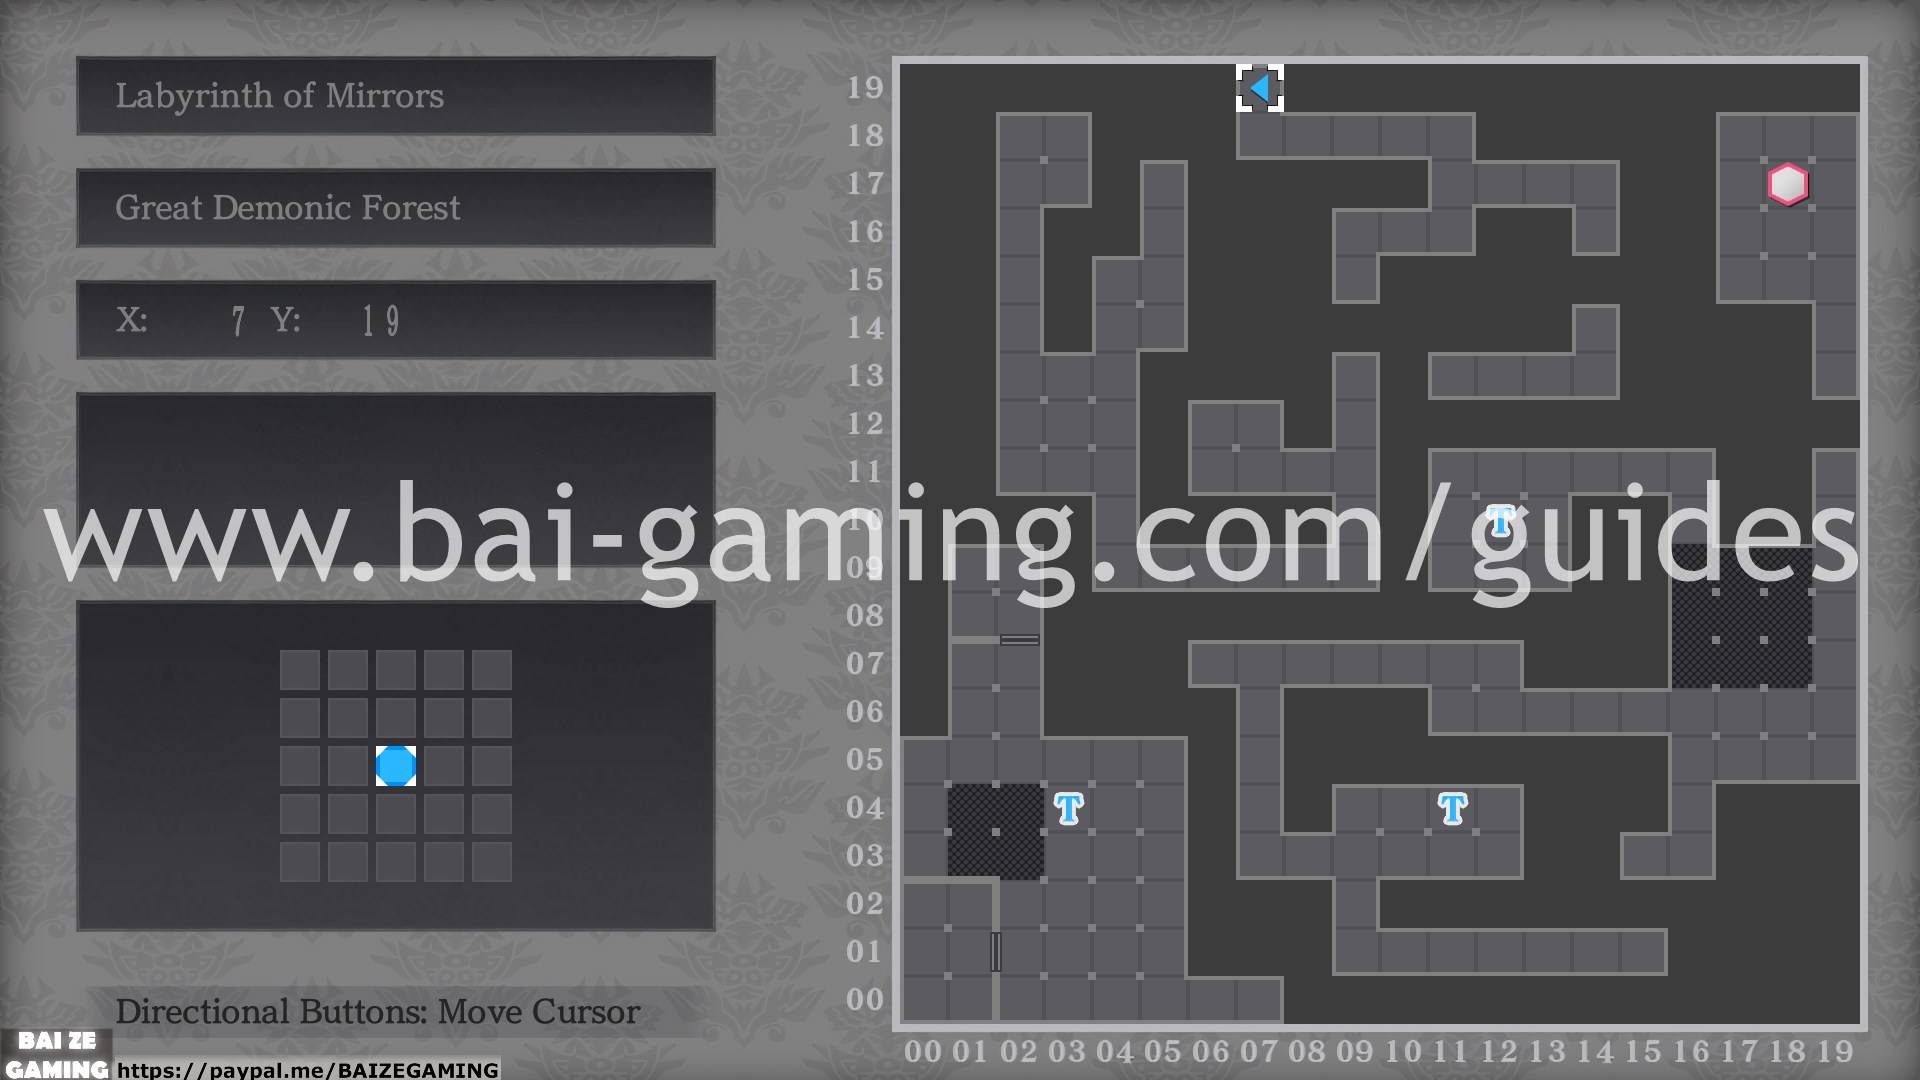
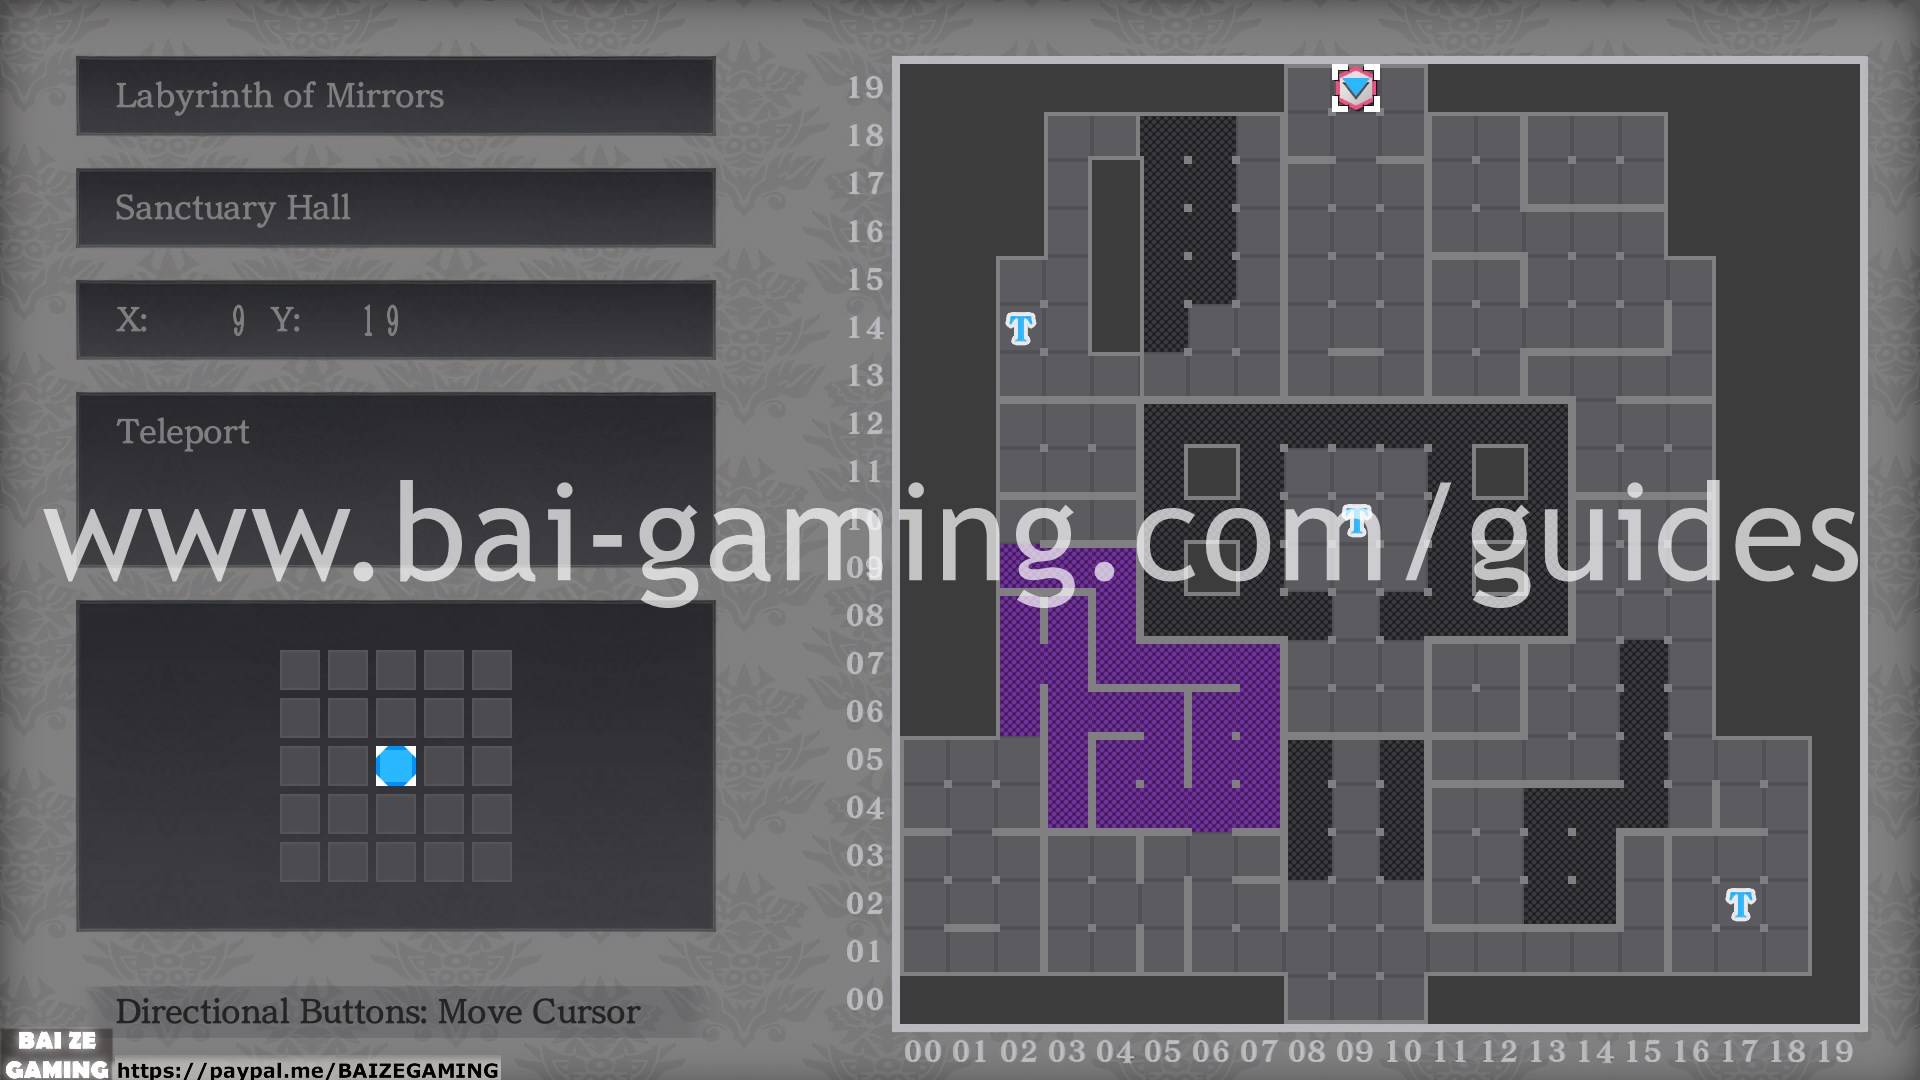
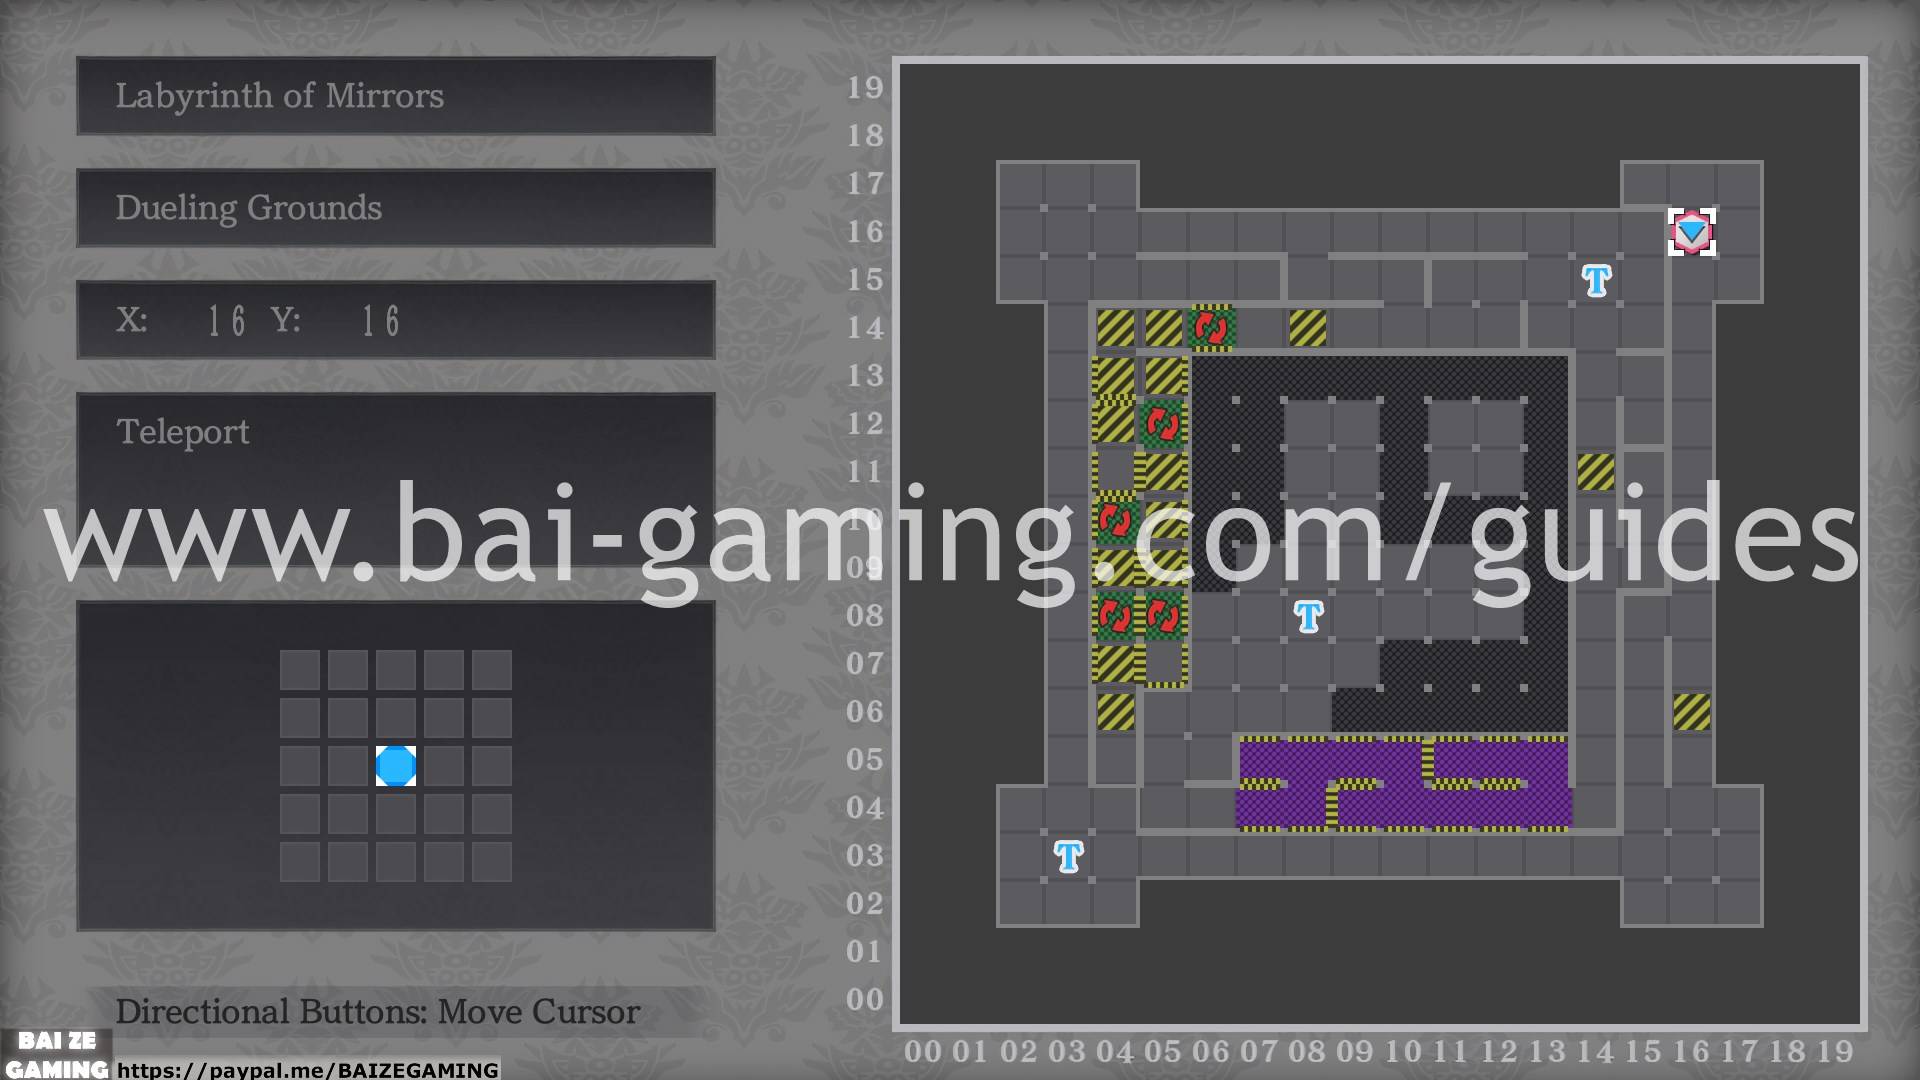
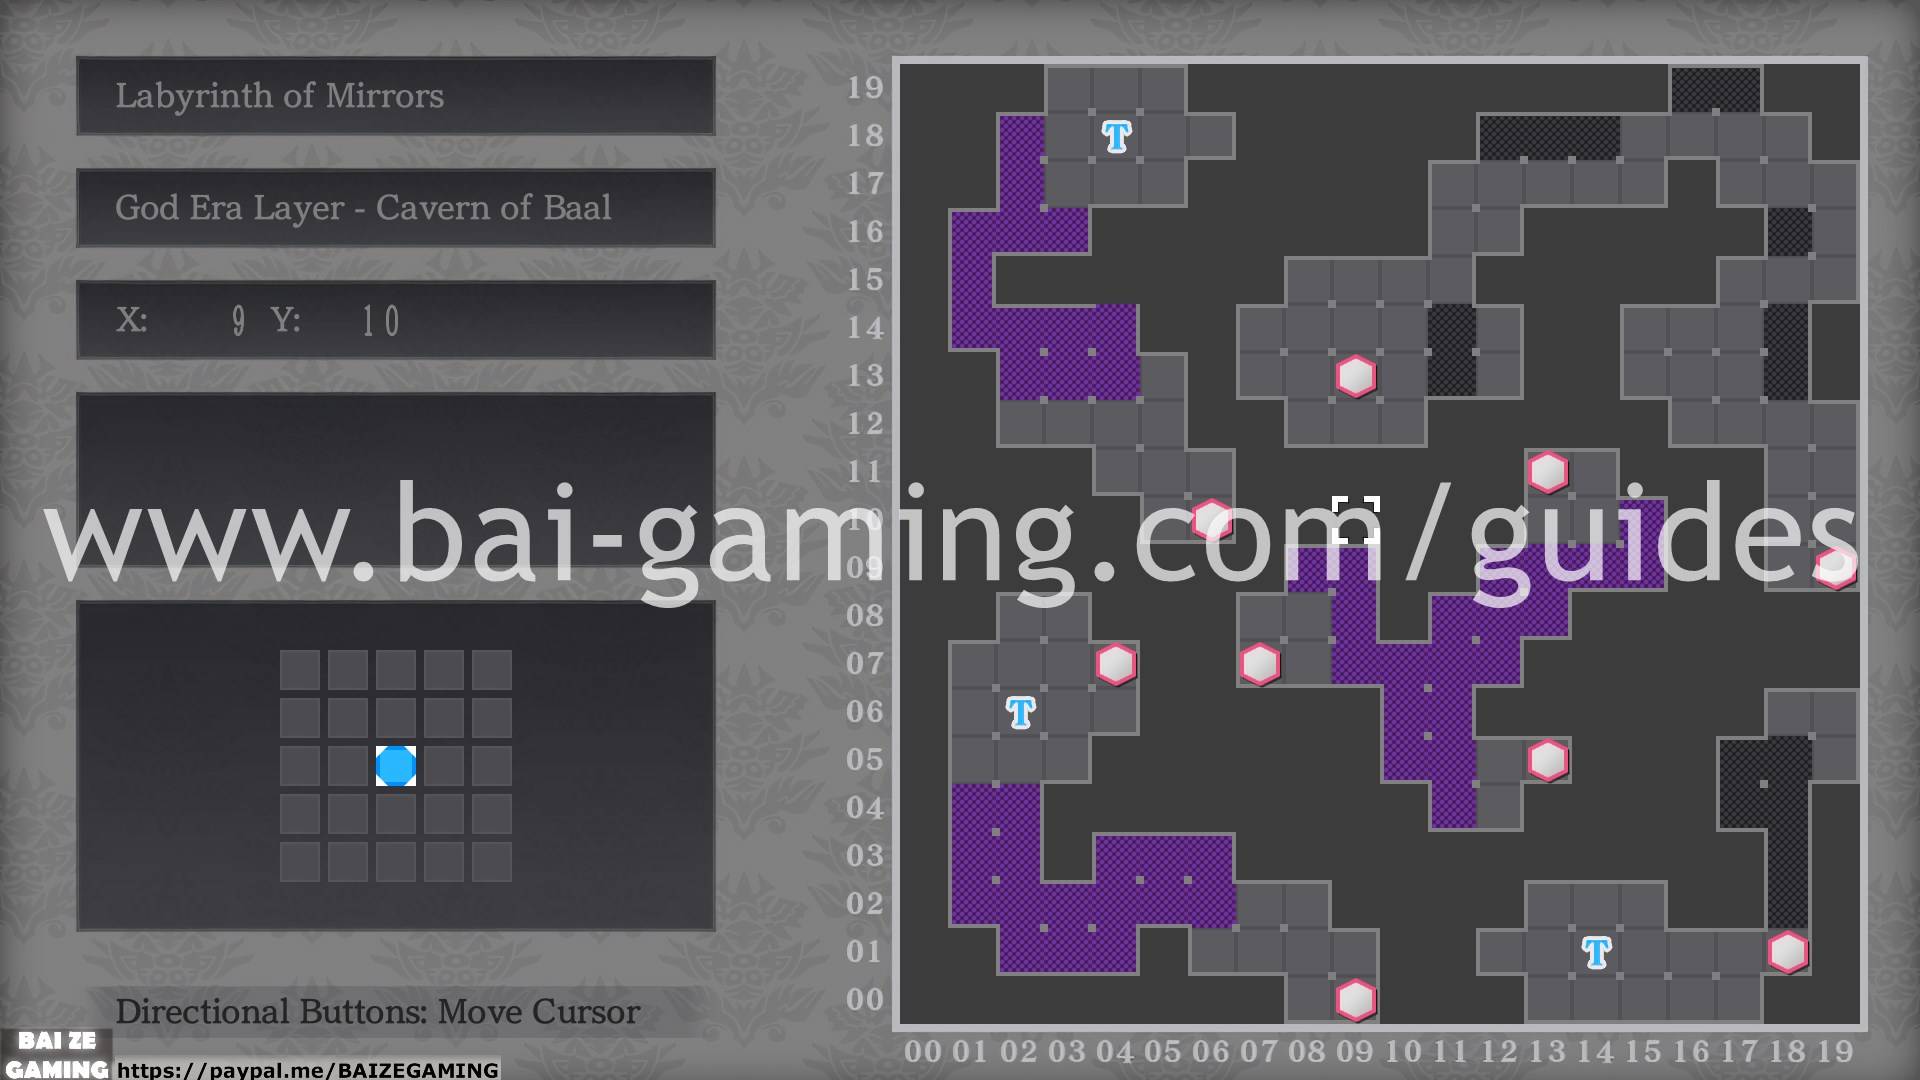
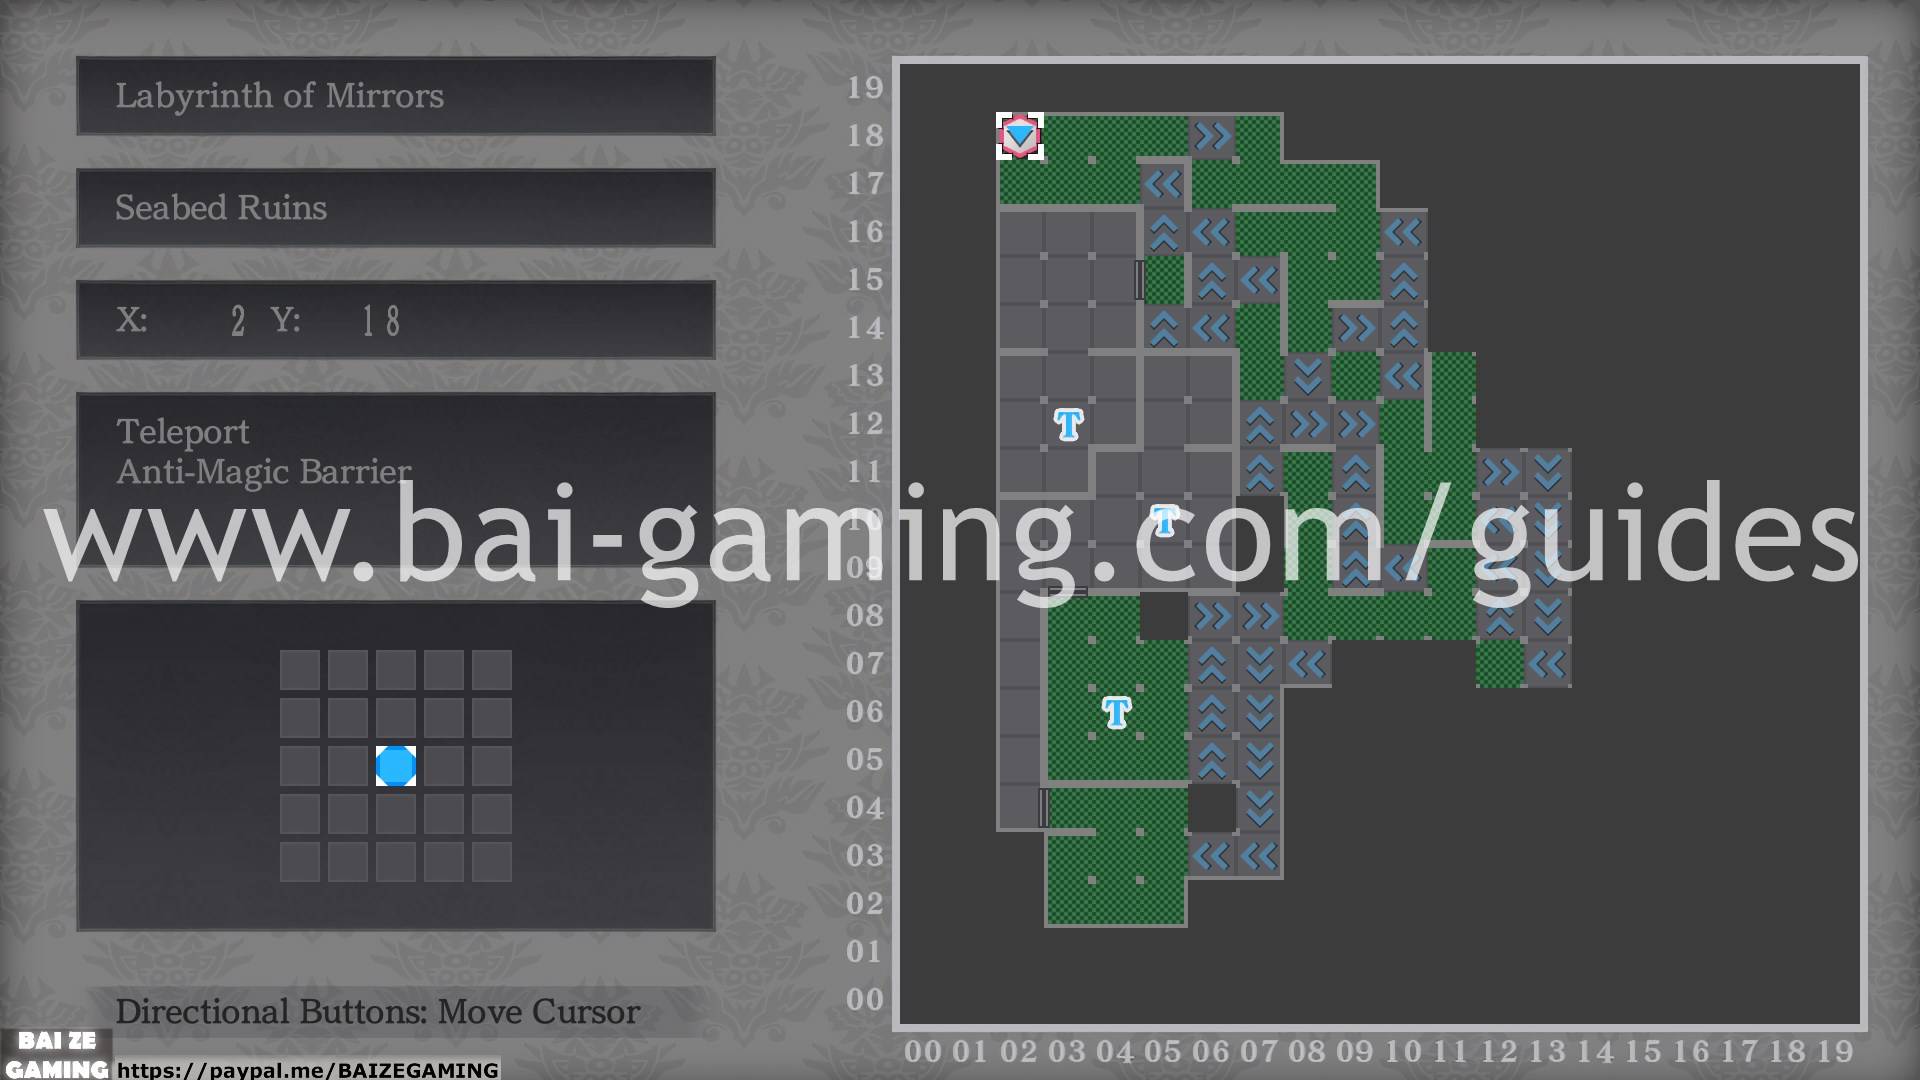
- If you see areas called “Labyrinth of Mirrors”, these are postgame regions unlocked after beating the main story, teleport areas will now be on the maps that you can use to access these new areas. If you’re missing a teleport location on your map, chances are you need to beat the game to get them to appear, and then they’ll teleport you to the Labyrinth of Mirrors area.
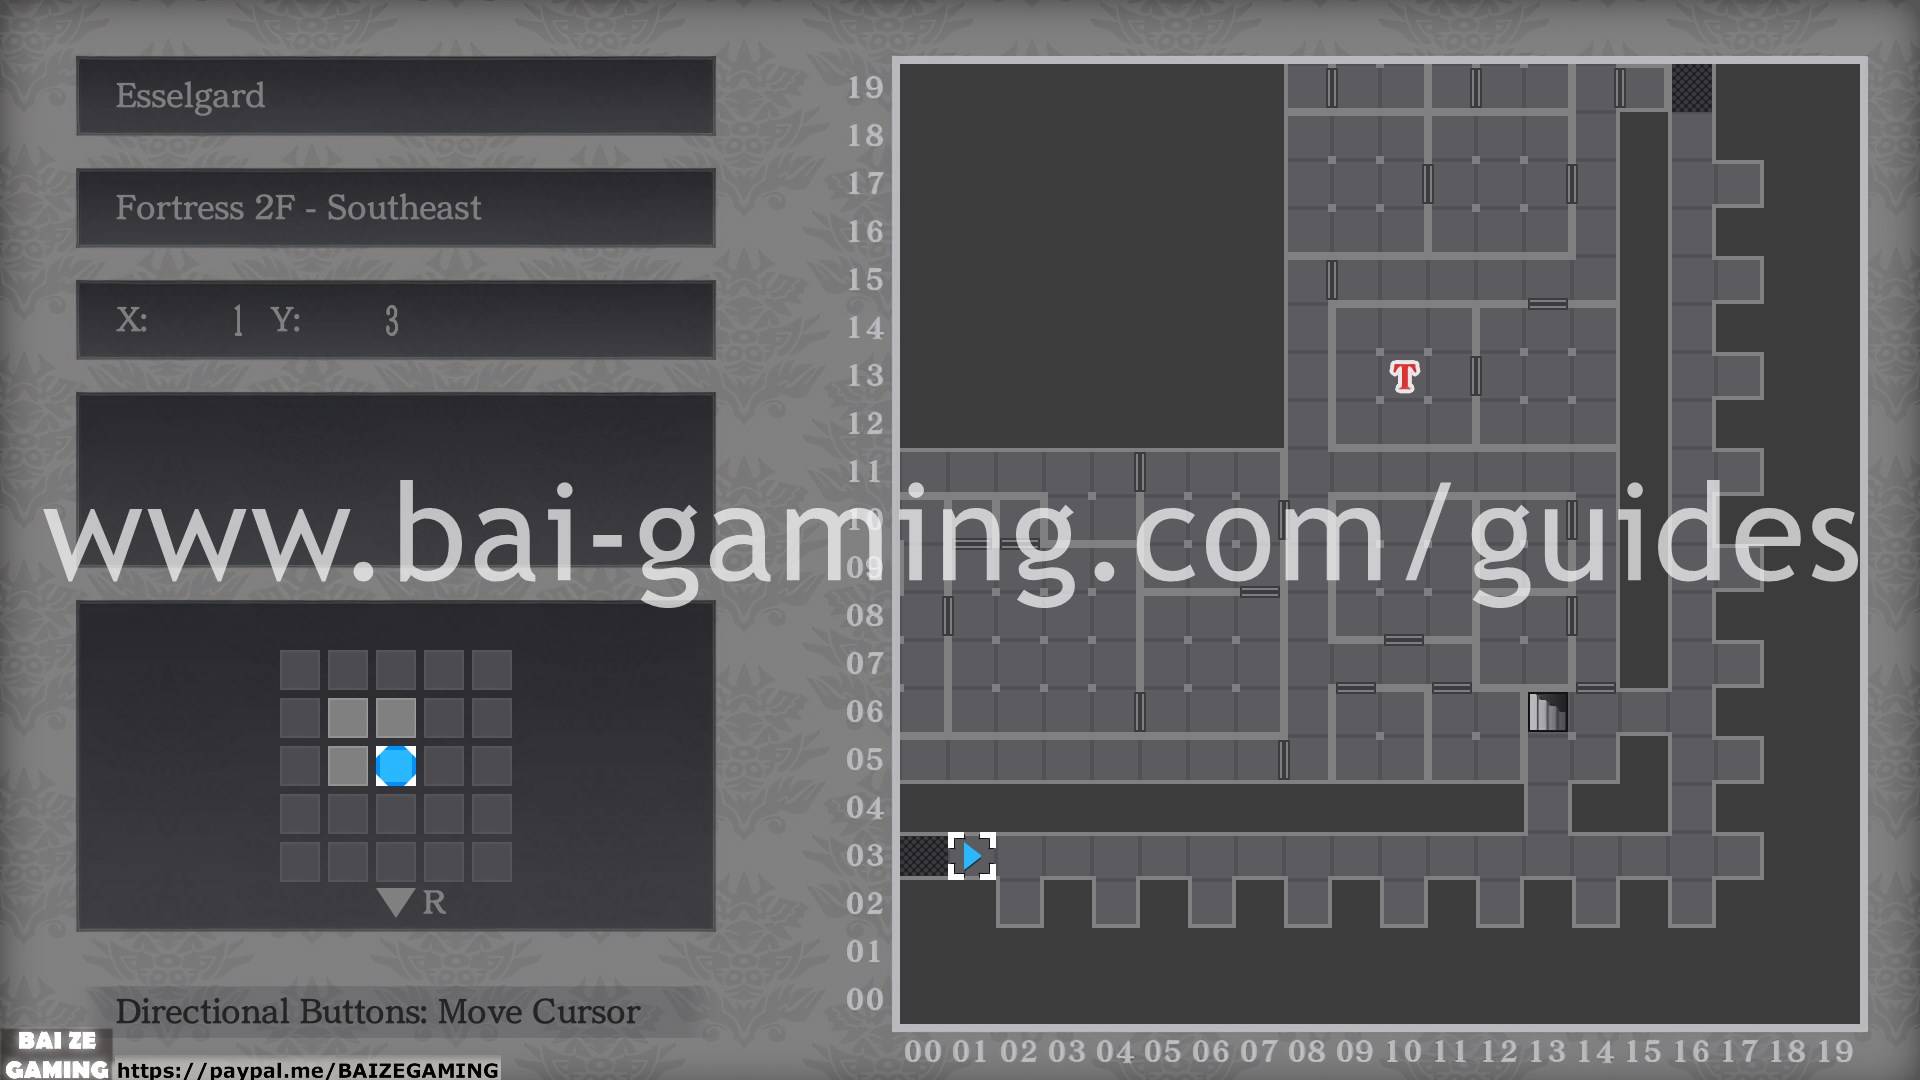
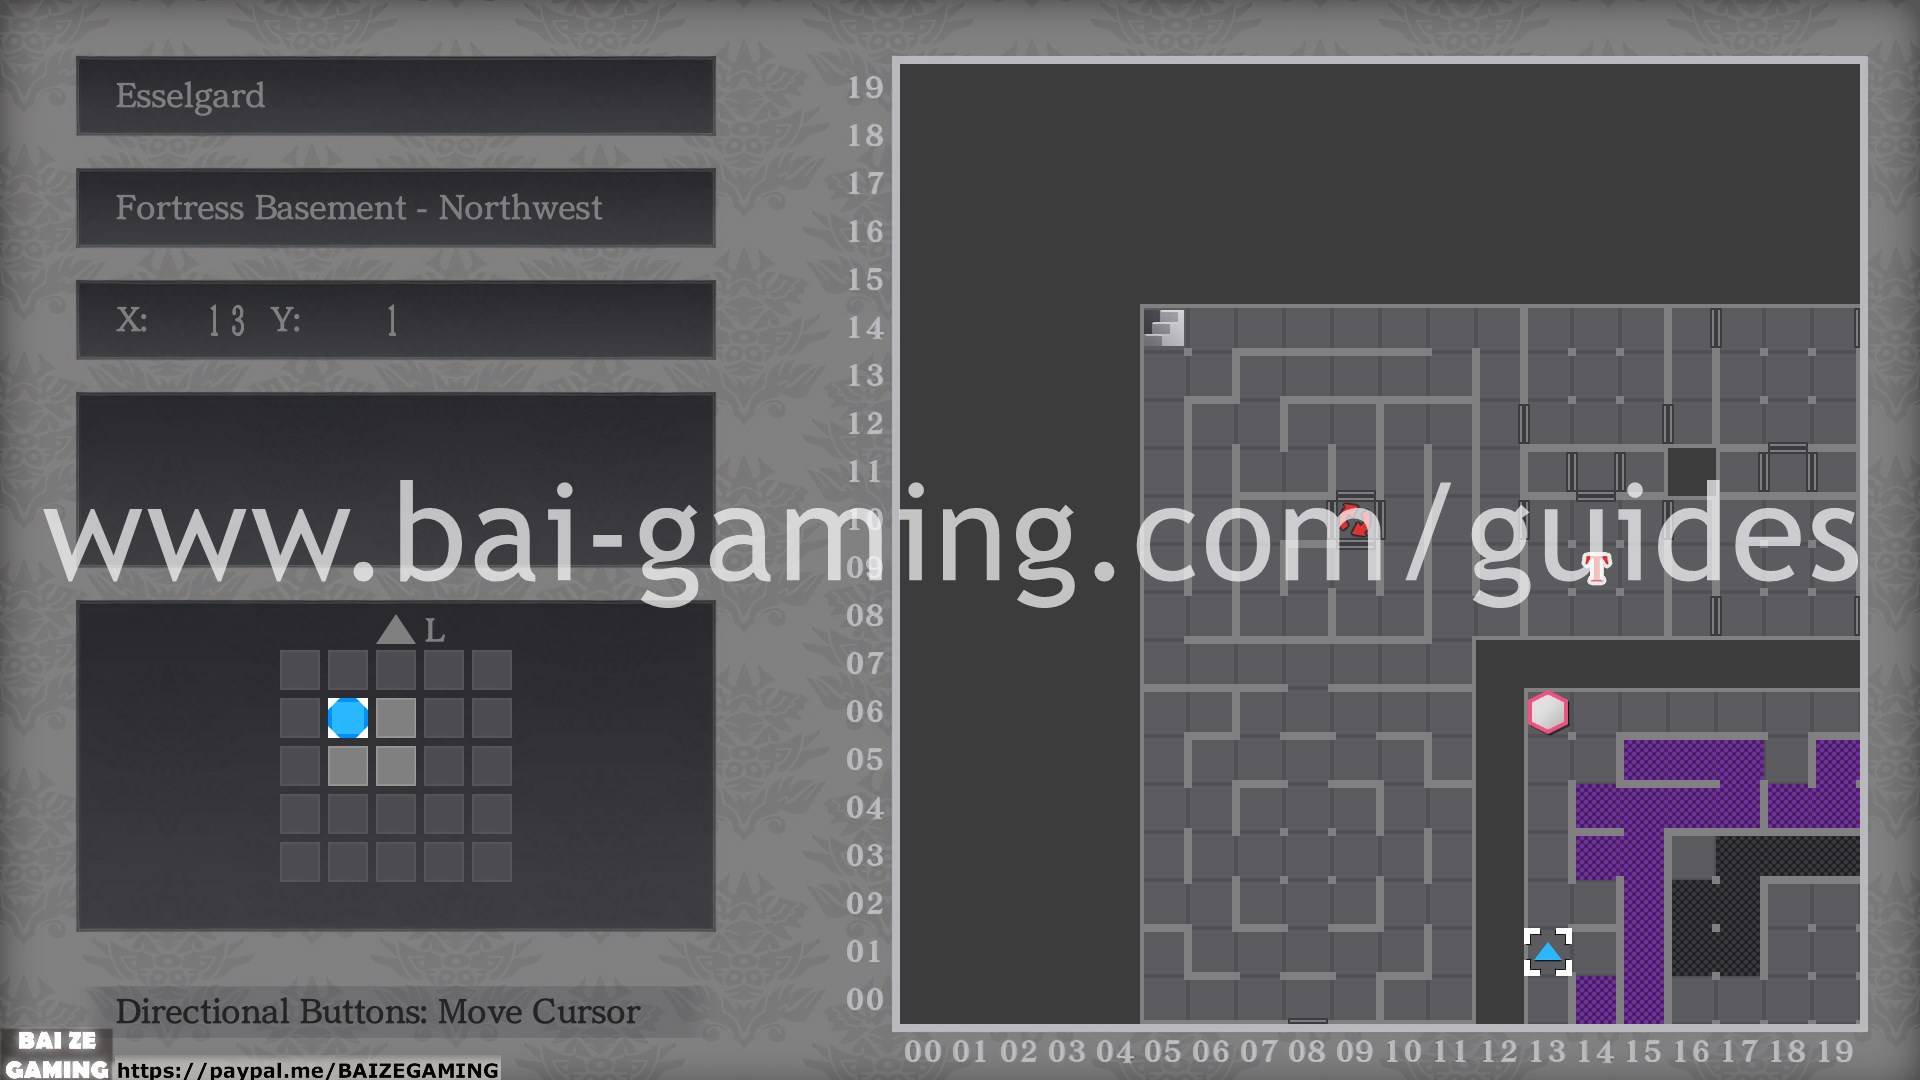
- The password in Esselgard is “loyalty”
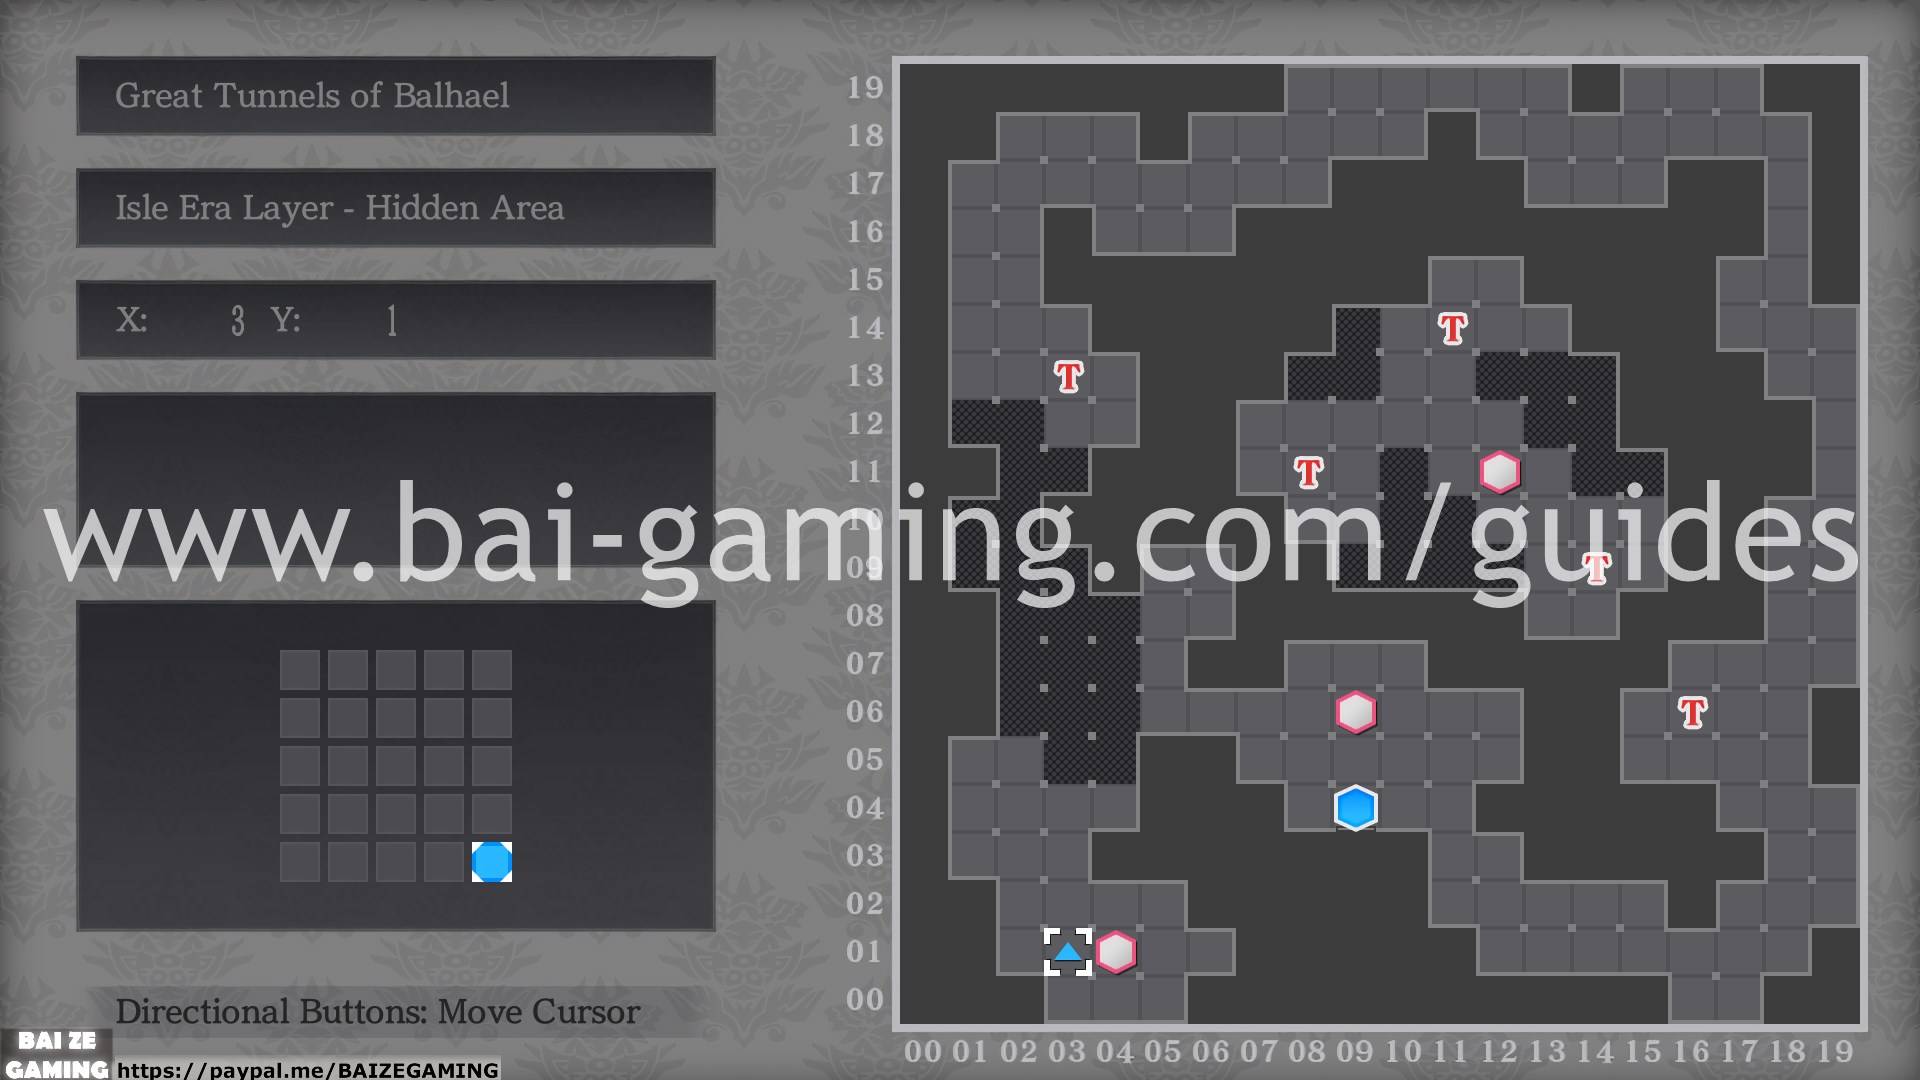
- The passwords in Tunnels of Balhael – Isle Era Area – Hidden Area is “Baal” and “Oblis”
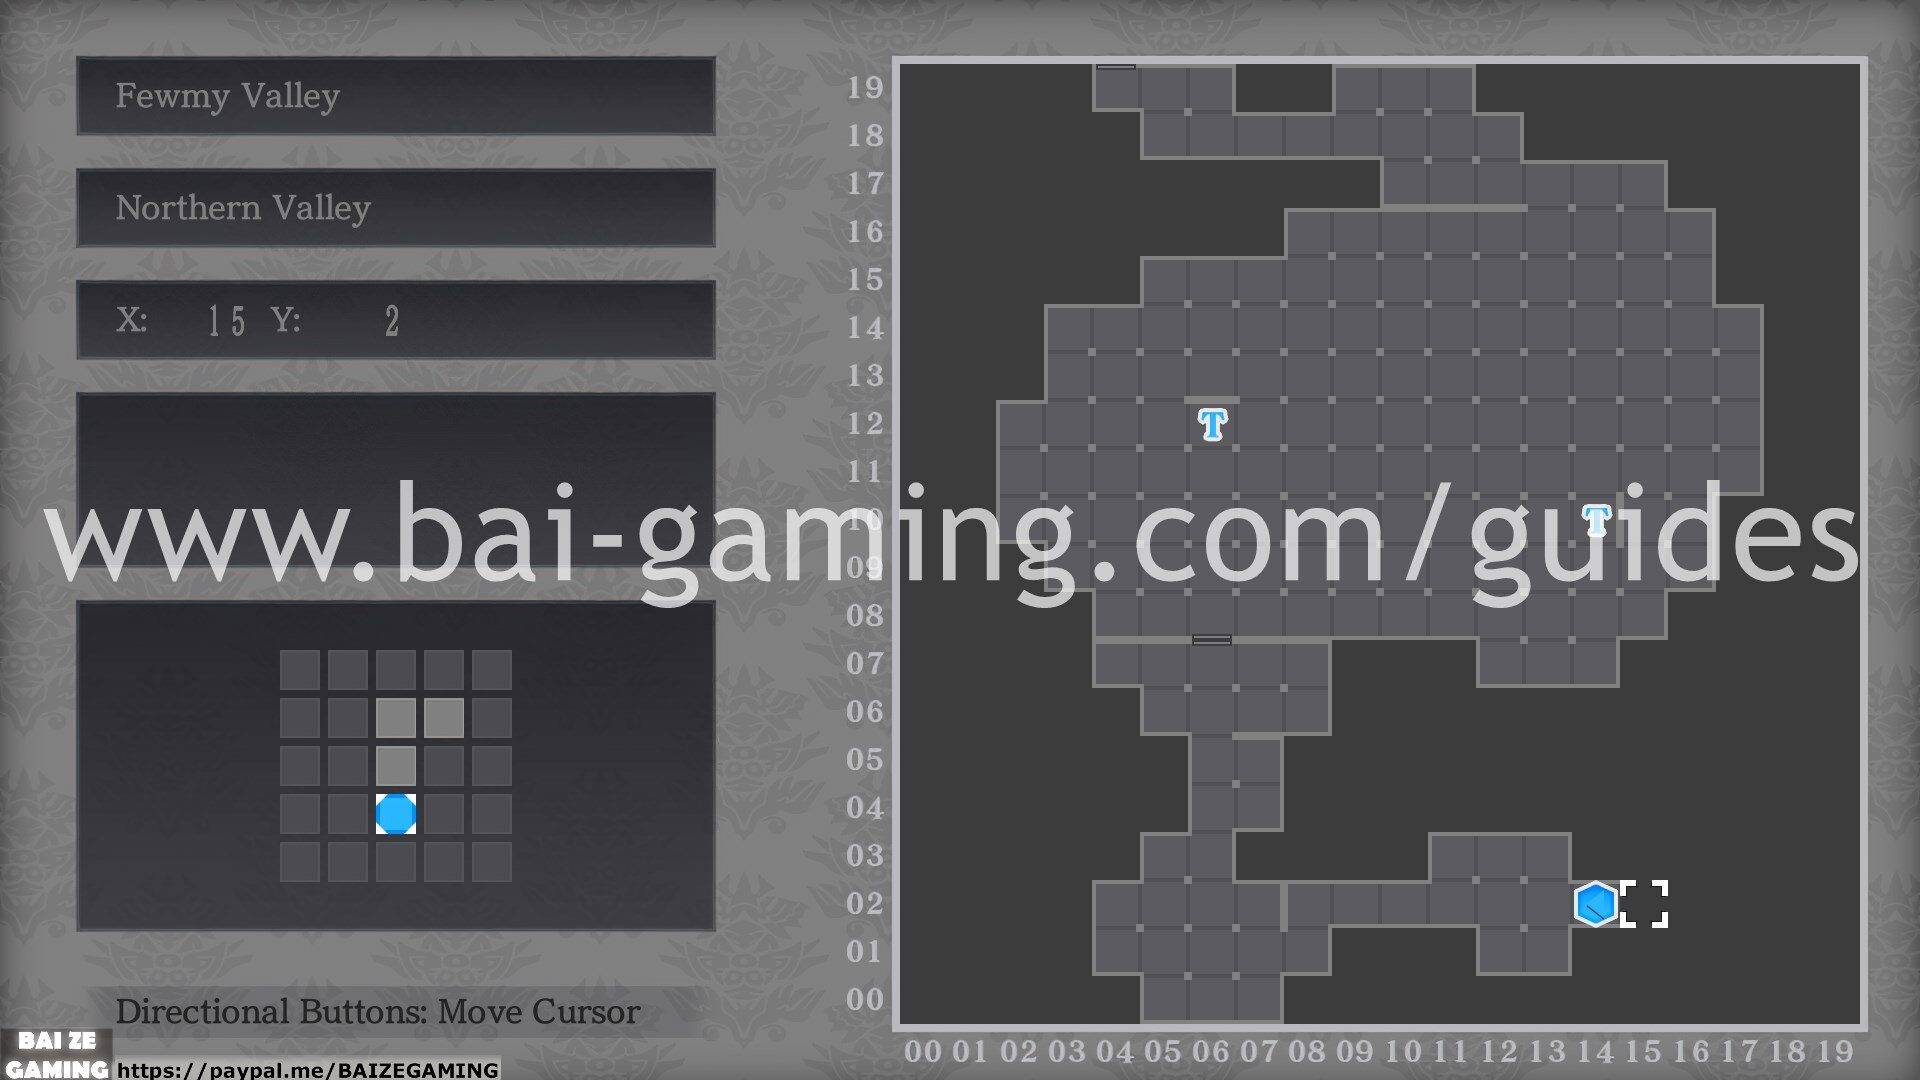
- Sometimes you’ll be able to float without using a spell. This happens in Fewmy Valley when doing a sidequest as well as a certain part of Balhael Tunnels, but the floating spell only works for that zone and when you leave you need to interact with the item again.
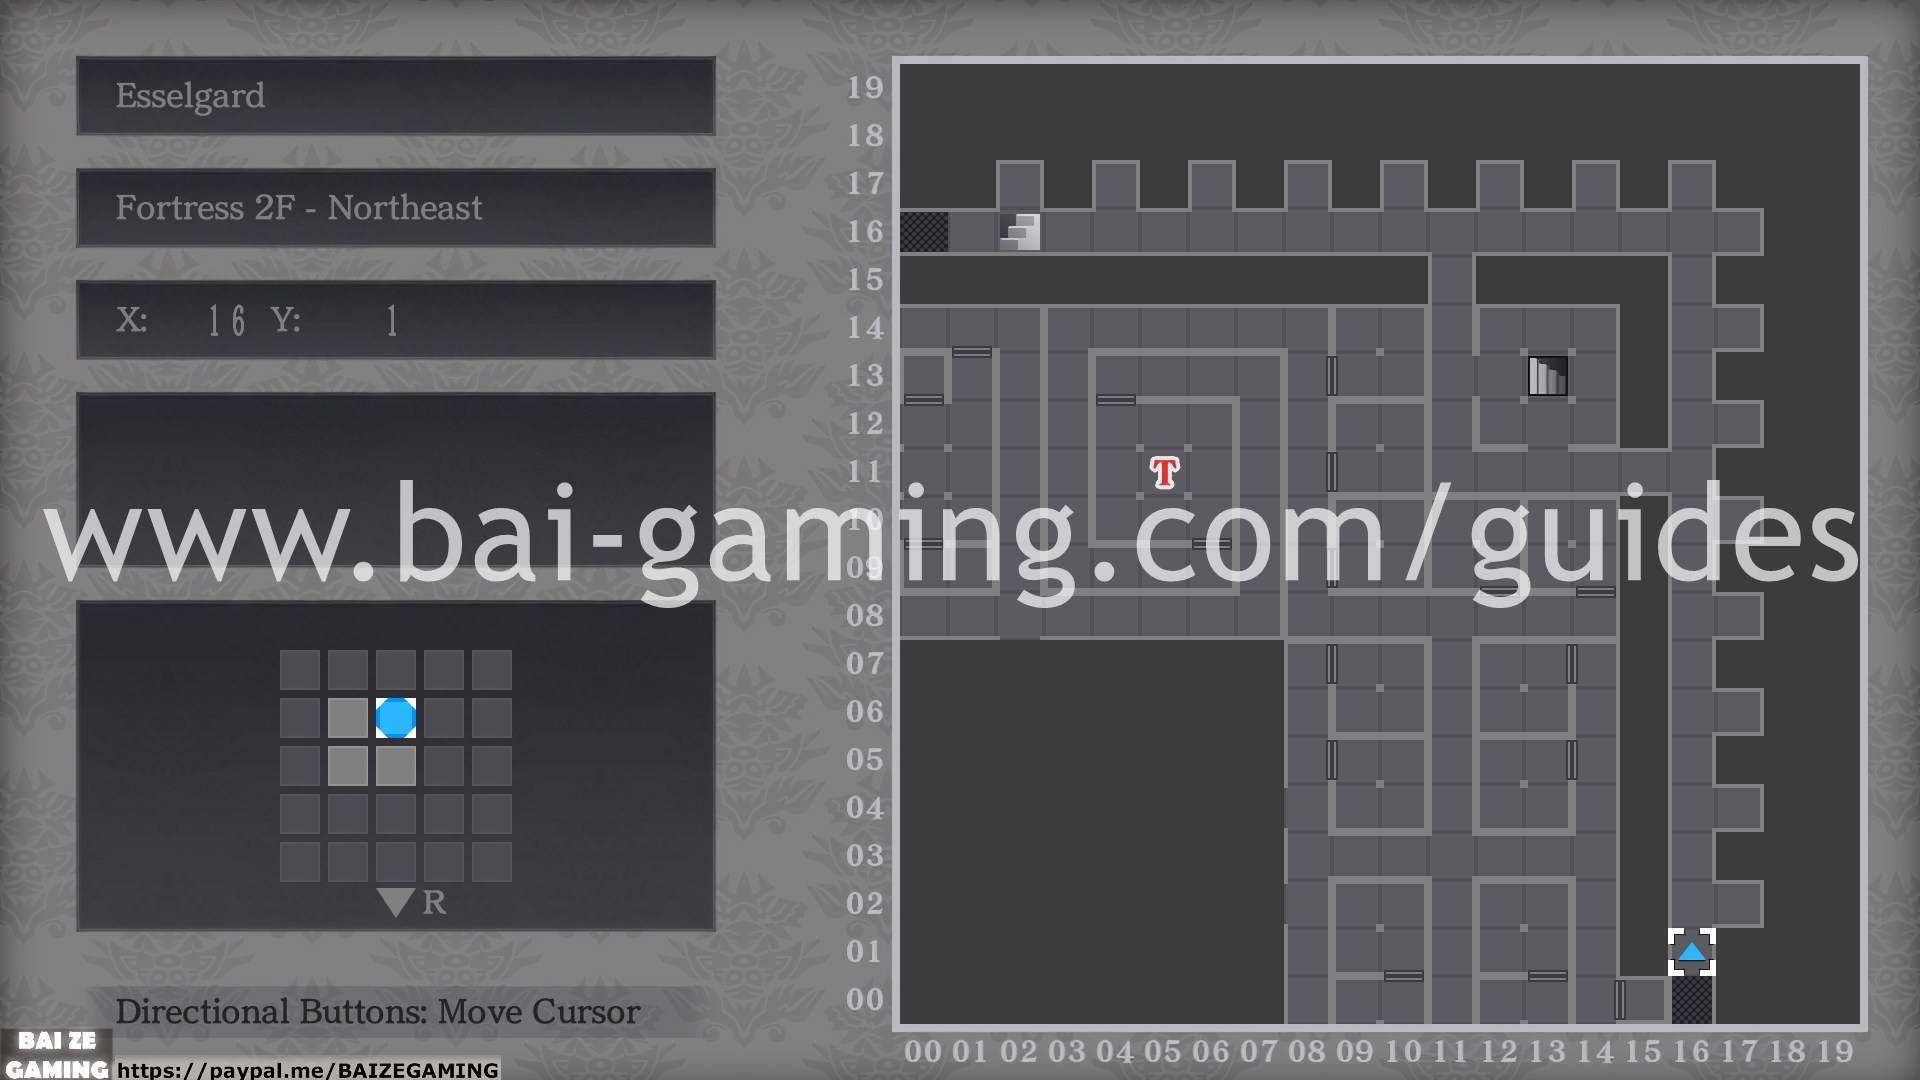
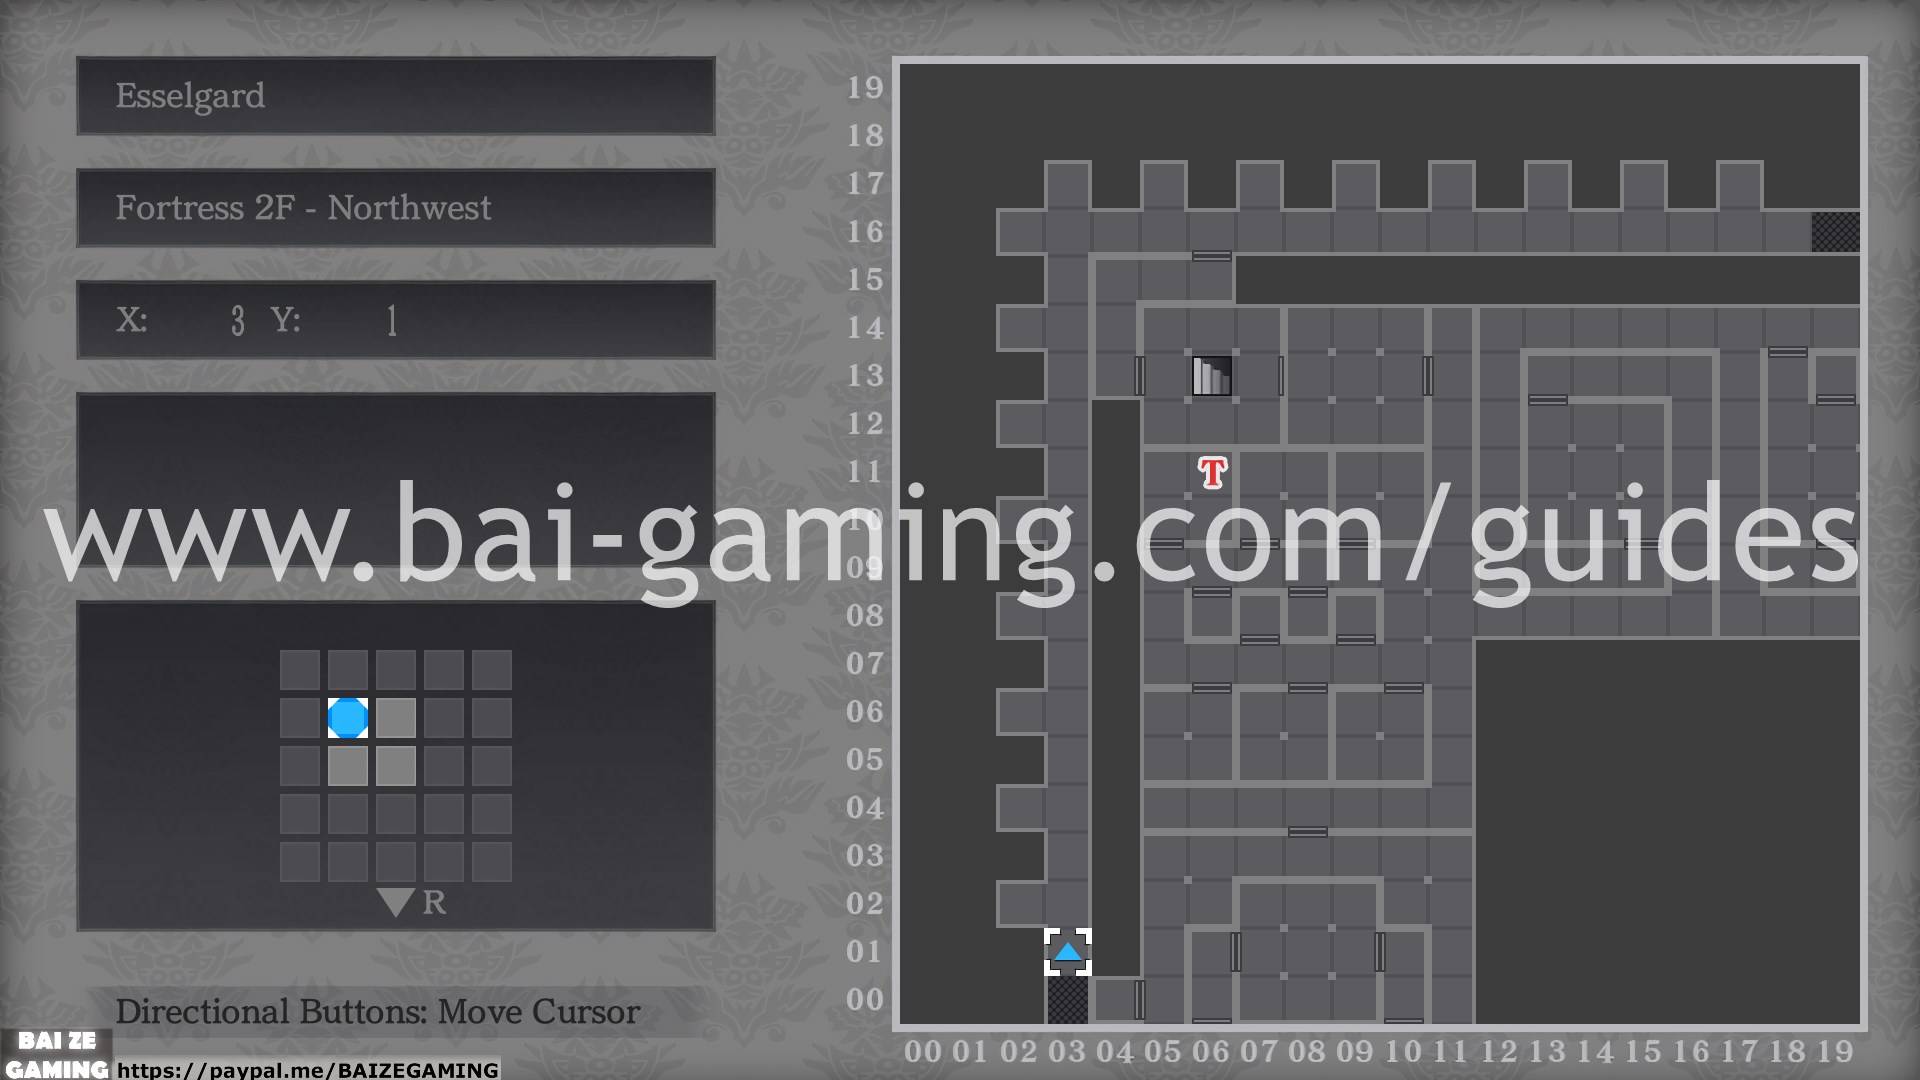
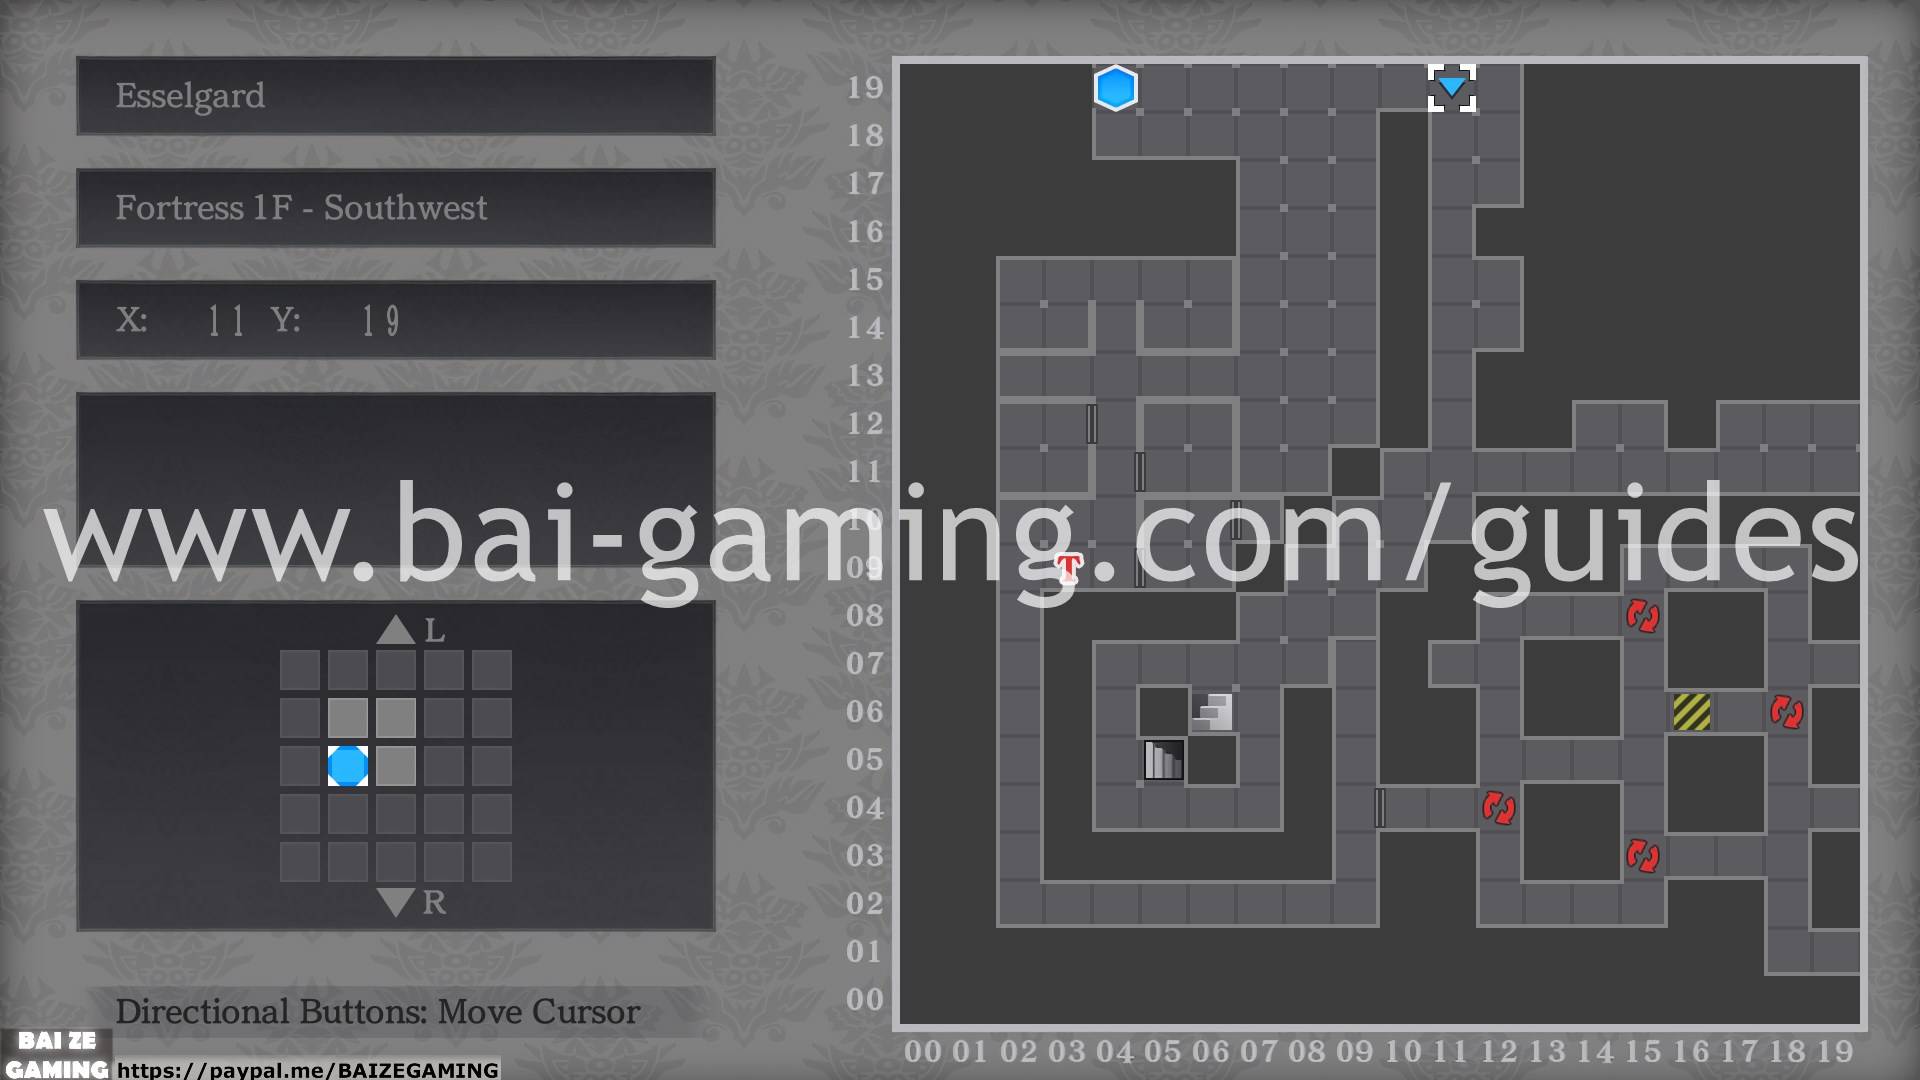
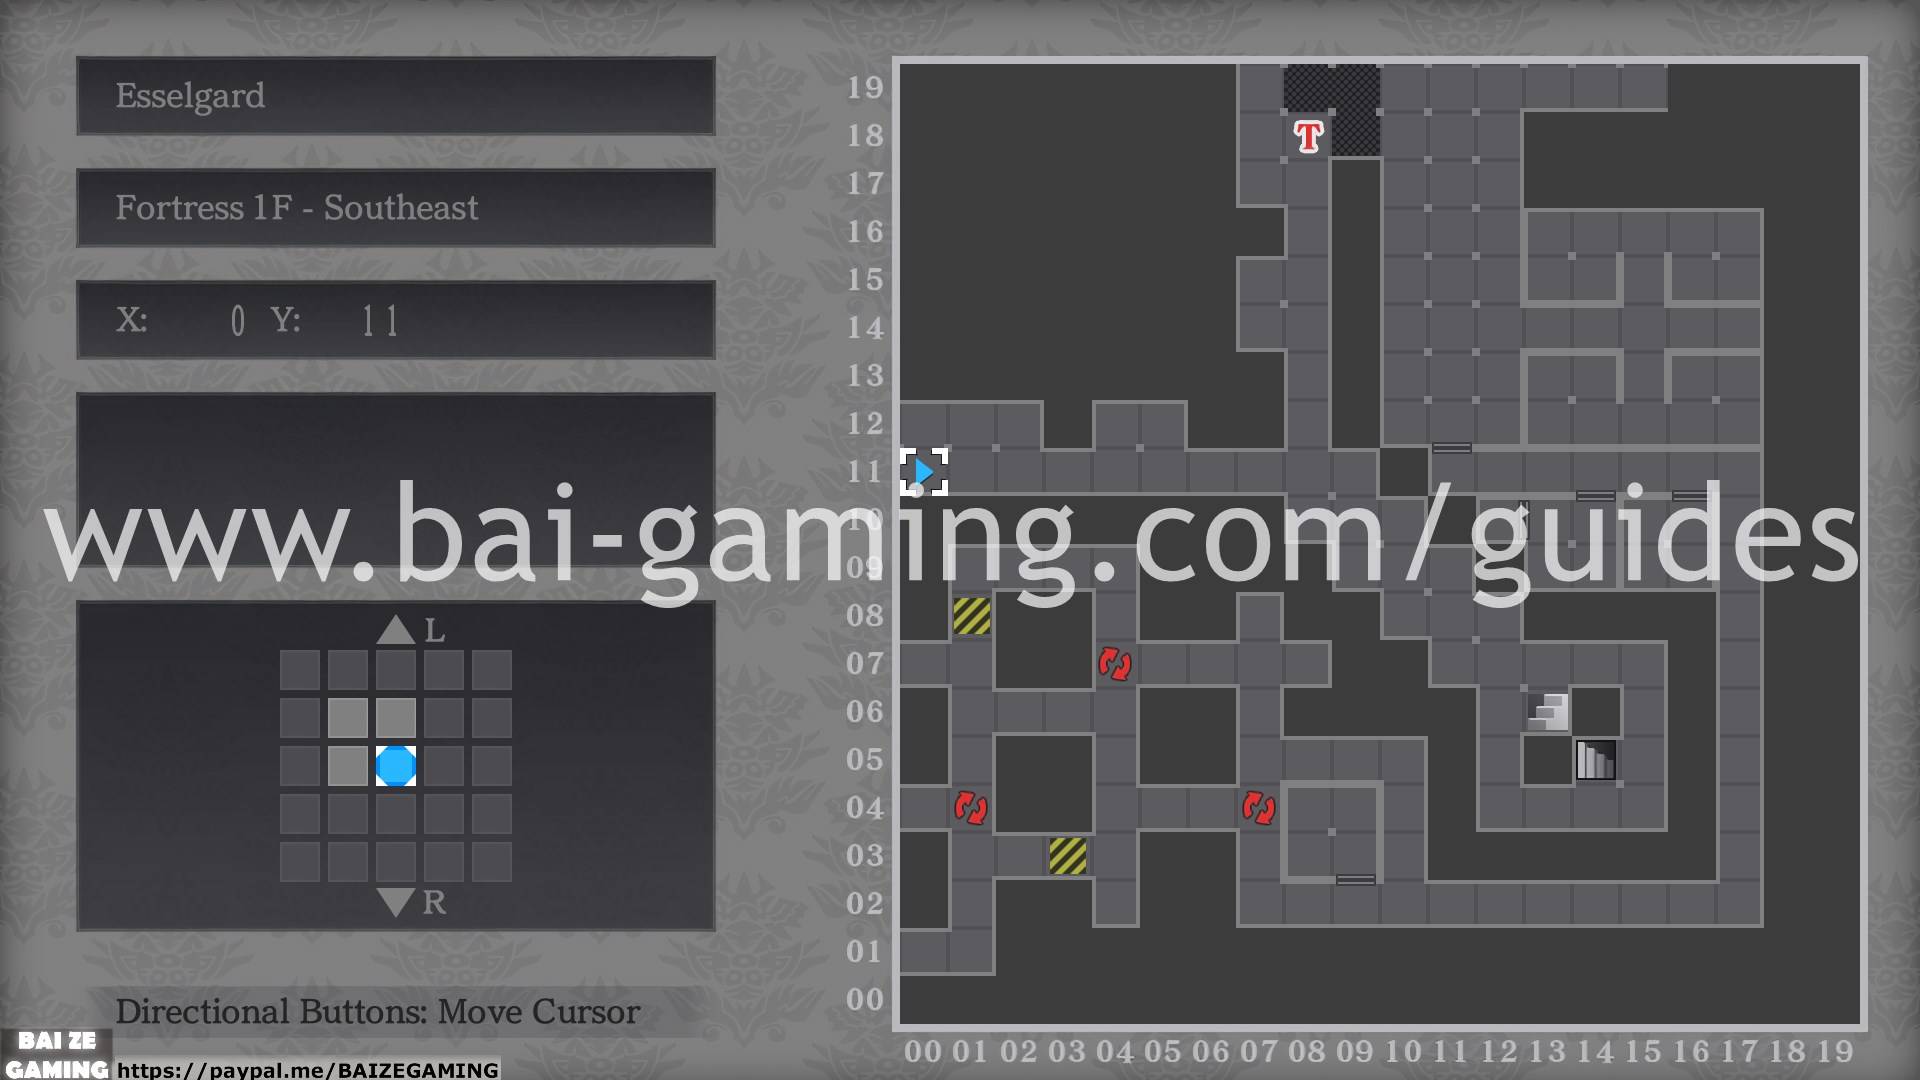
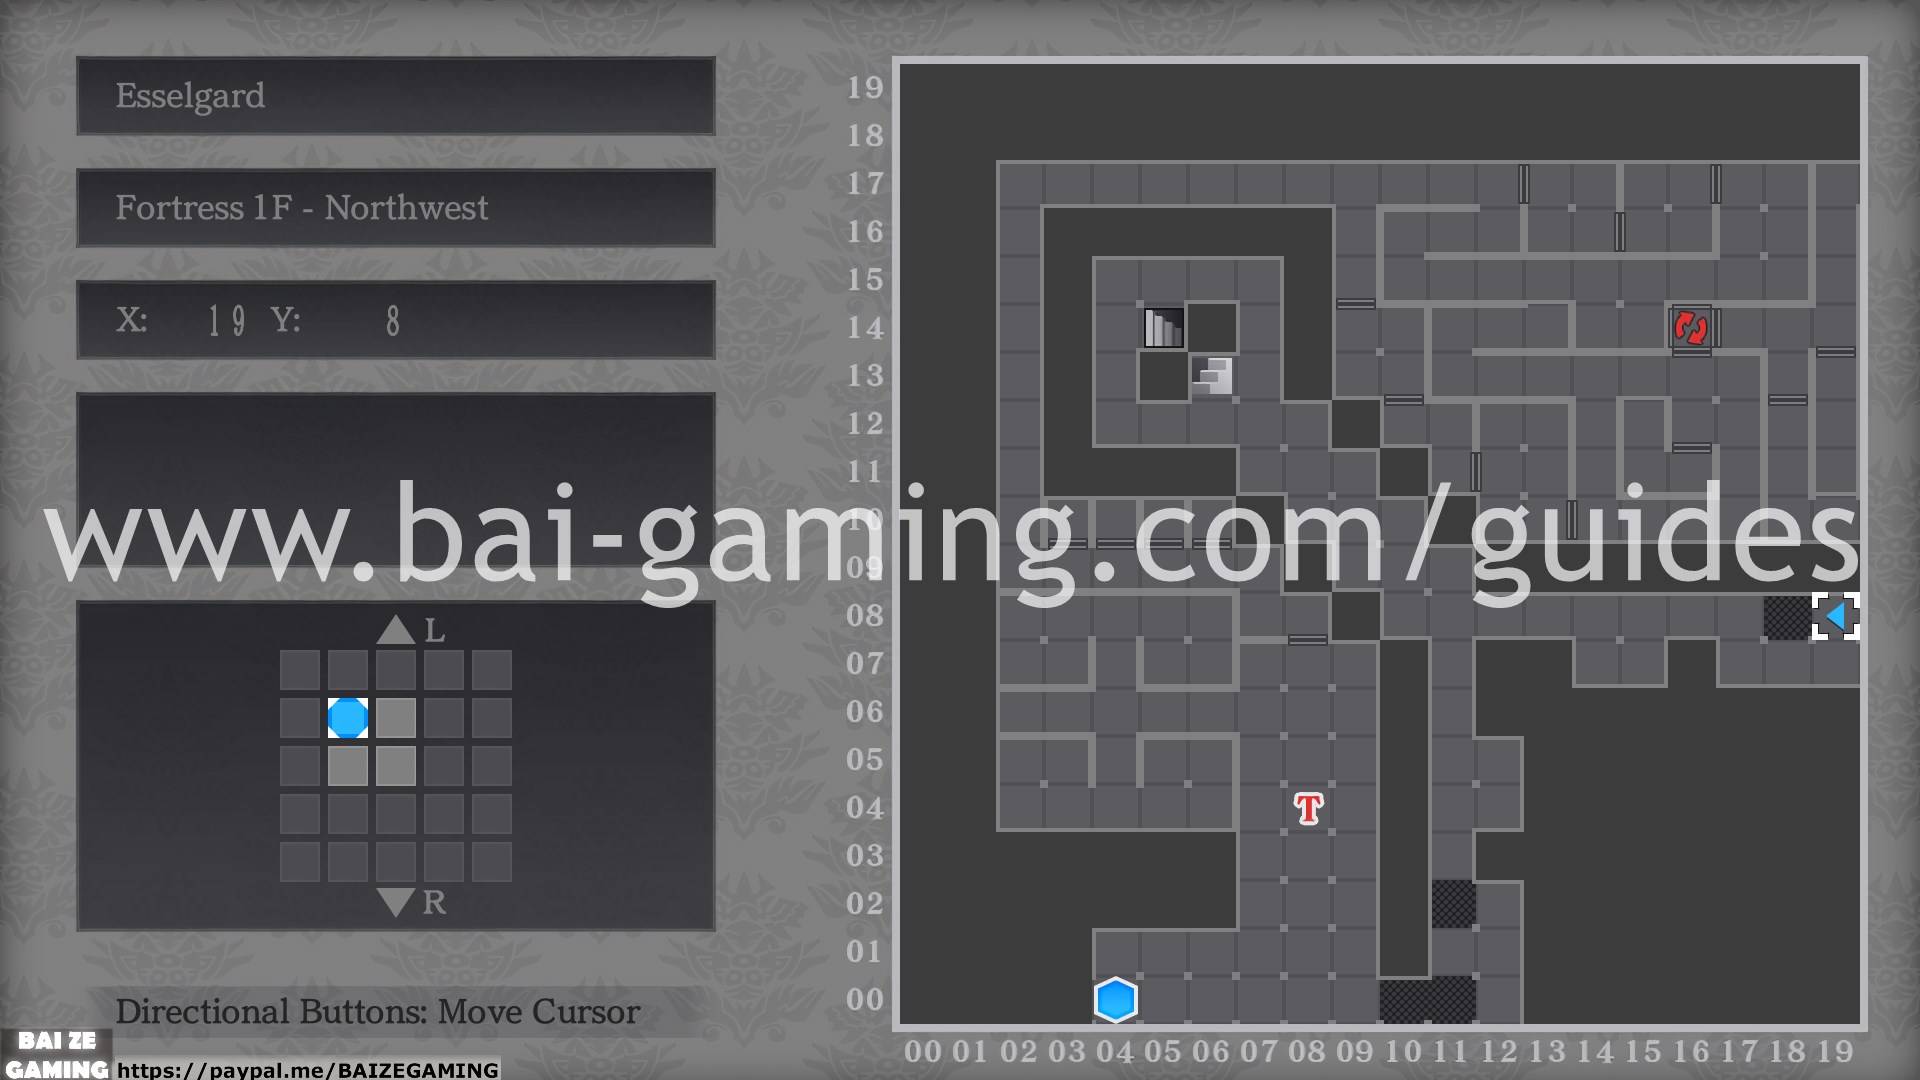
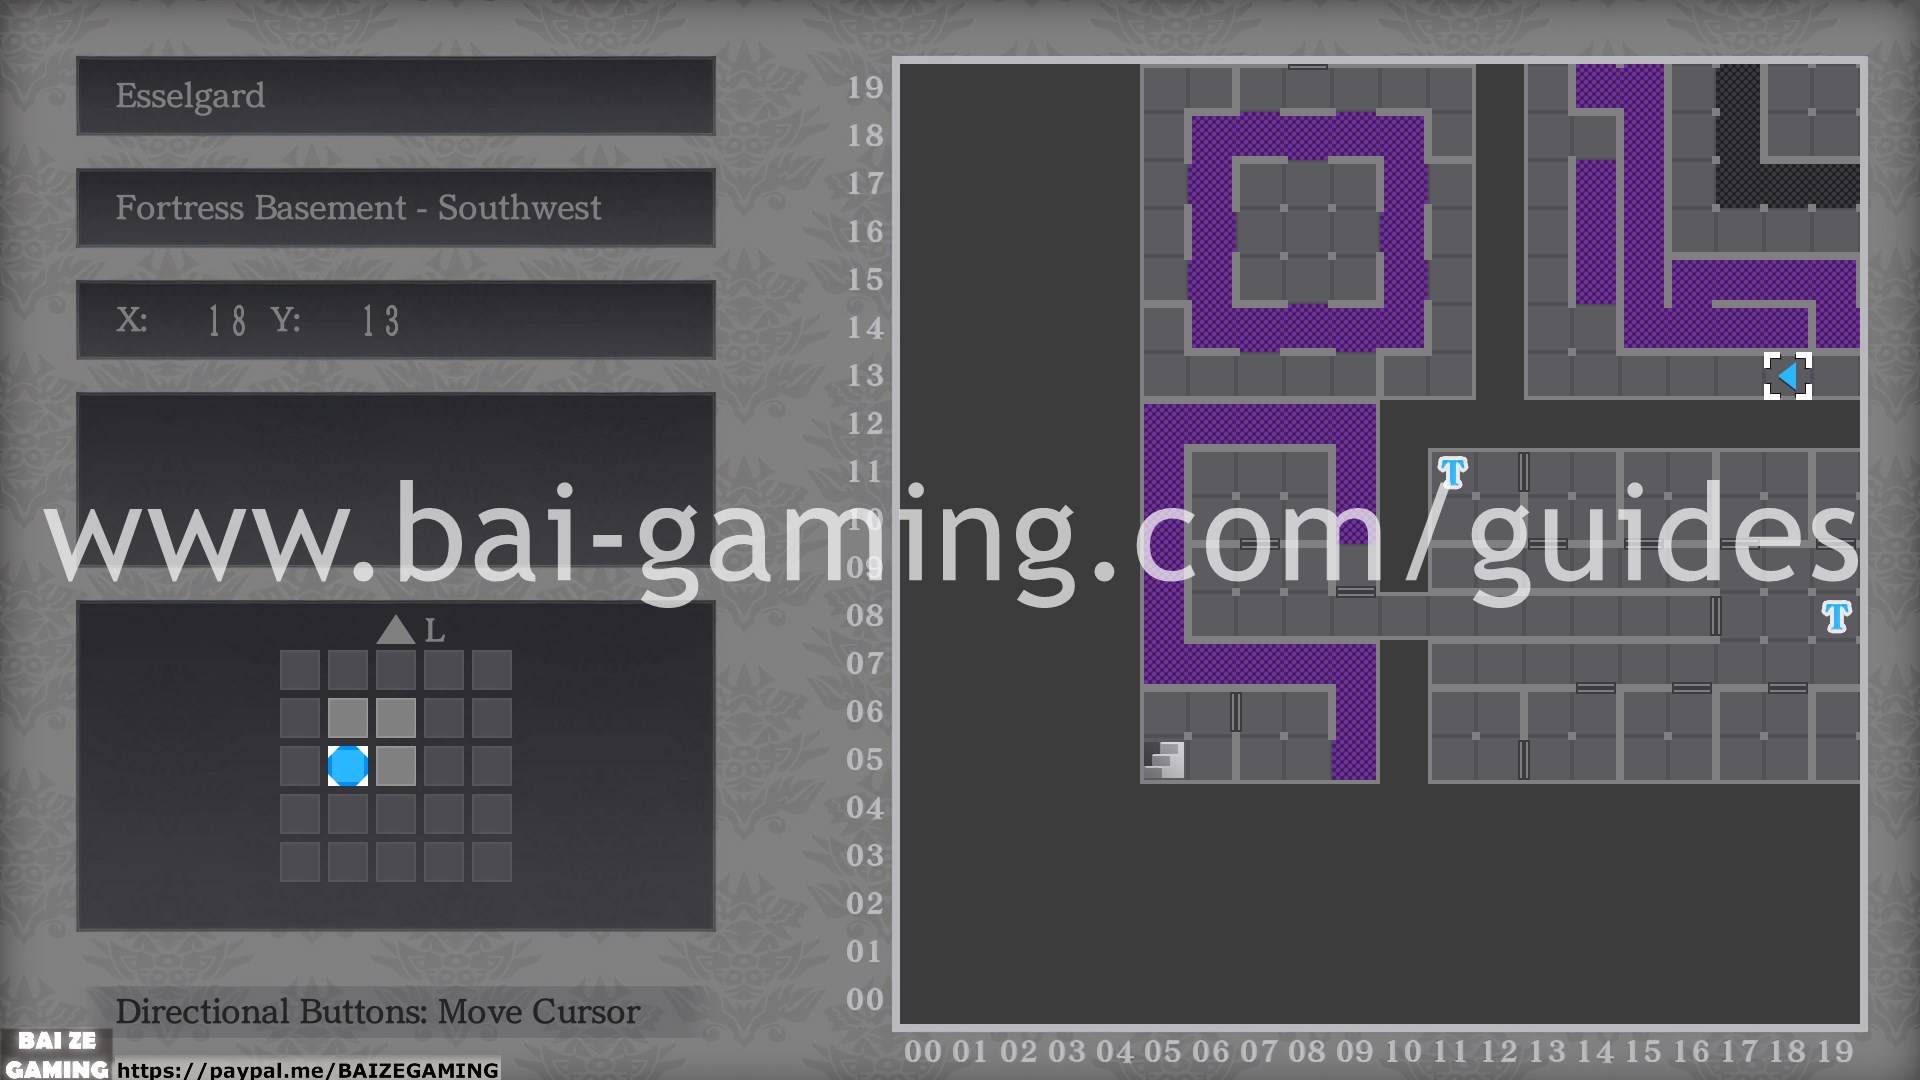
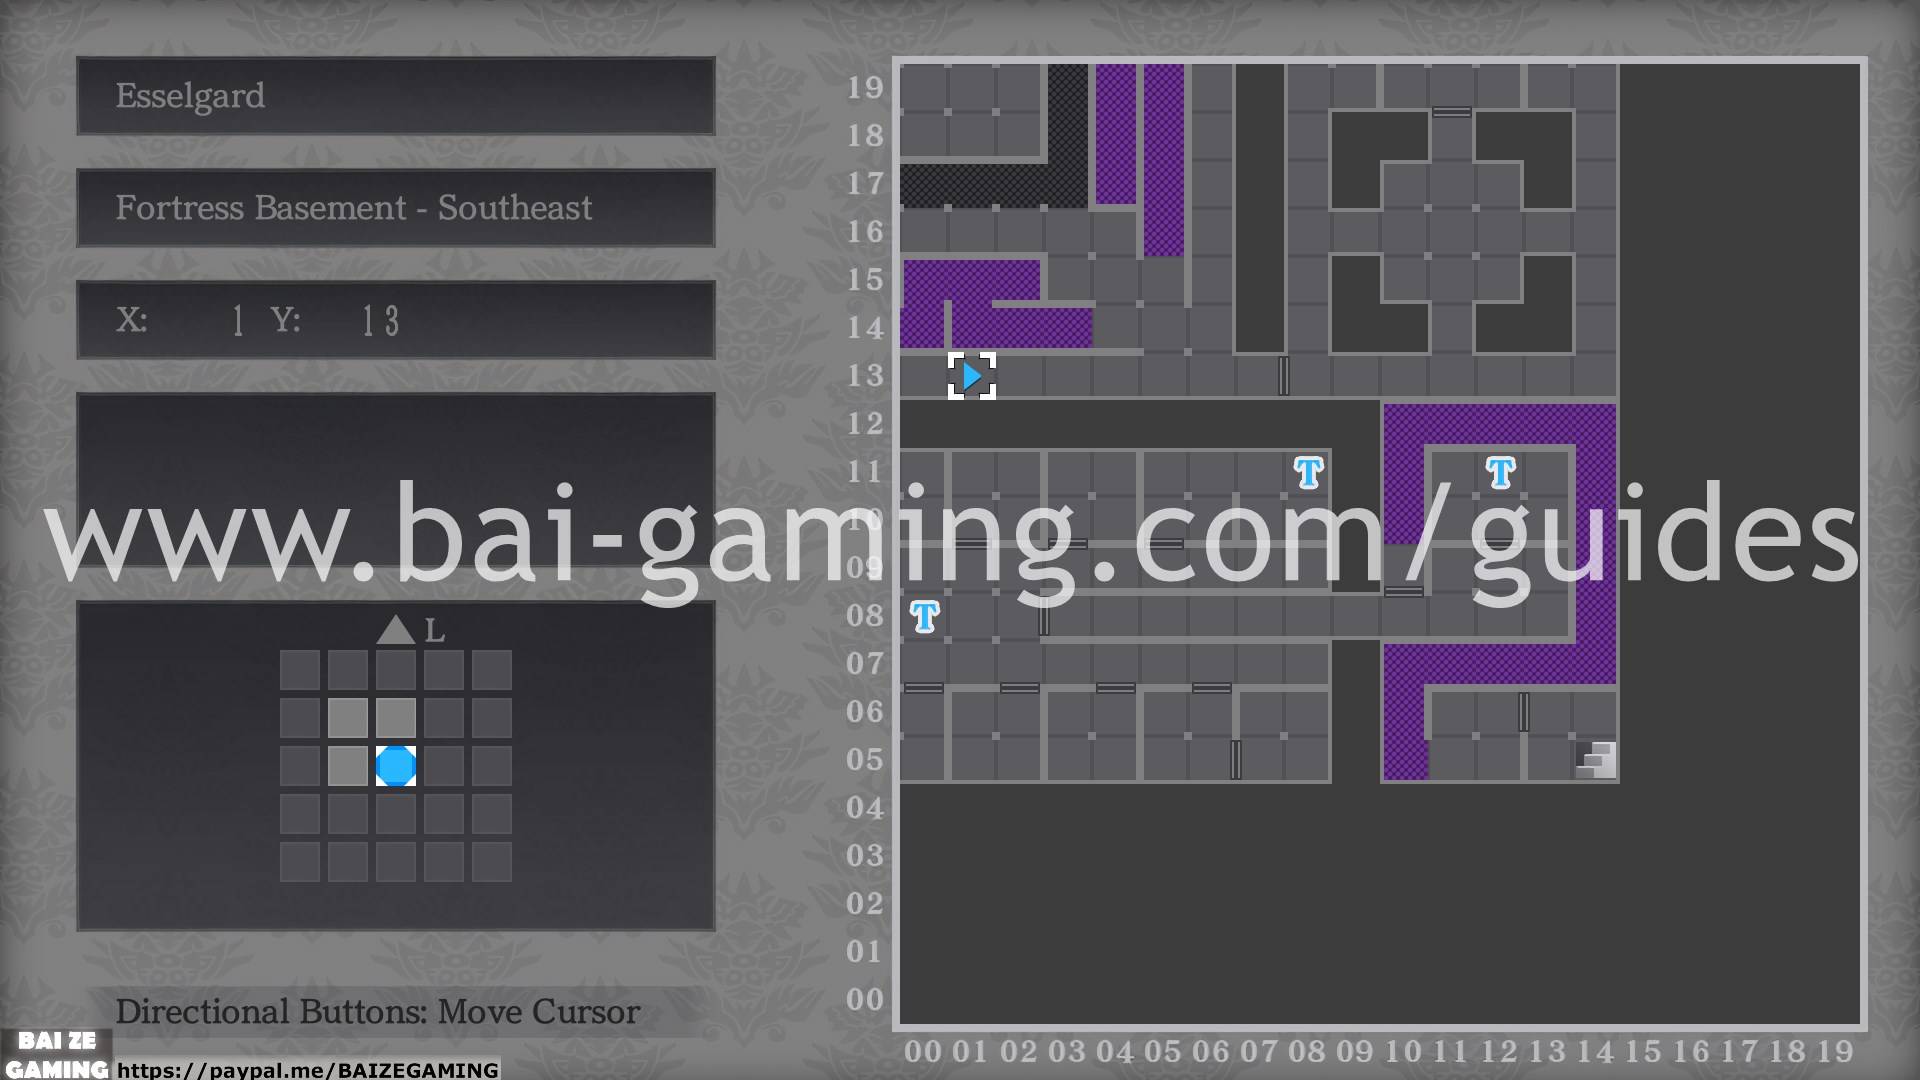
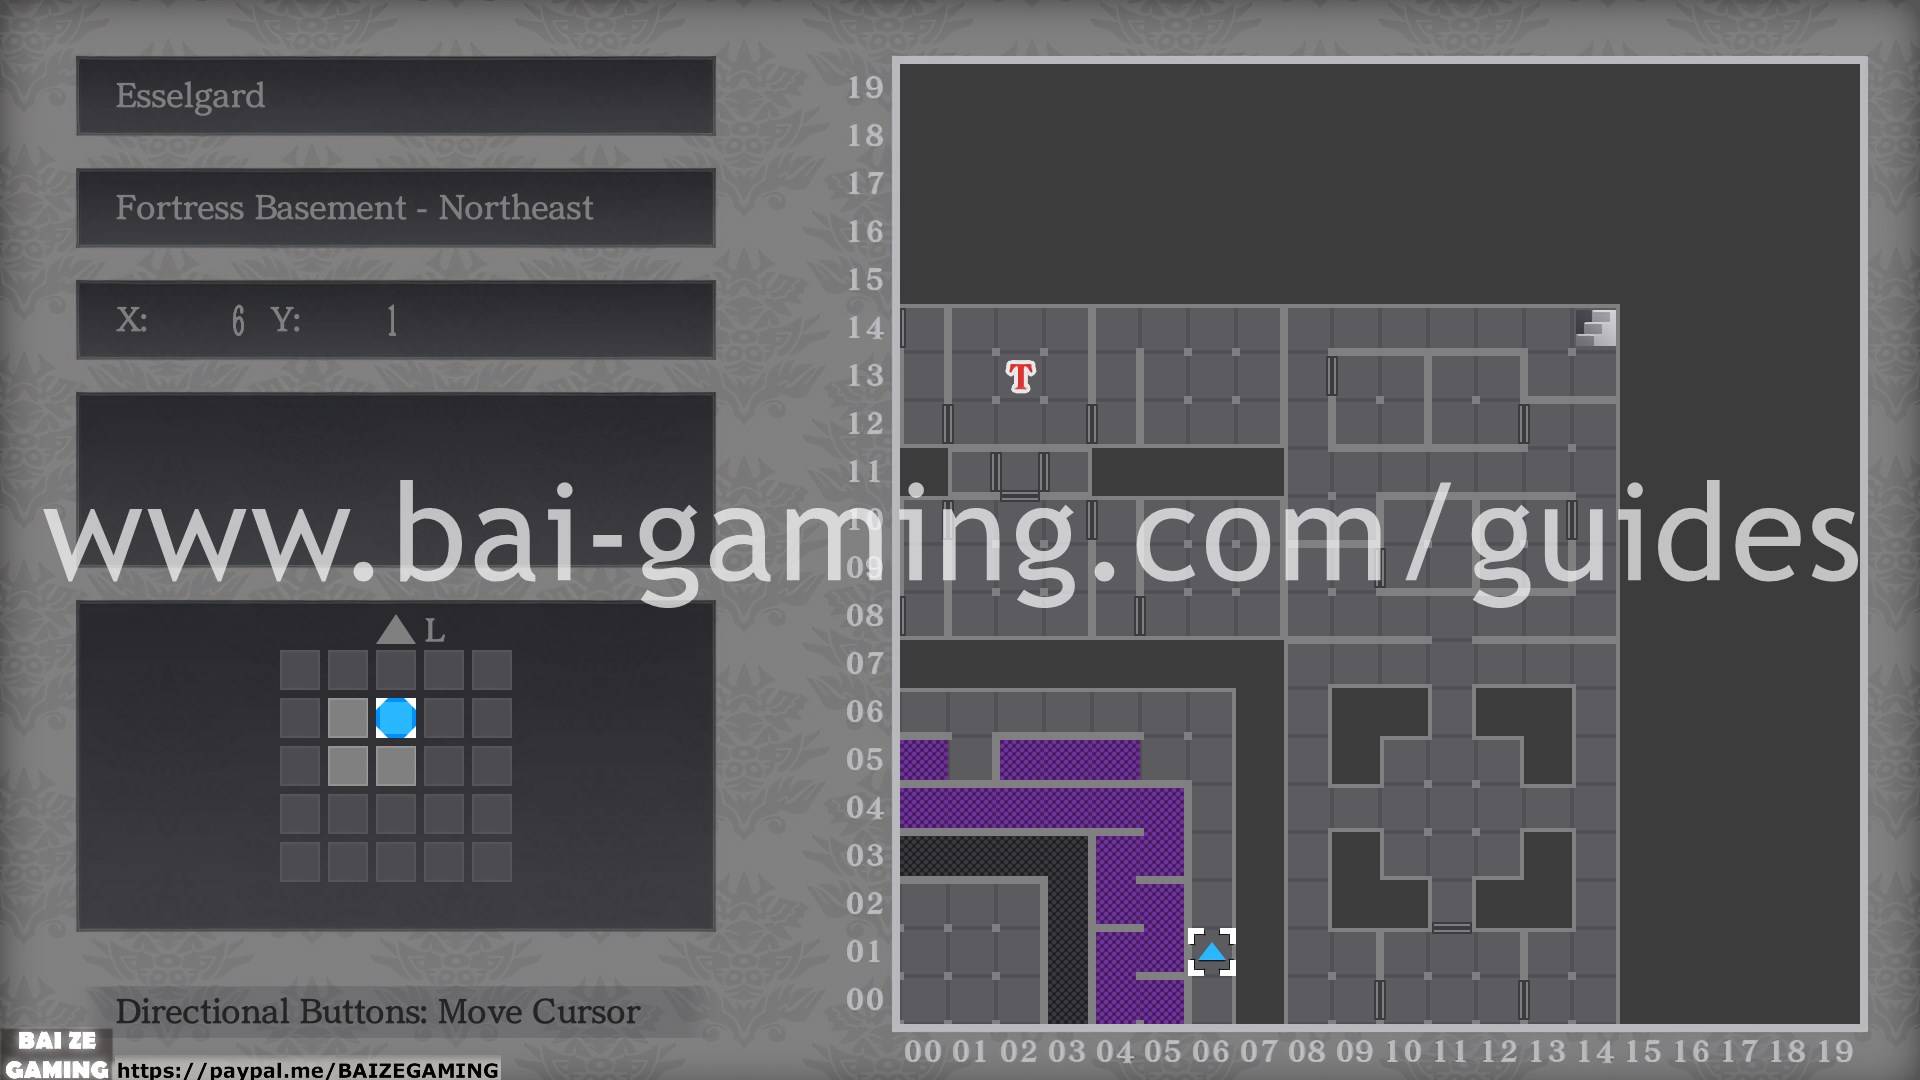
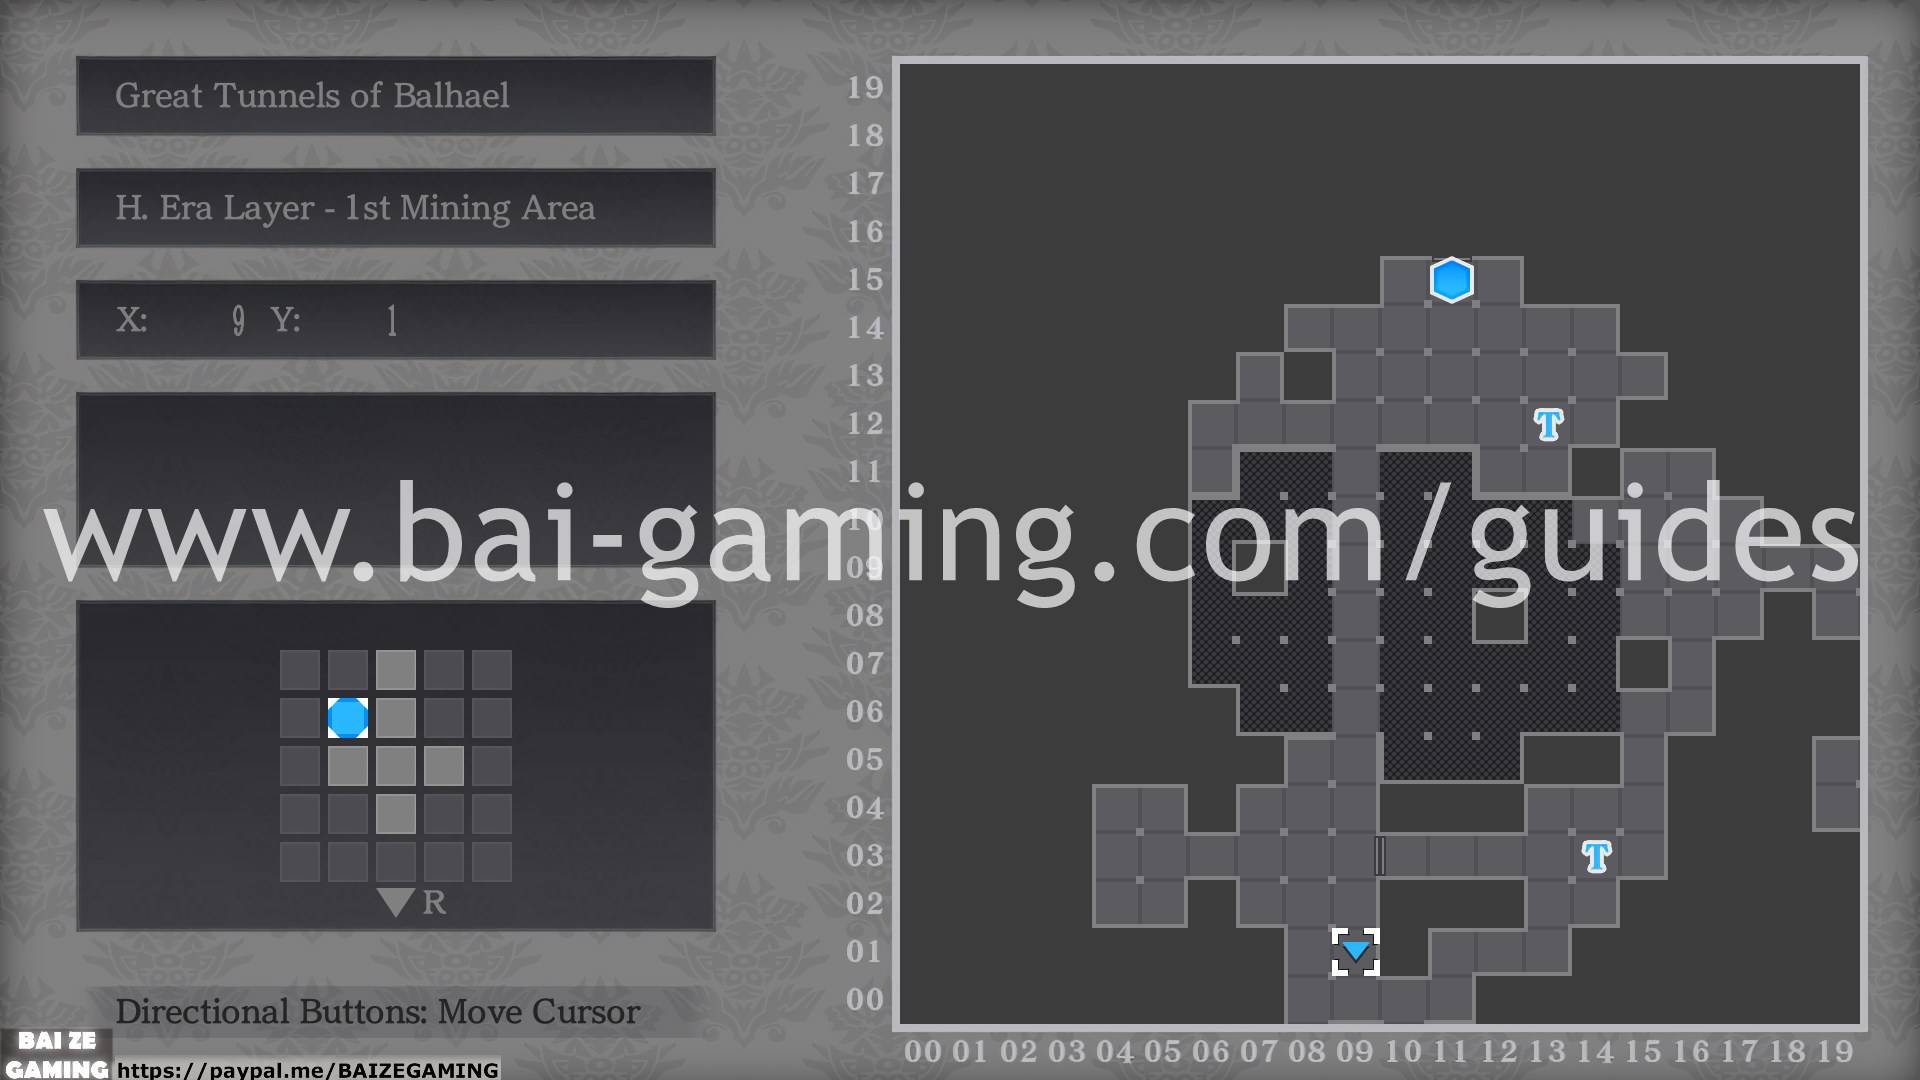
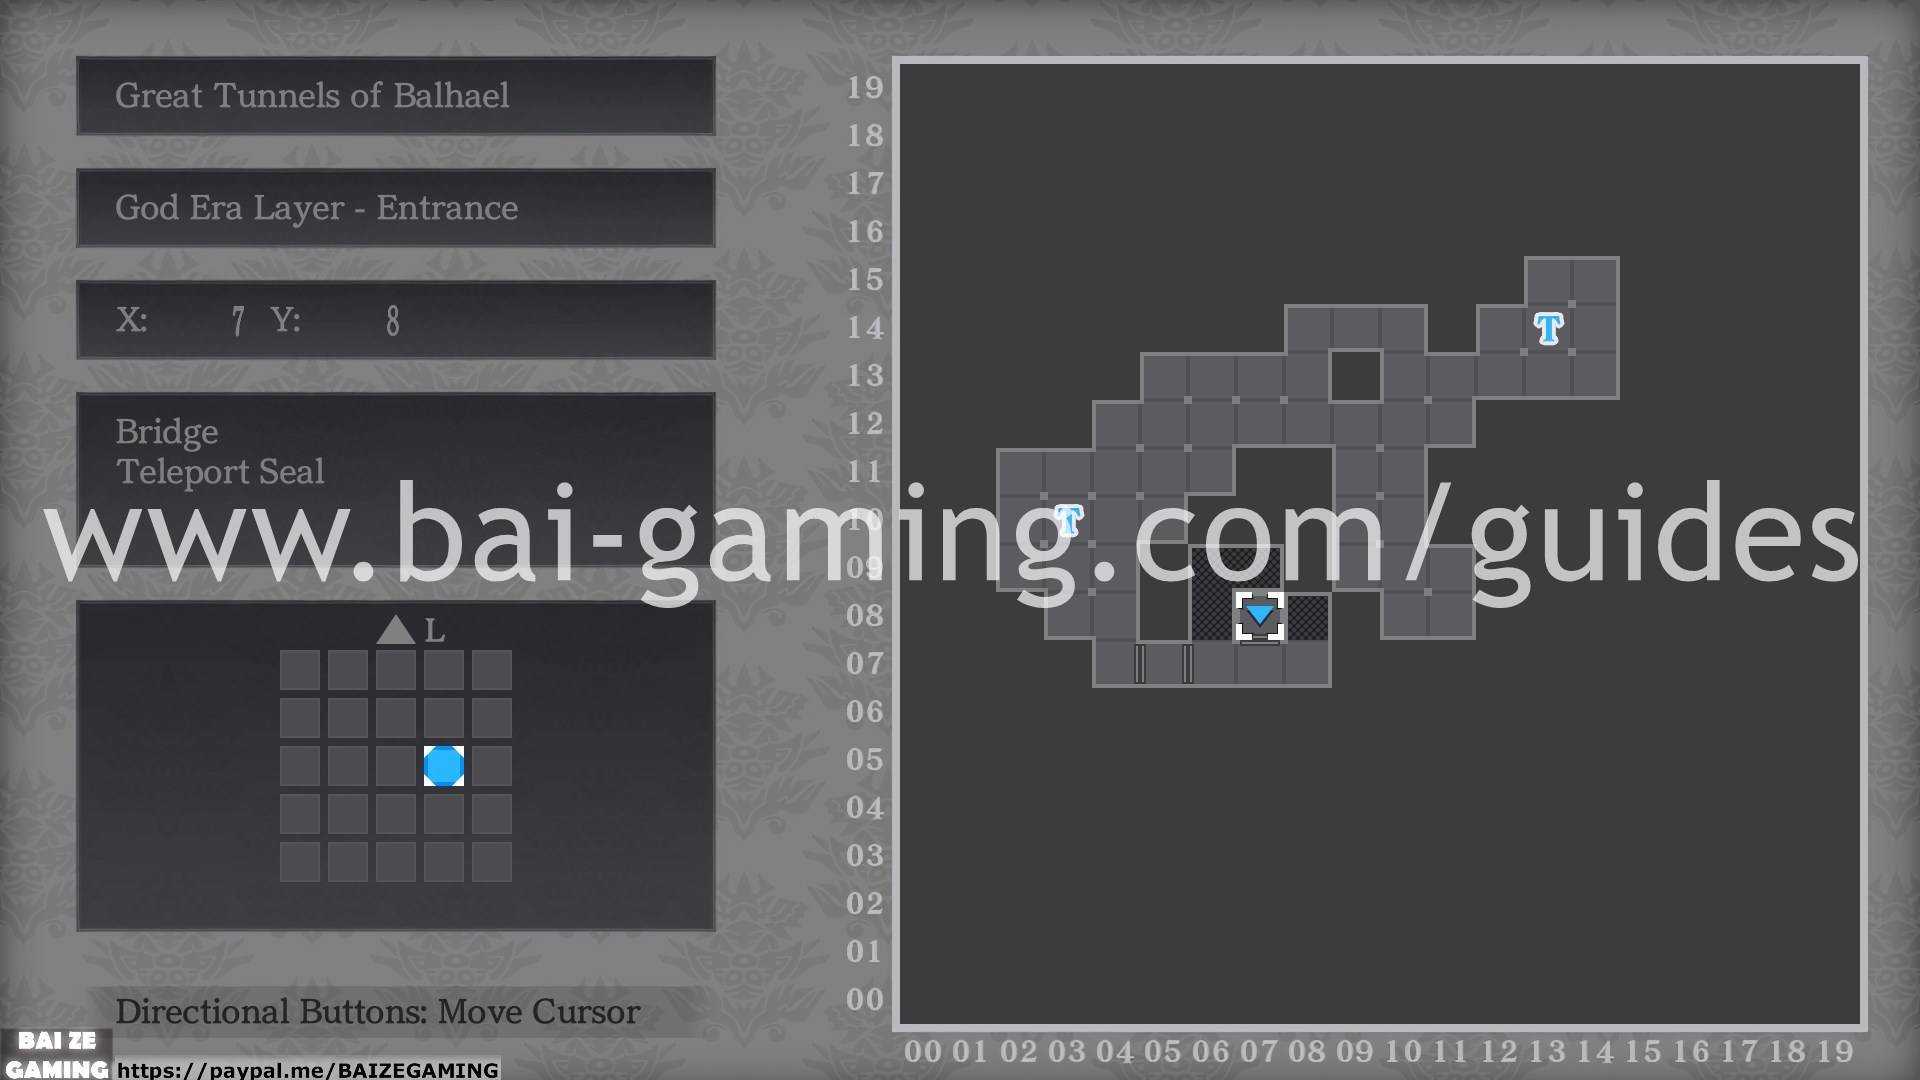
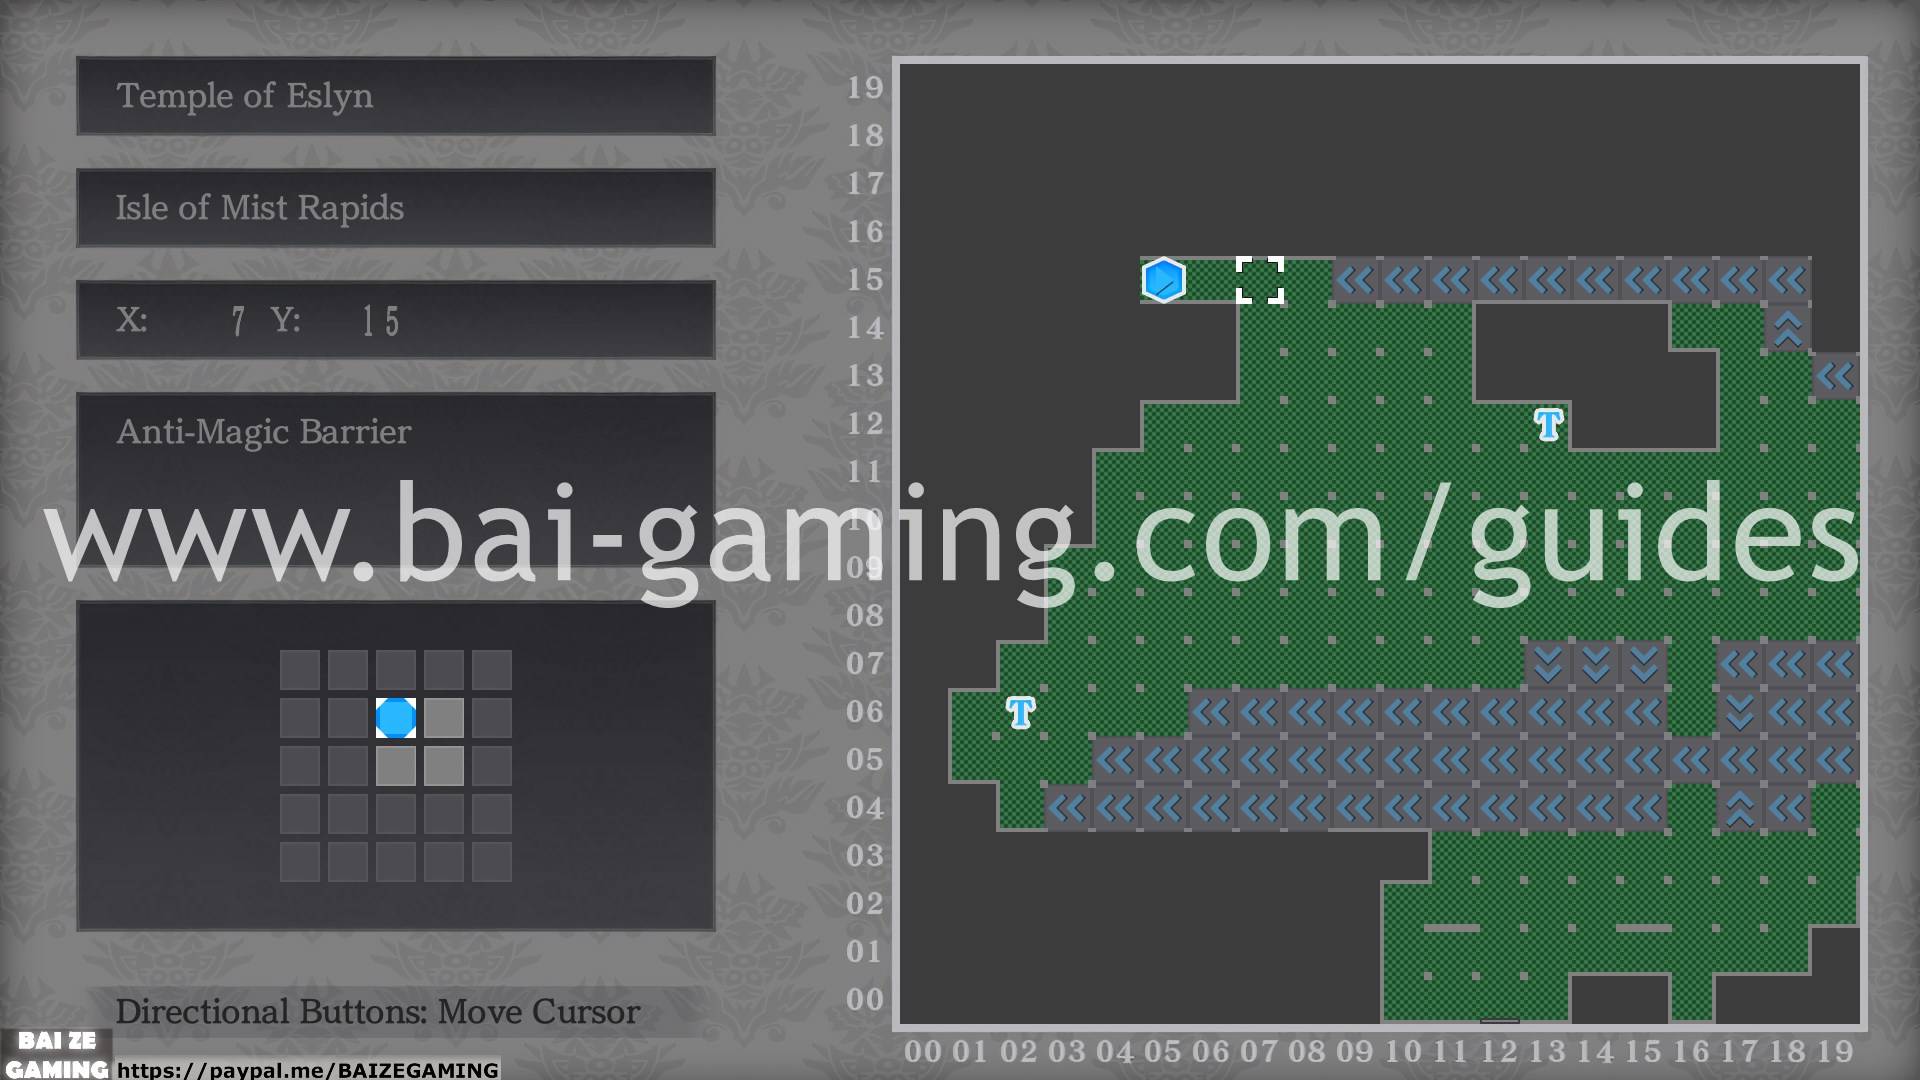
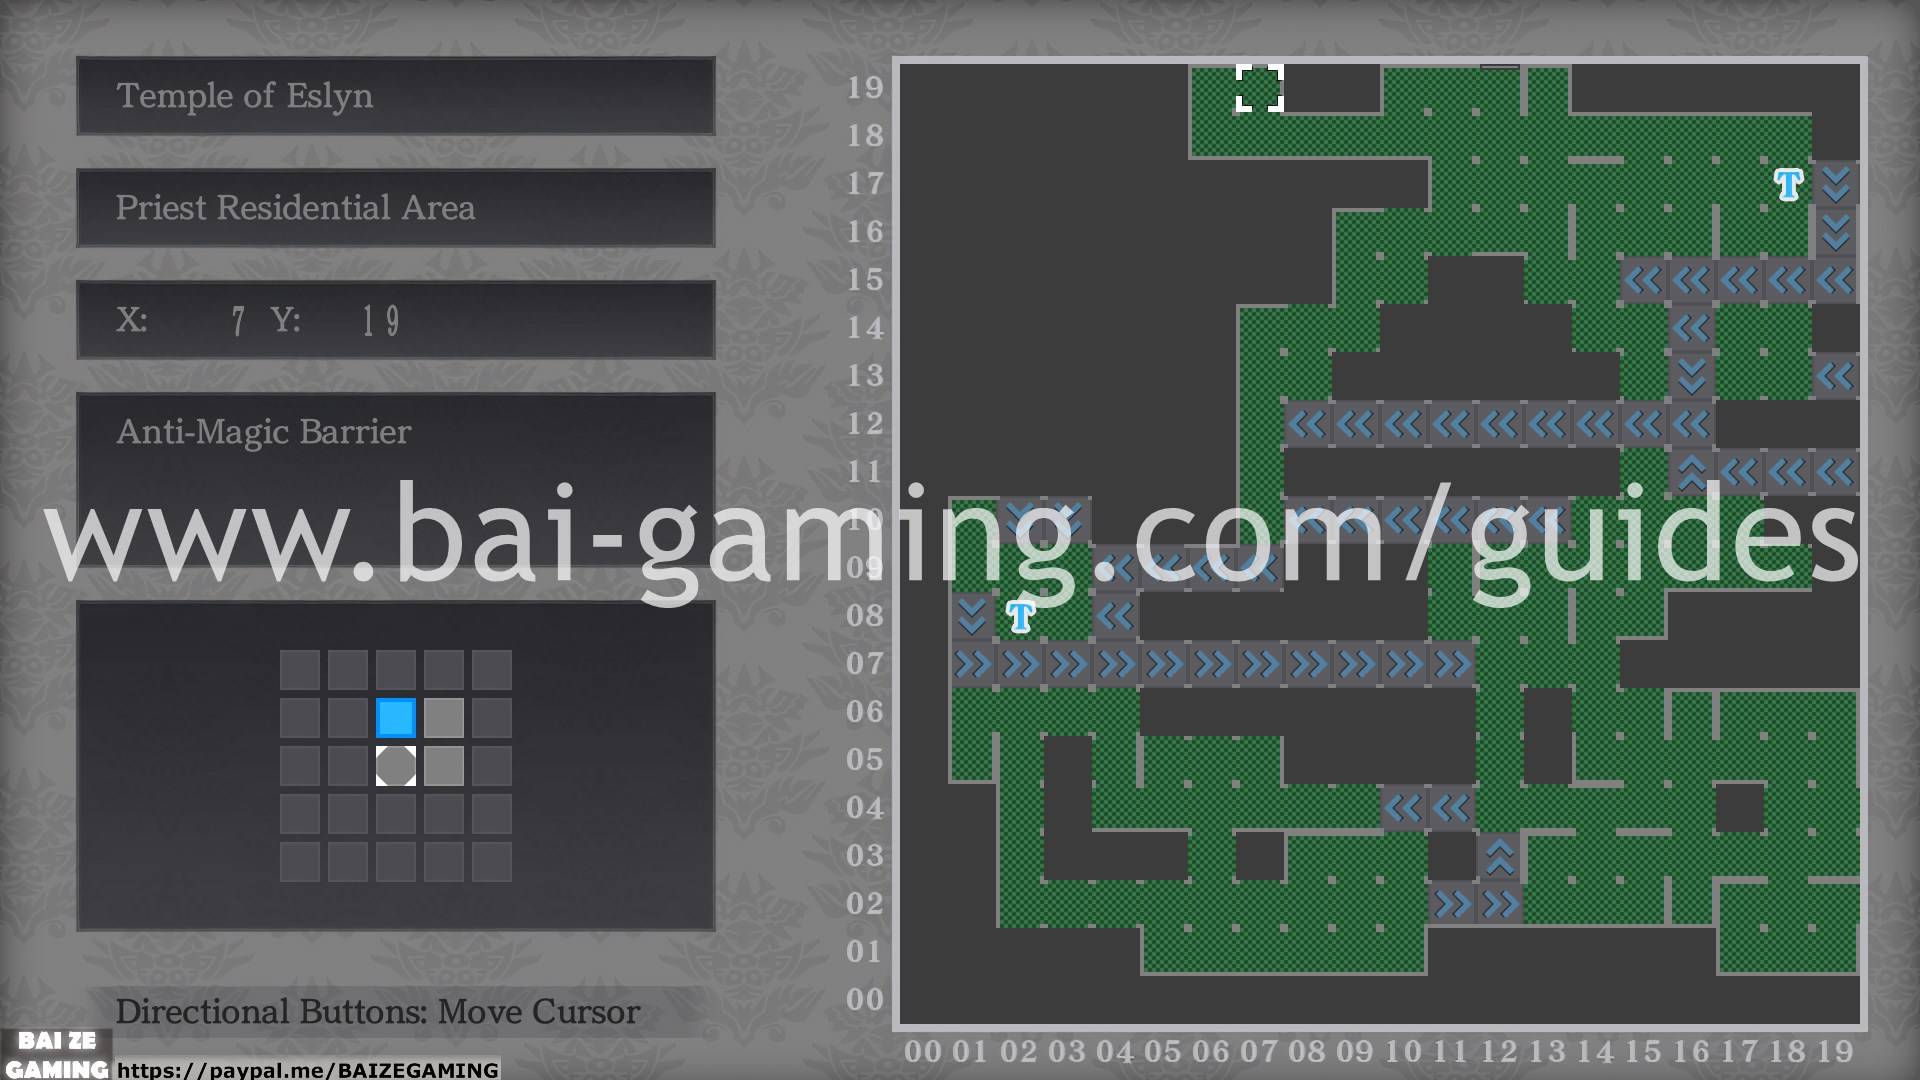
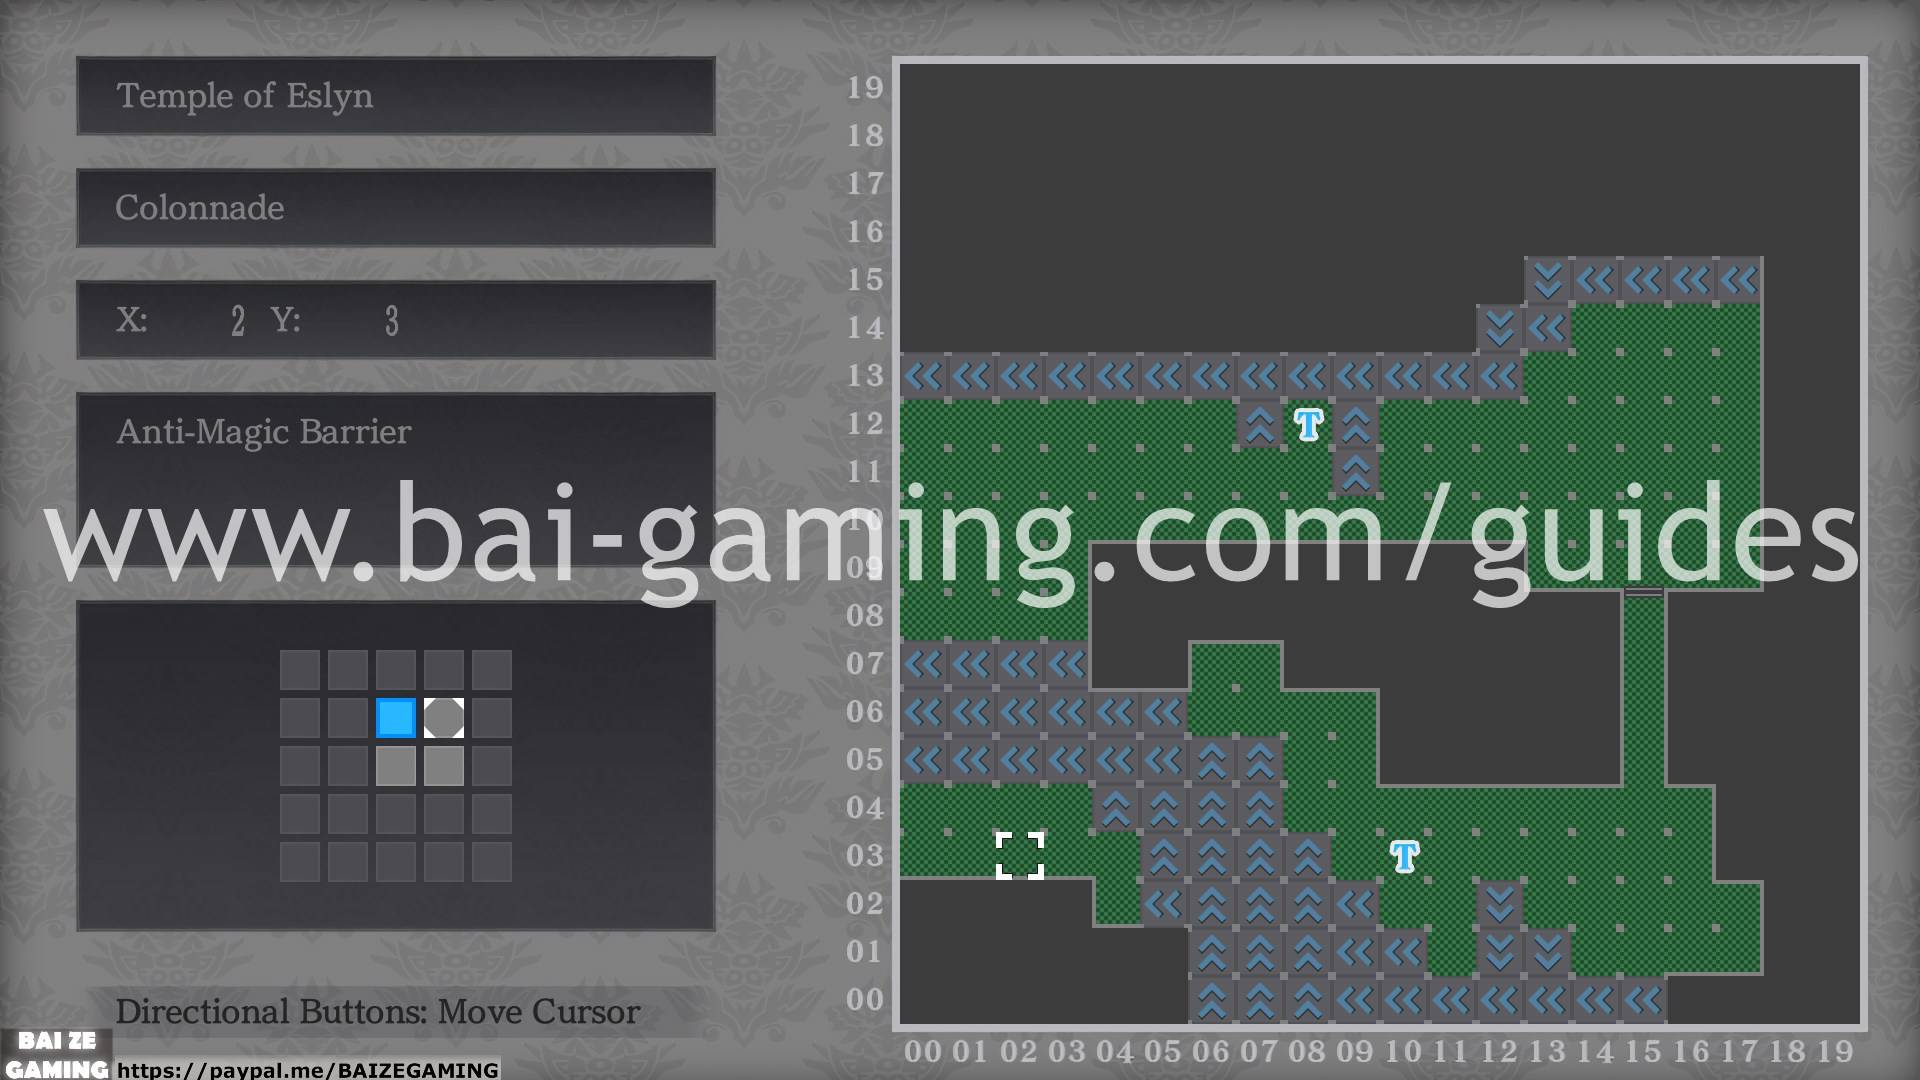
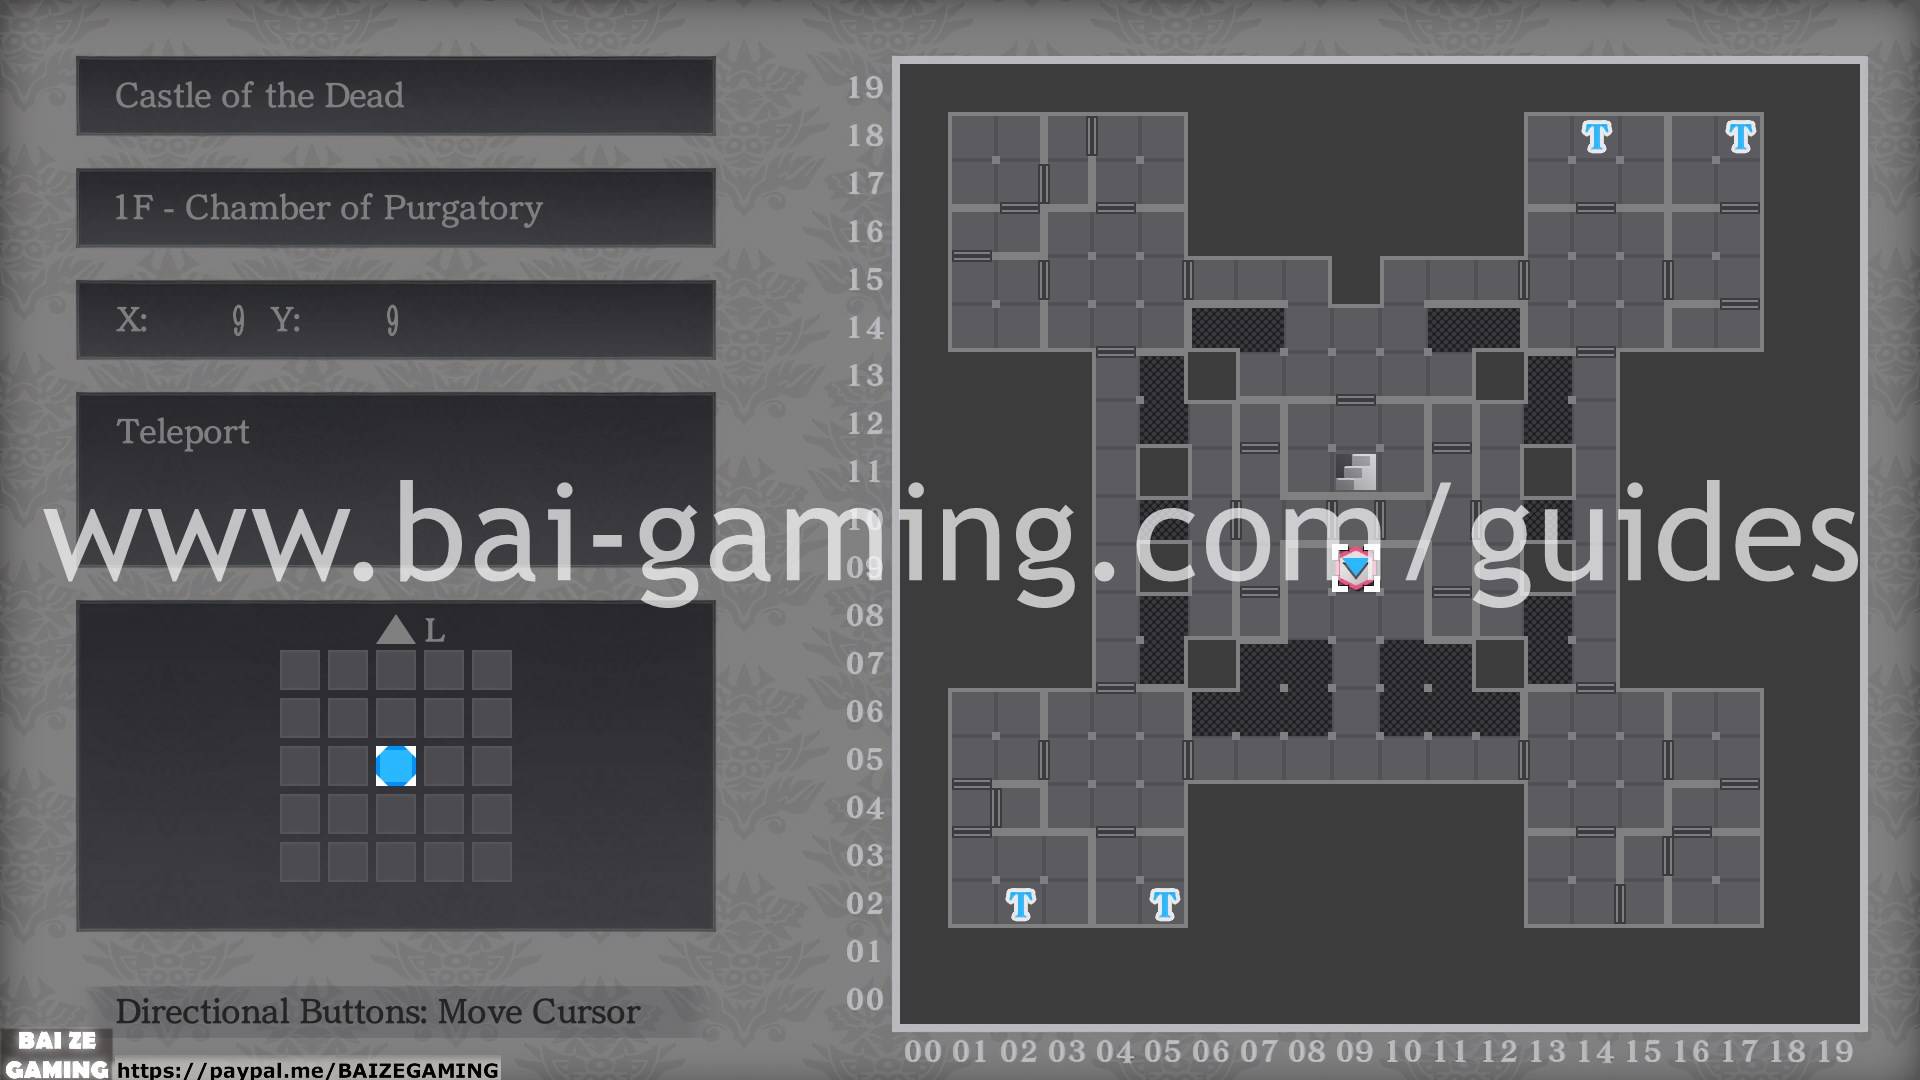
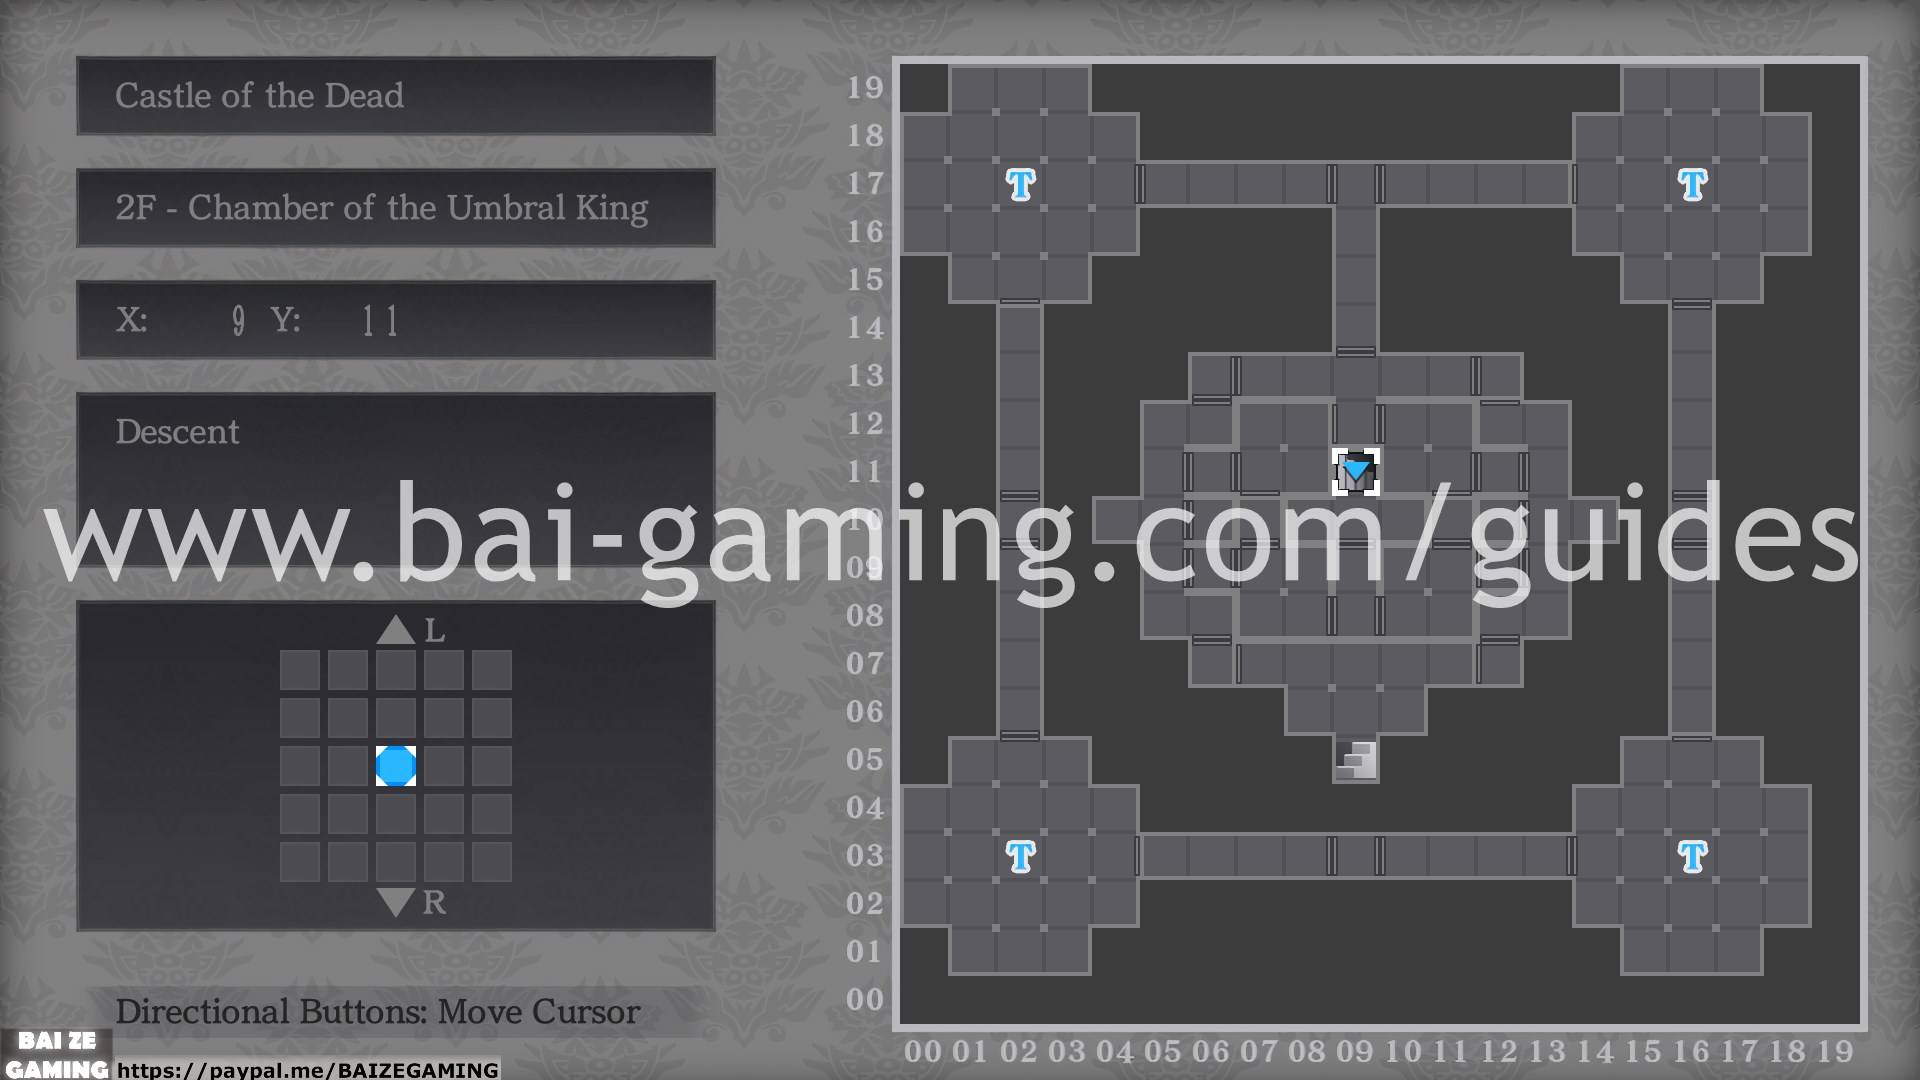
- Use the bottom-left hand map to determine where the map is in comparison to the other maps on the same floor. In the bottom-left corner map, the blue square in that mini-map represents where I am, and the square white cursor there represents the map that is being shown. Usually the blue and white cursor overlap each other, but in some cases they don’t because you can press L1/R1 to change what map you’re looking at. So if they don’t overlap, it’s the white square cursor that represents where the map is. This happens because sometimes I’m standing in one map zone, and I’m looking at another map zone using L1/R1.
- Click to expand the images
- If you’d rather see a walkthrough in a YouTube playlist here.
Fewmy Valley
Fewmy Valley – Northern Valley
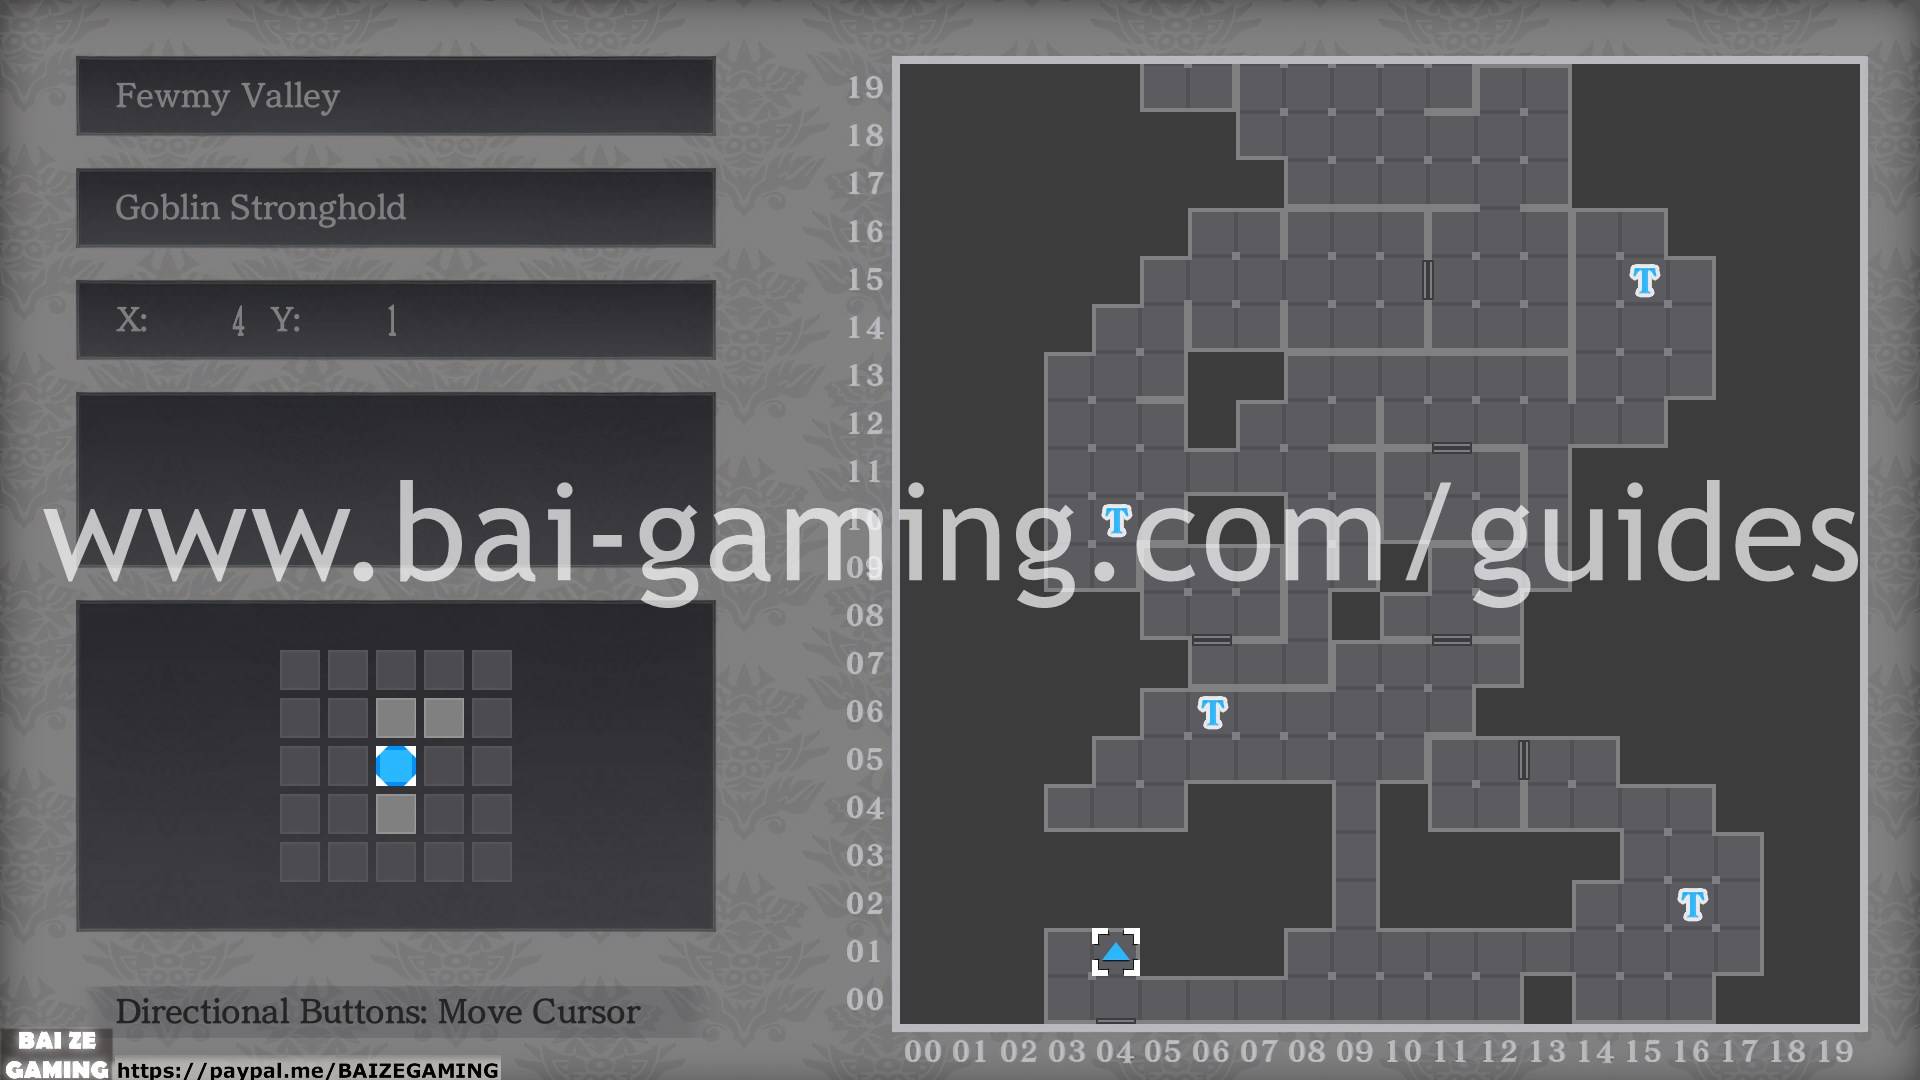
Fewmy Valley – Goblin Stronghold
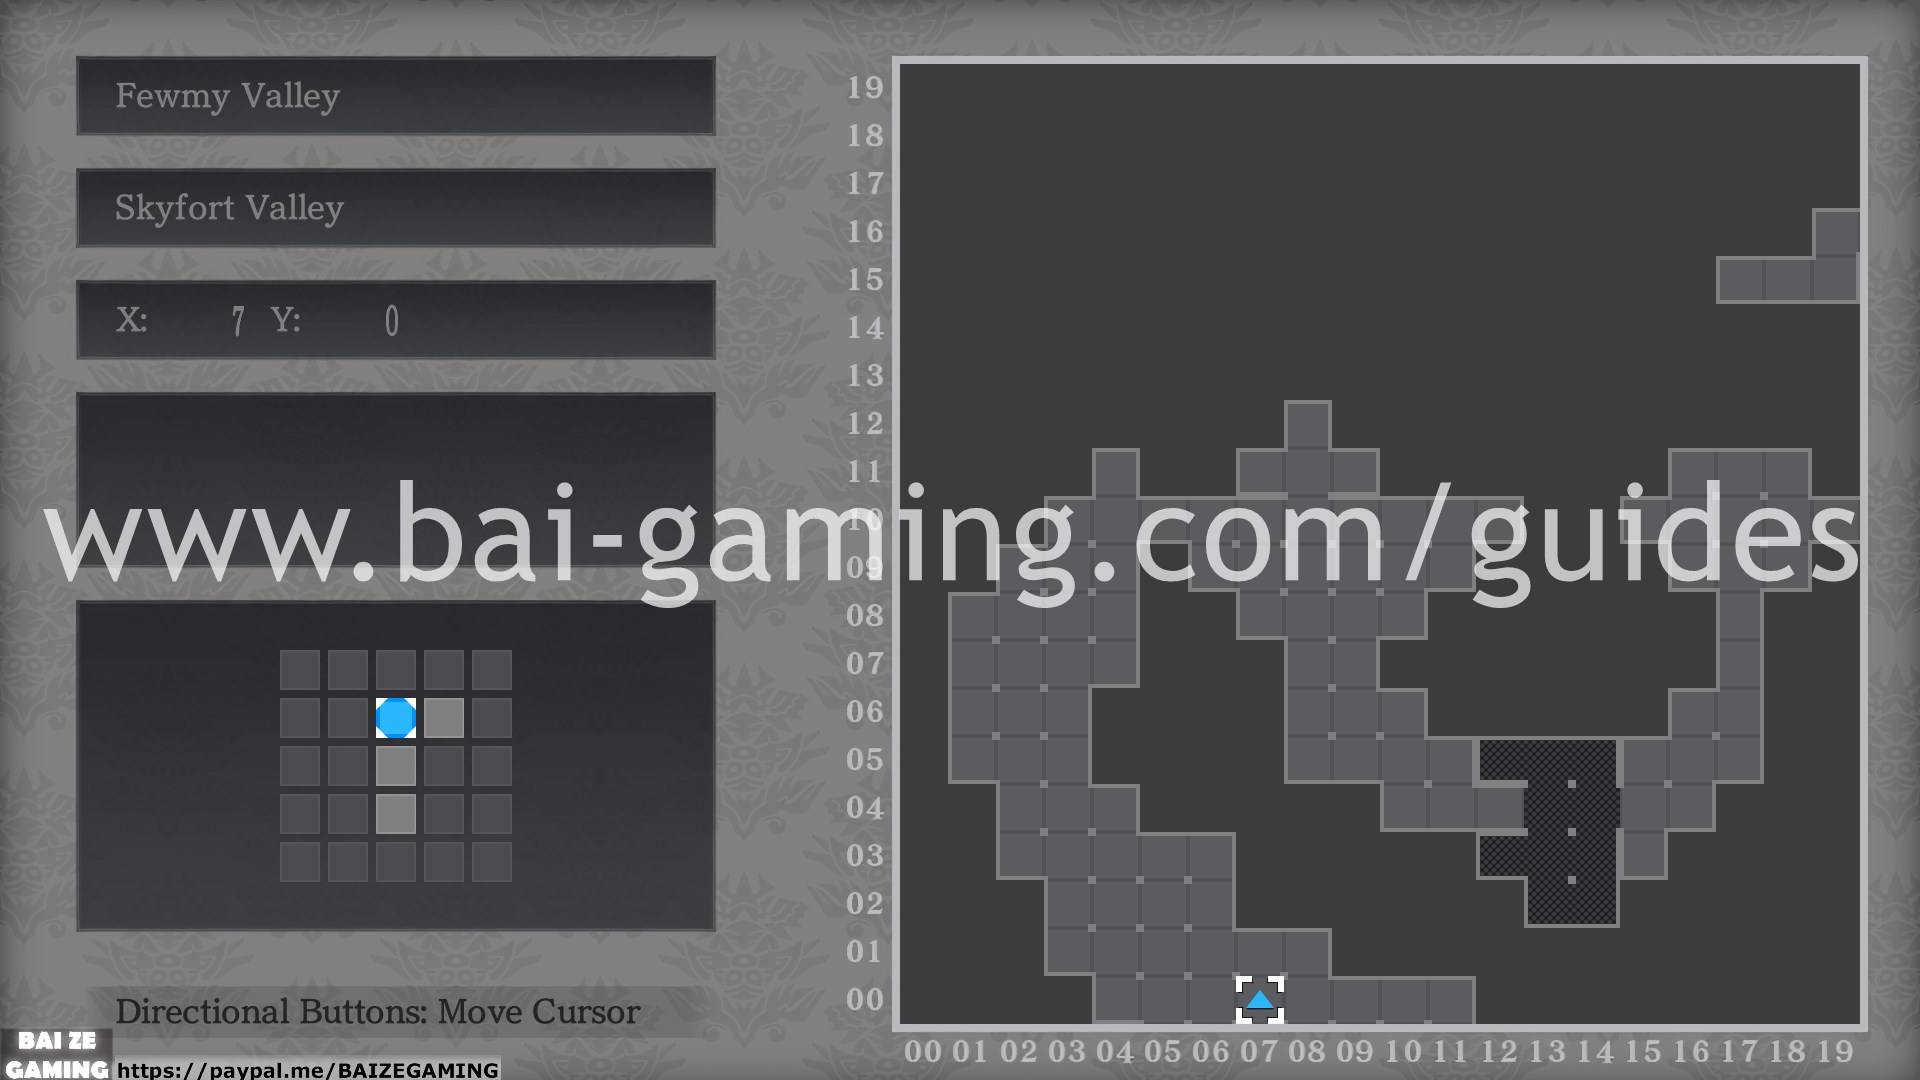
Fewmy Valley – Skyfort Valley
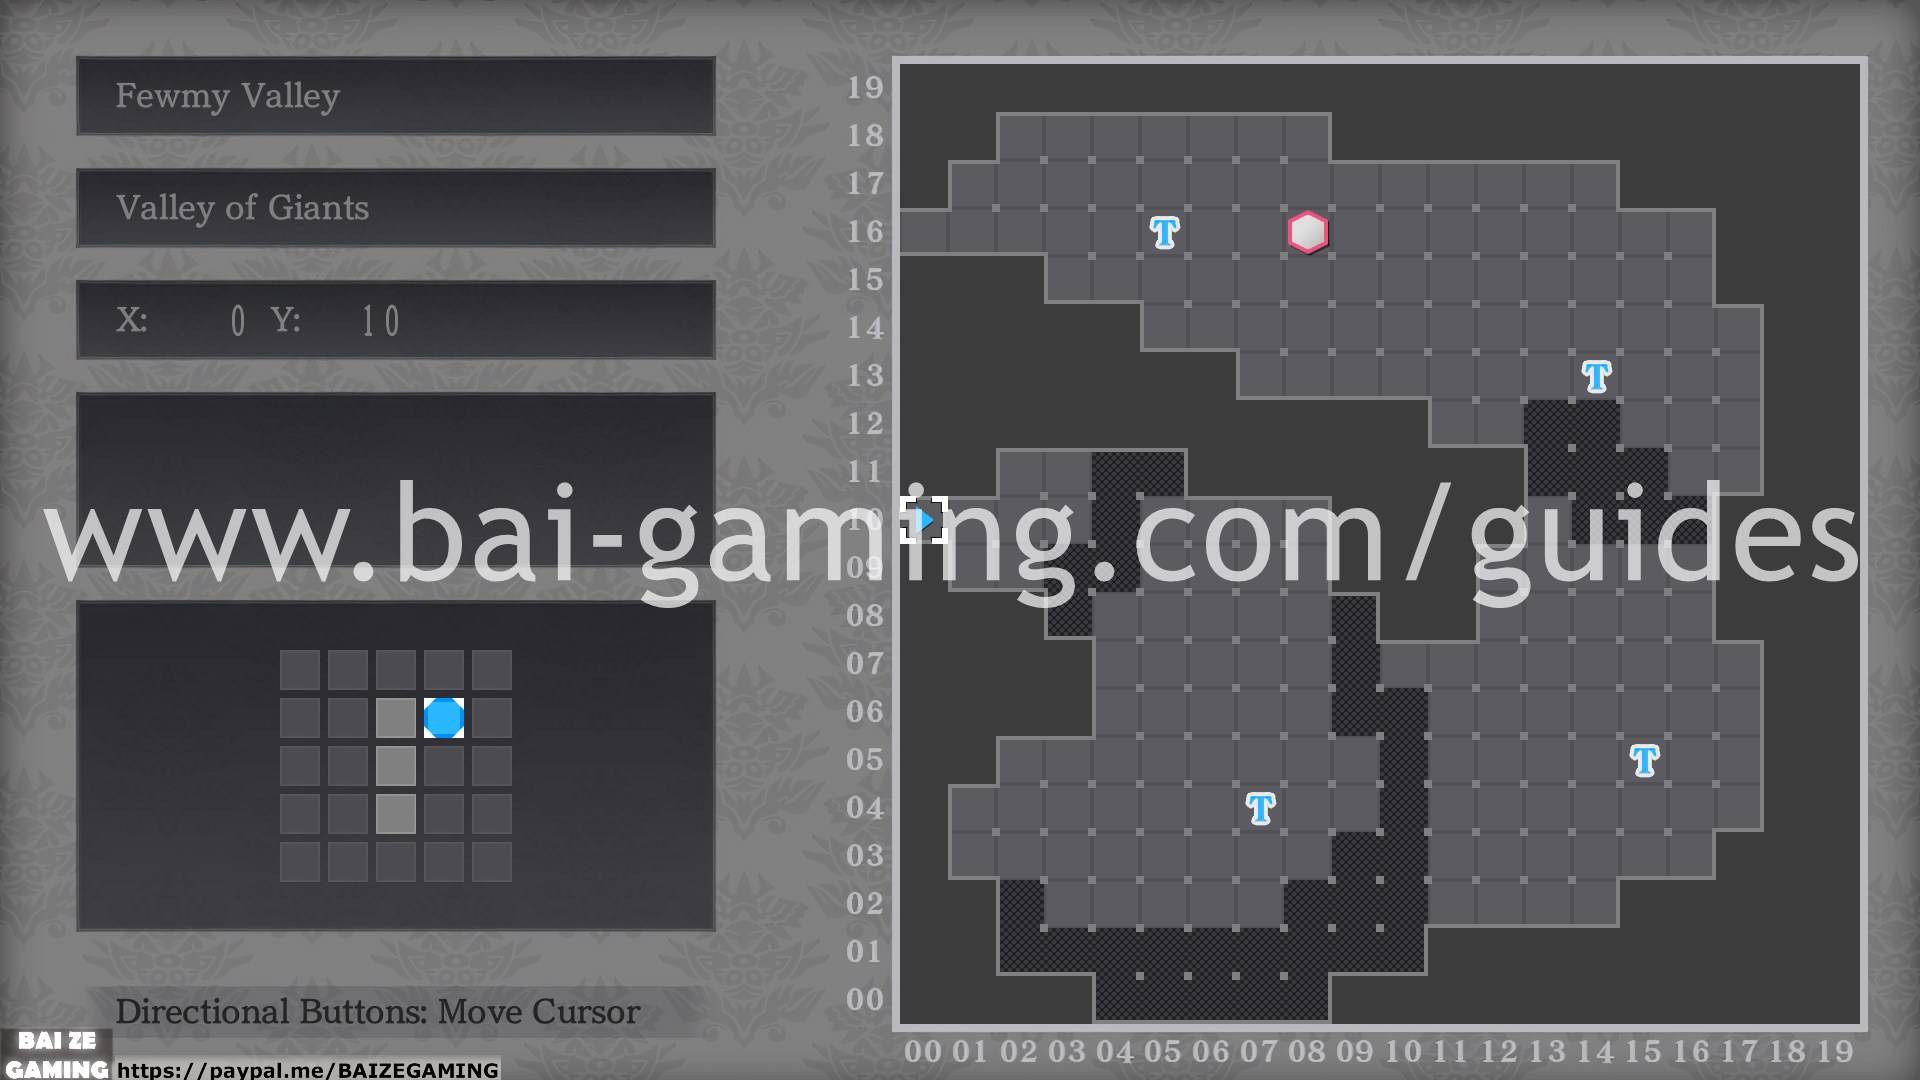
Fewmy Valley – Valley of Giants
Fewmy Valley – Labyrinth of Mirrors – Ancient Valley
Morlock
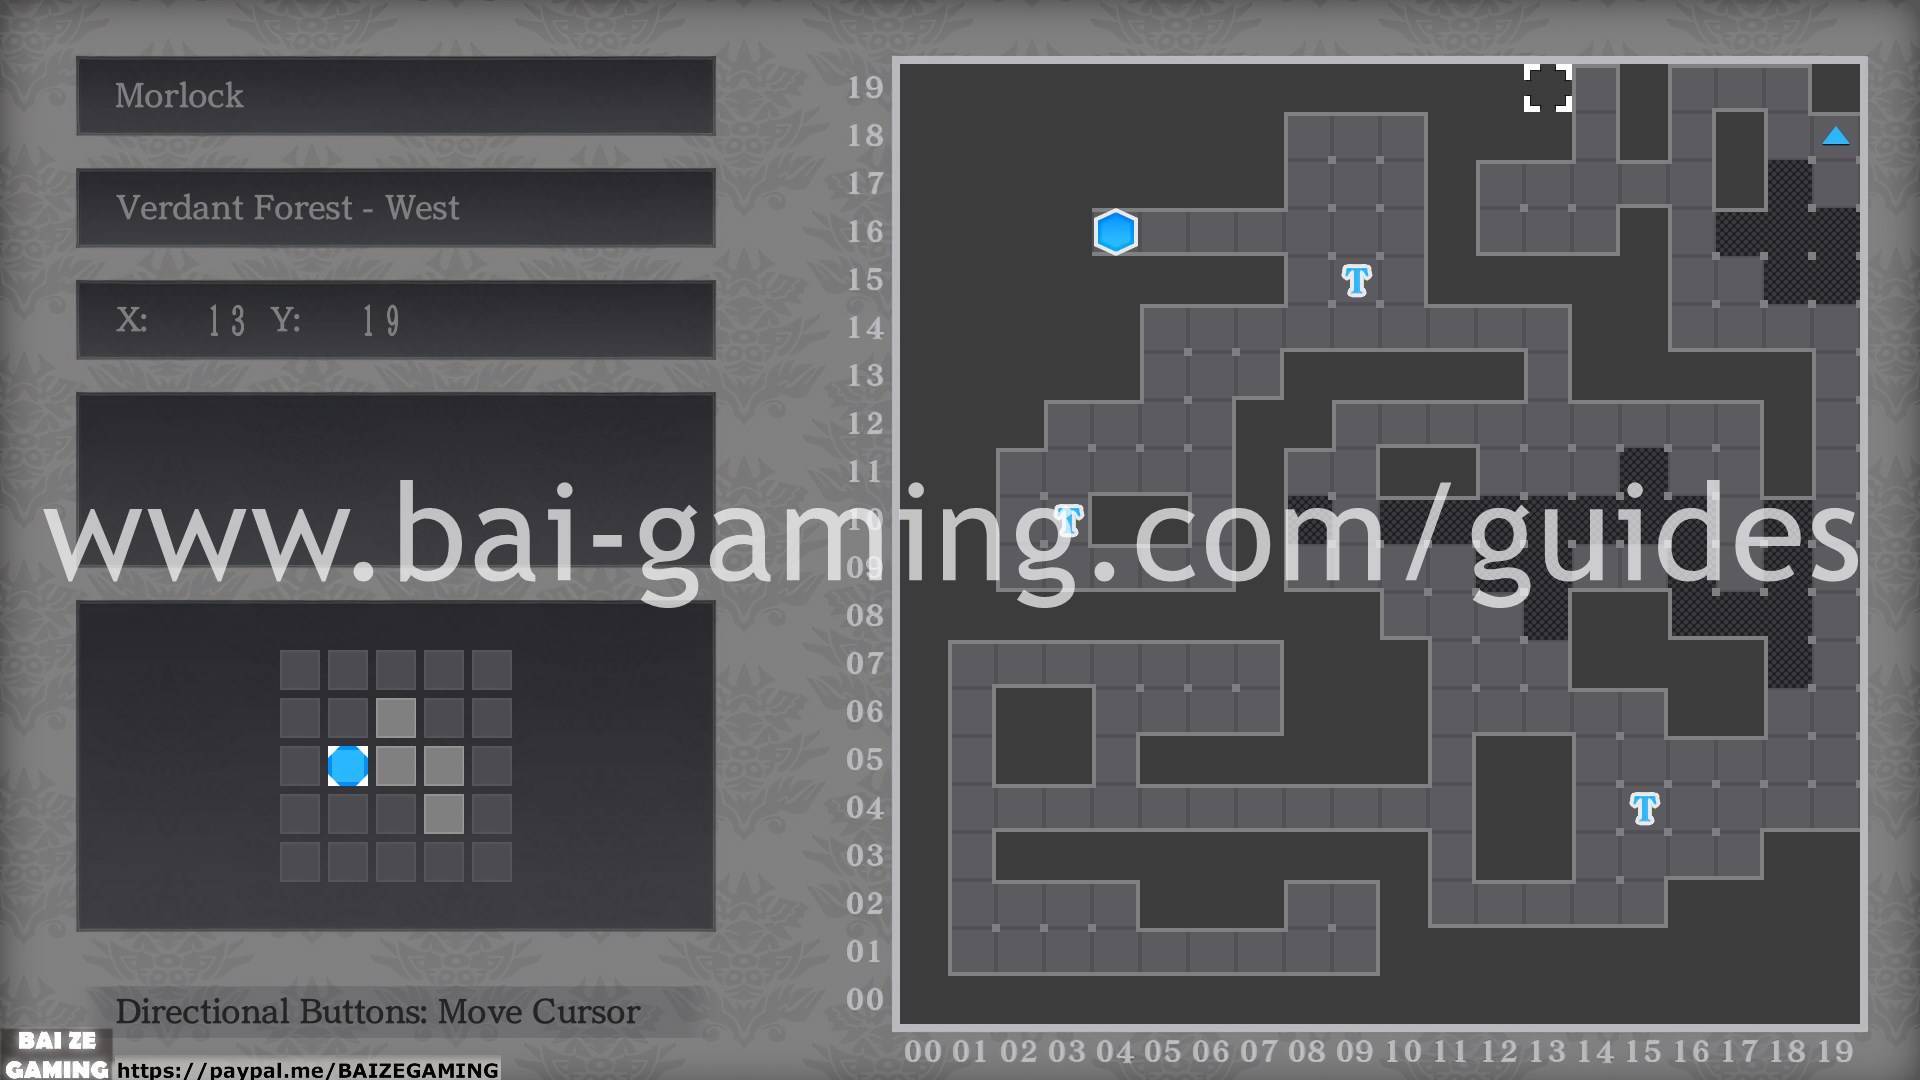
Morlock – Verdant Forest – West
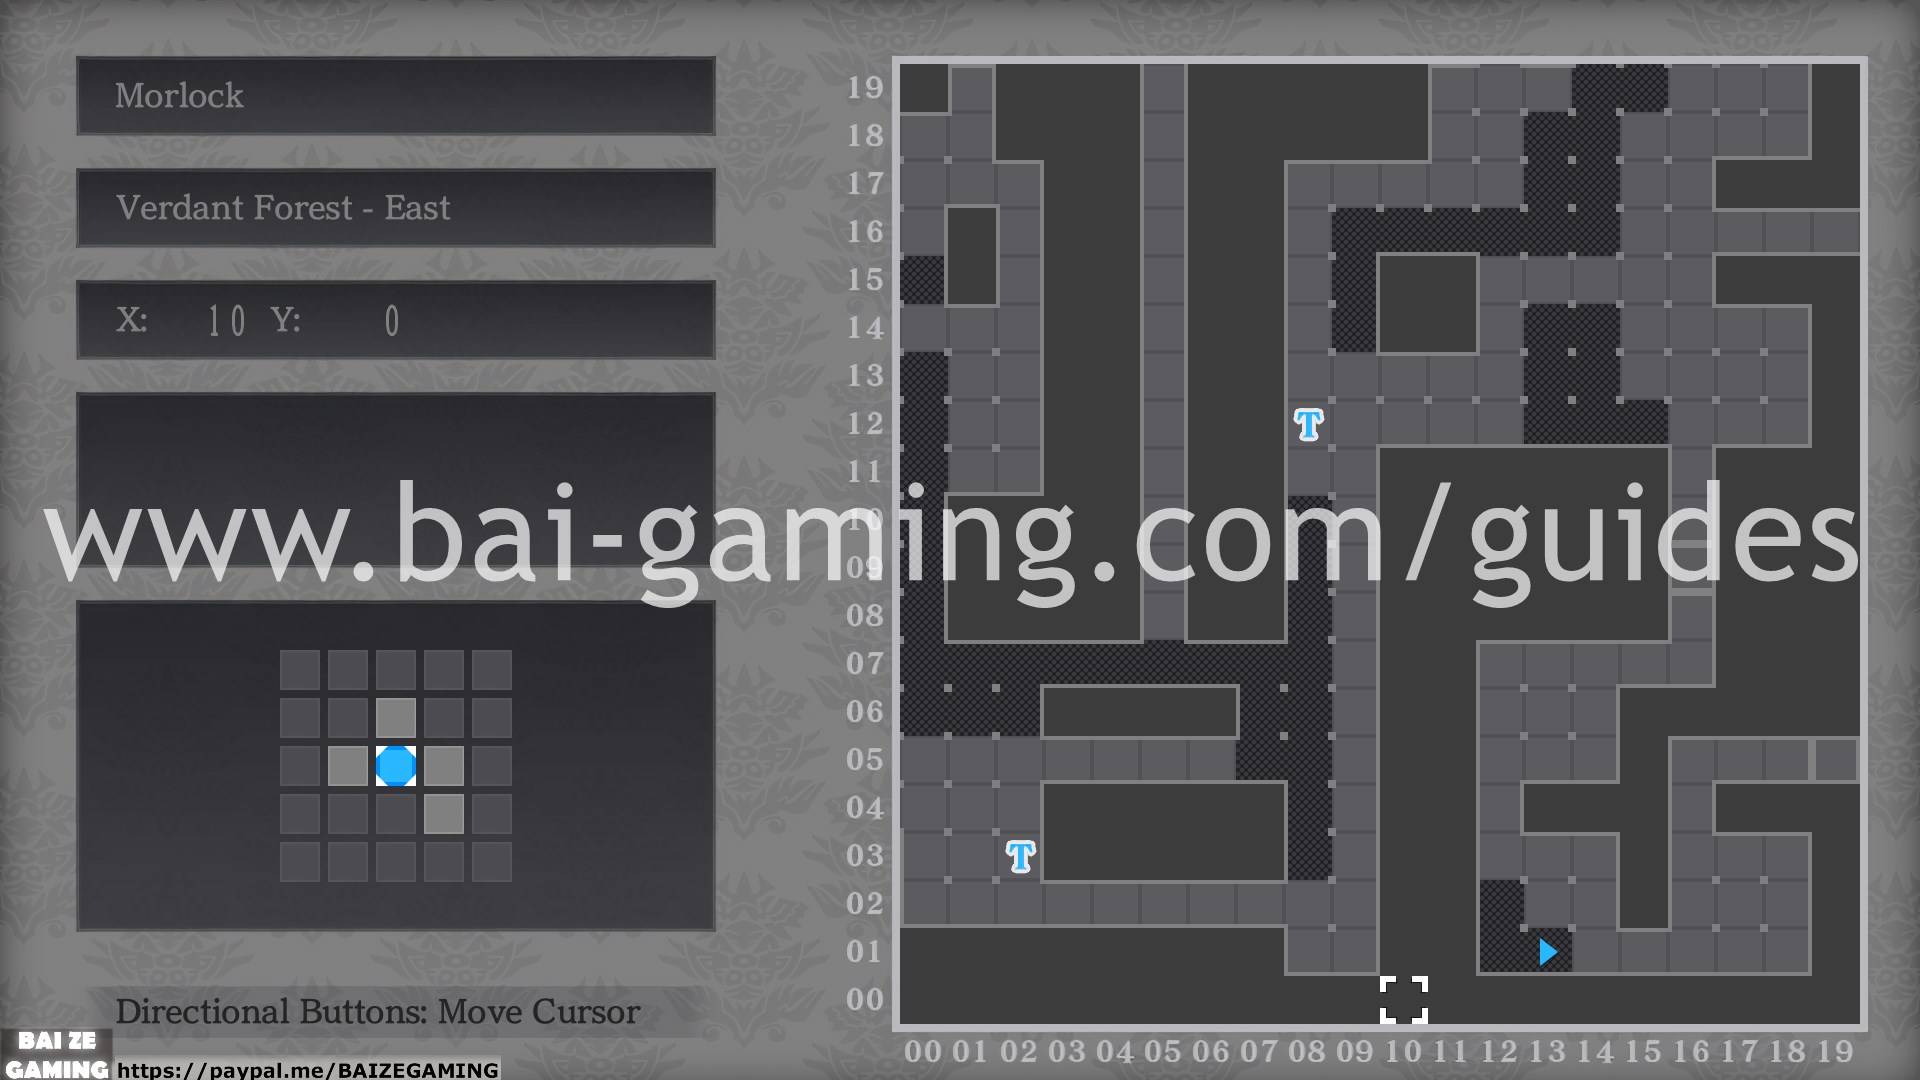
Morlock – Verdant Forest – East
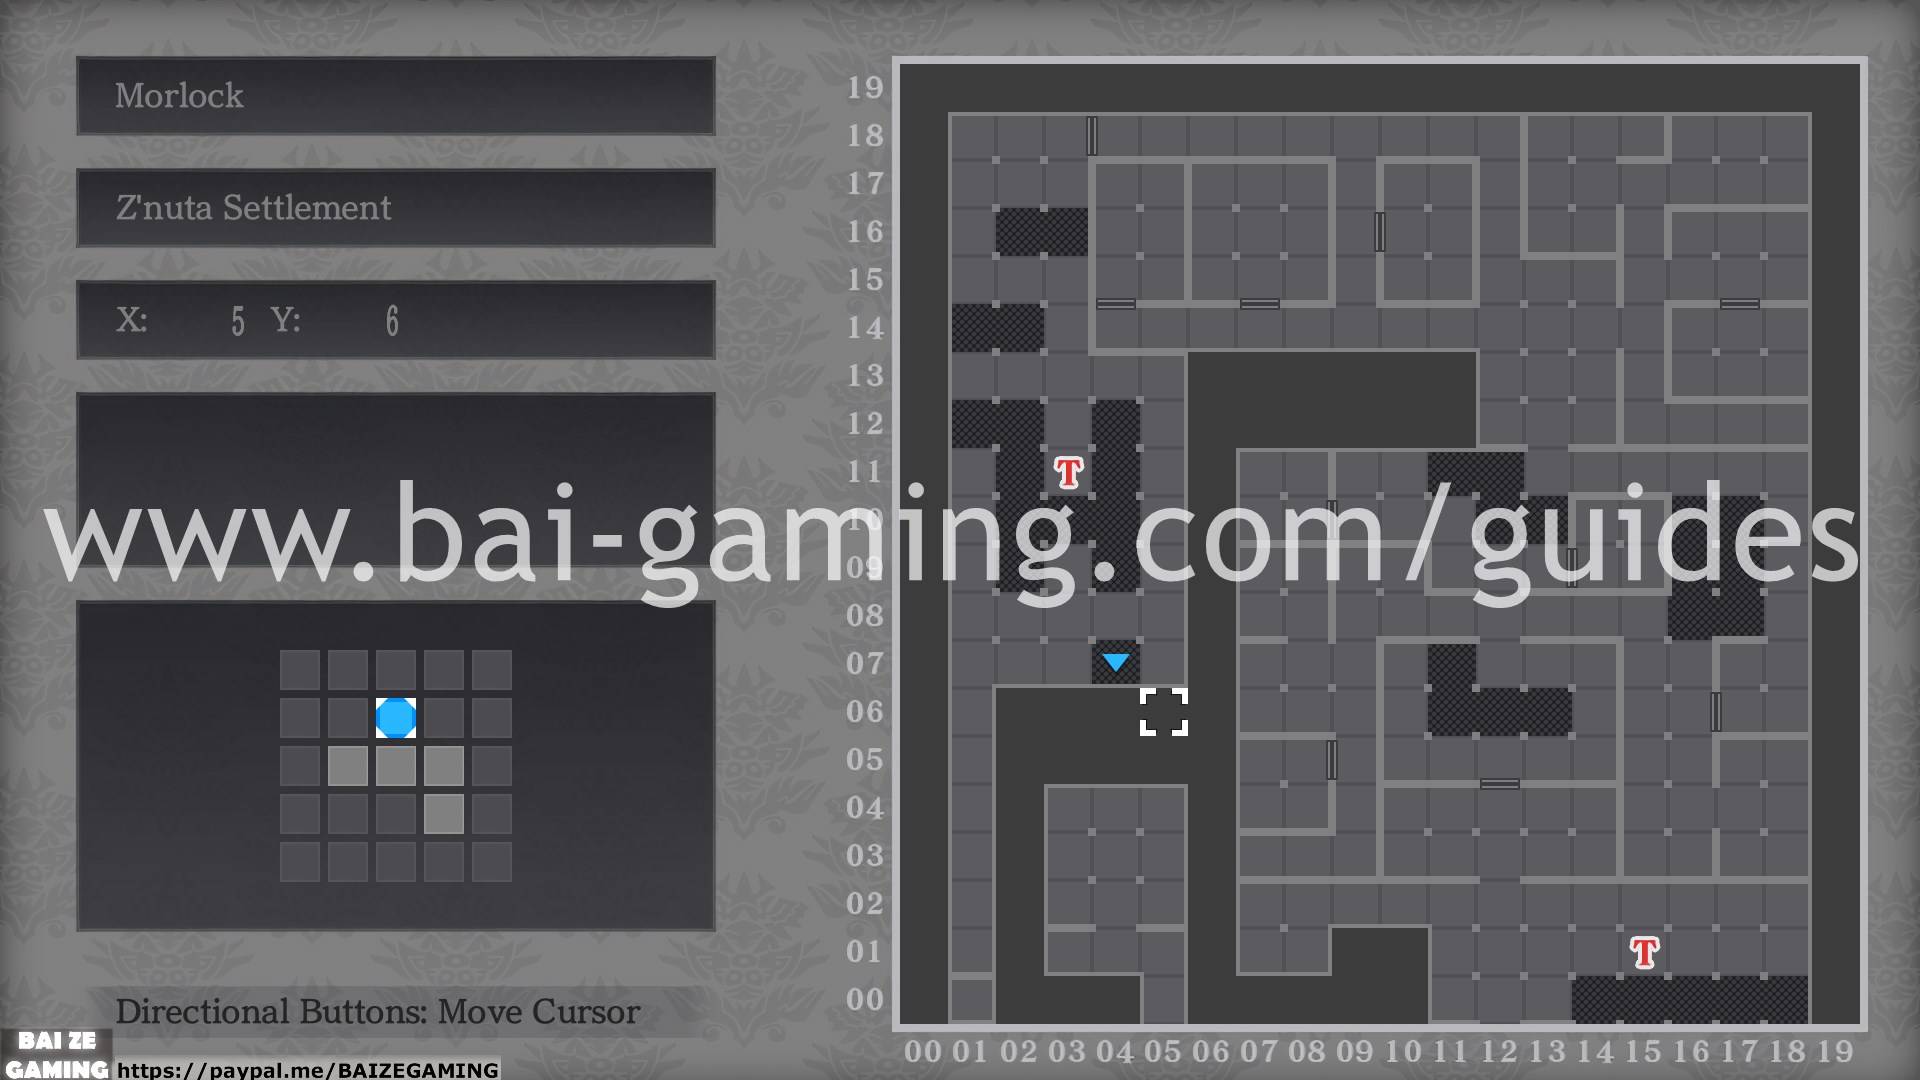
Morlock – Z’nuta Settlement
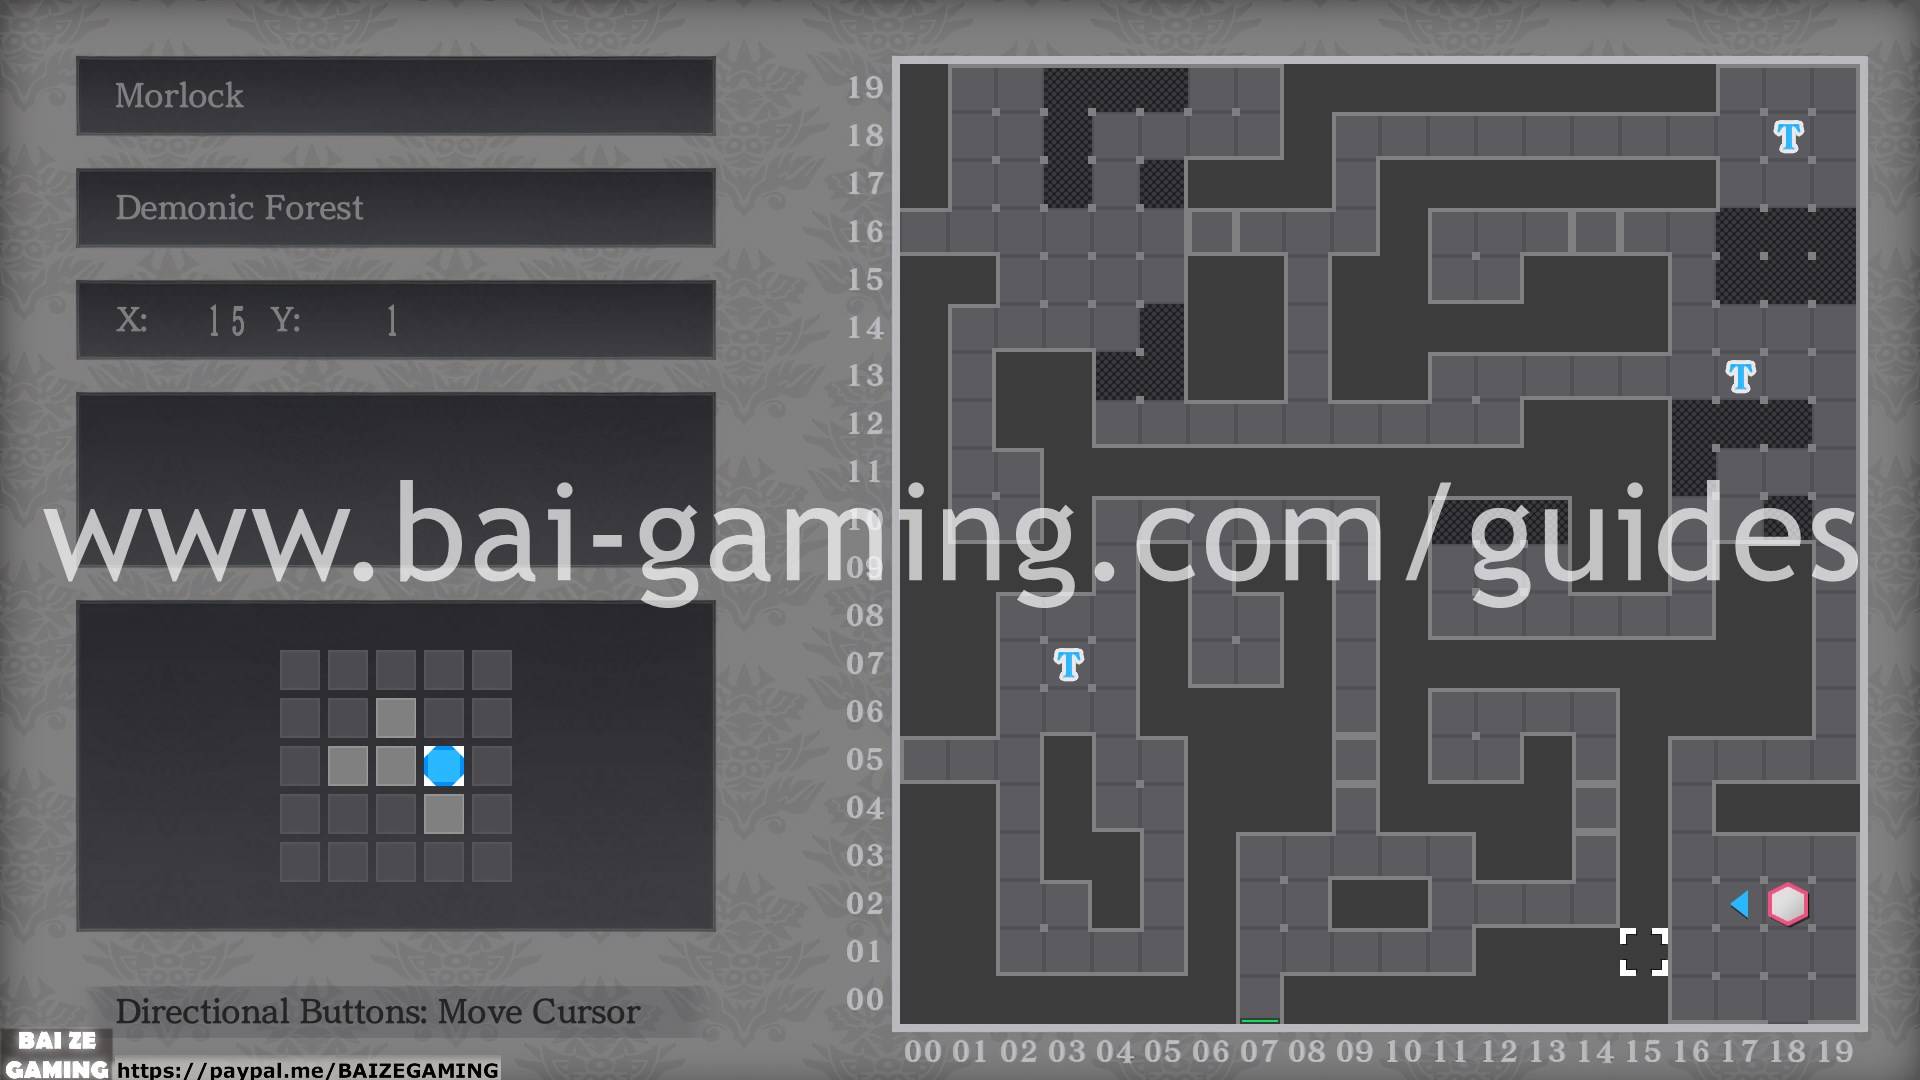
Morlock – Demonic Forest
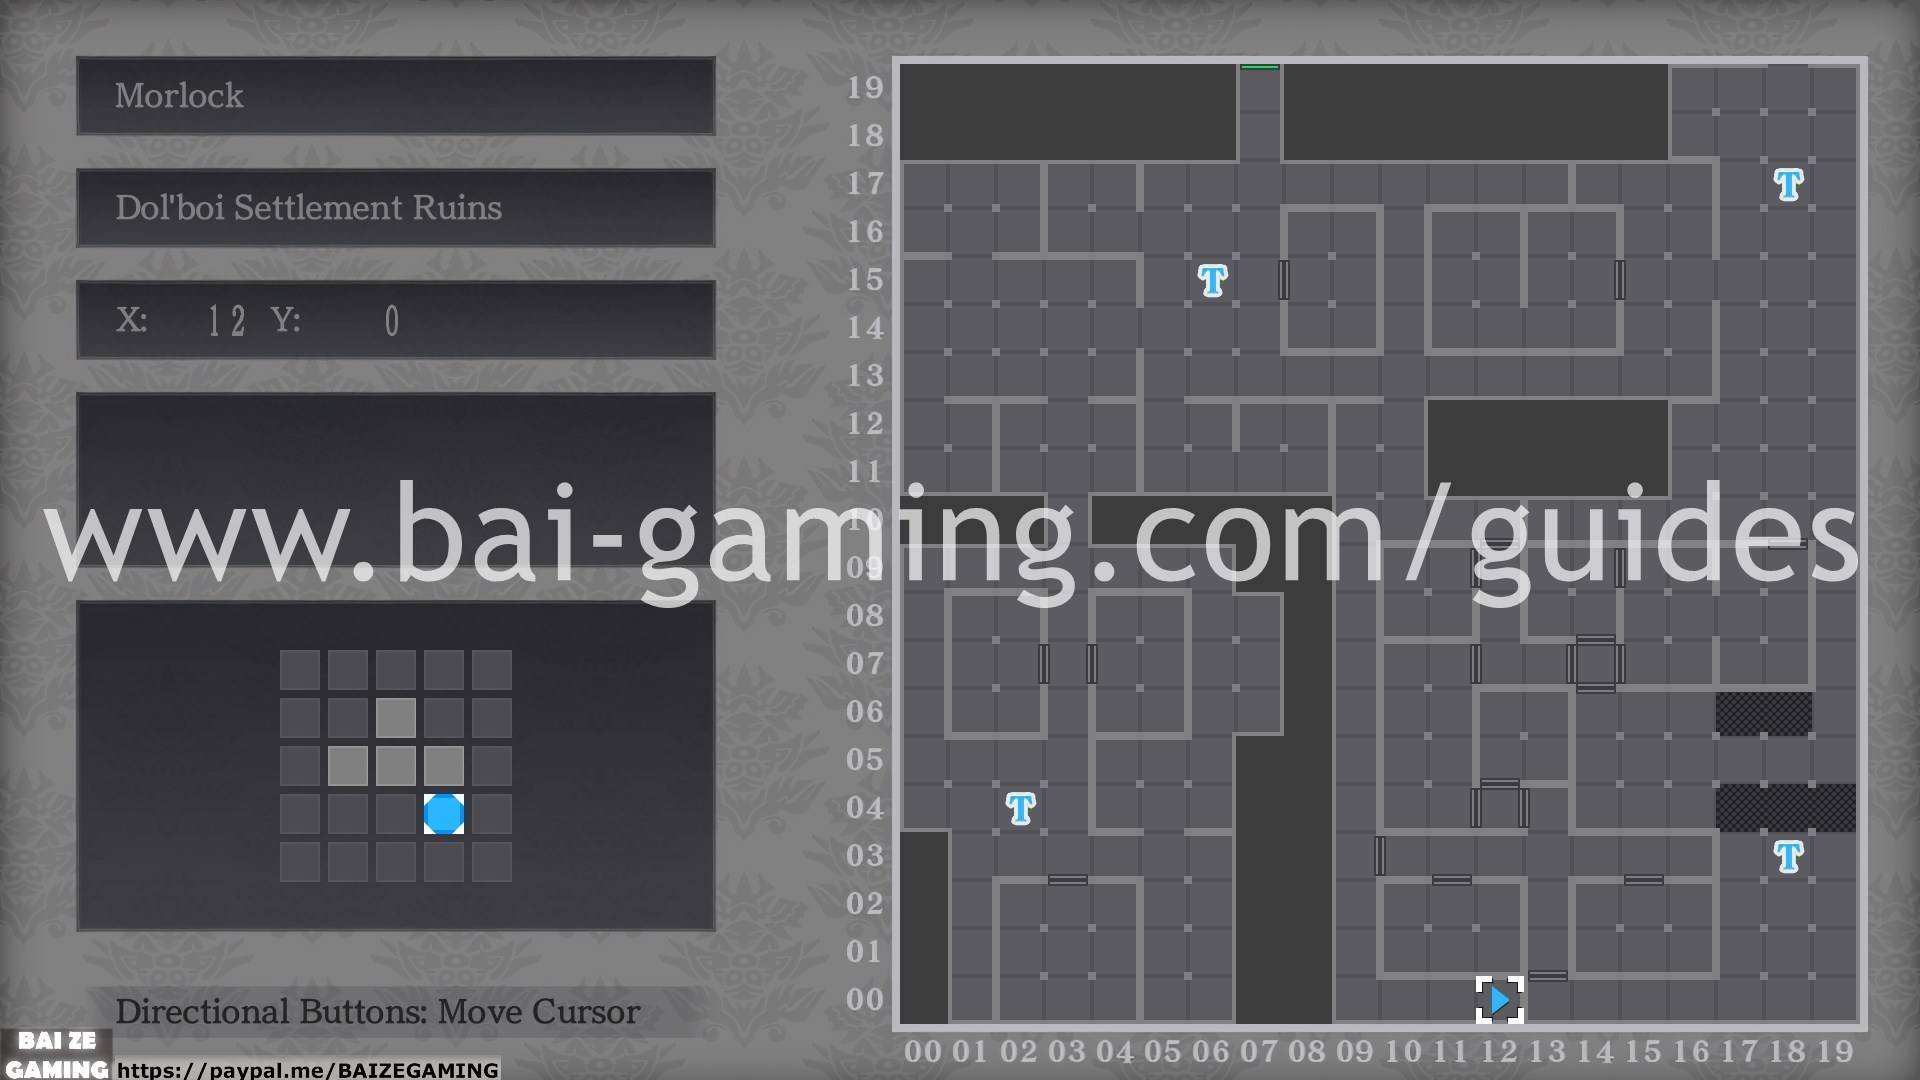
Morlock – Dol’boi Settlement Ruins
Morlock – Labyrinth of Mirrors – Great Demonic Forest
Yncirynn
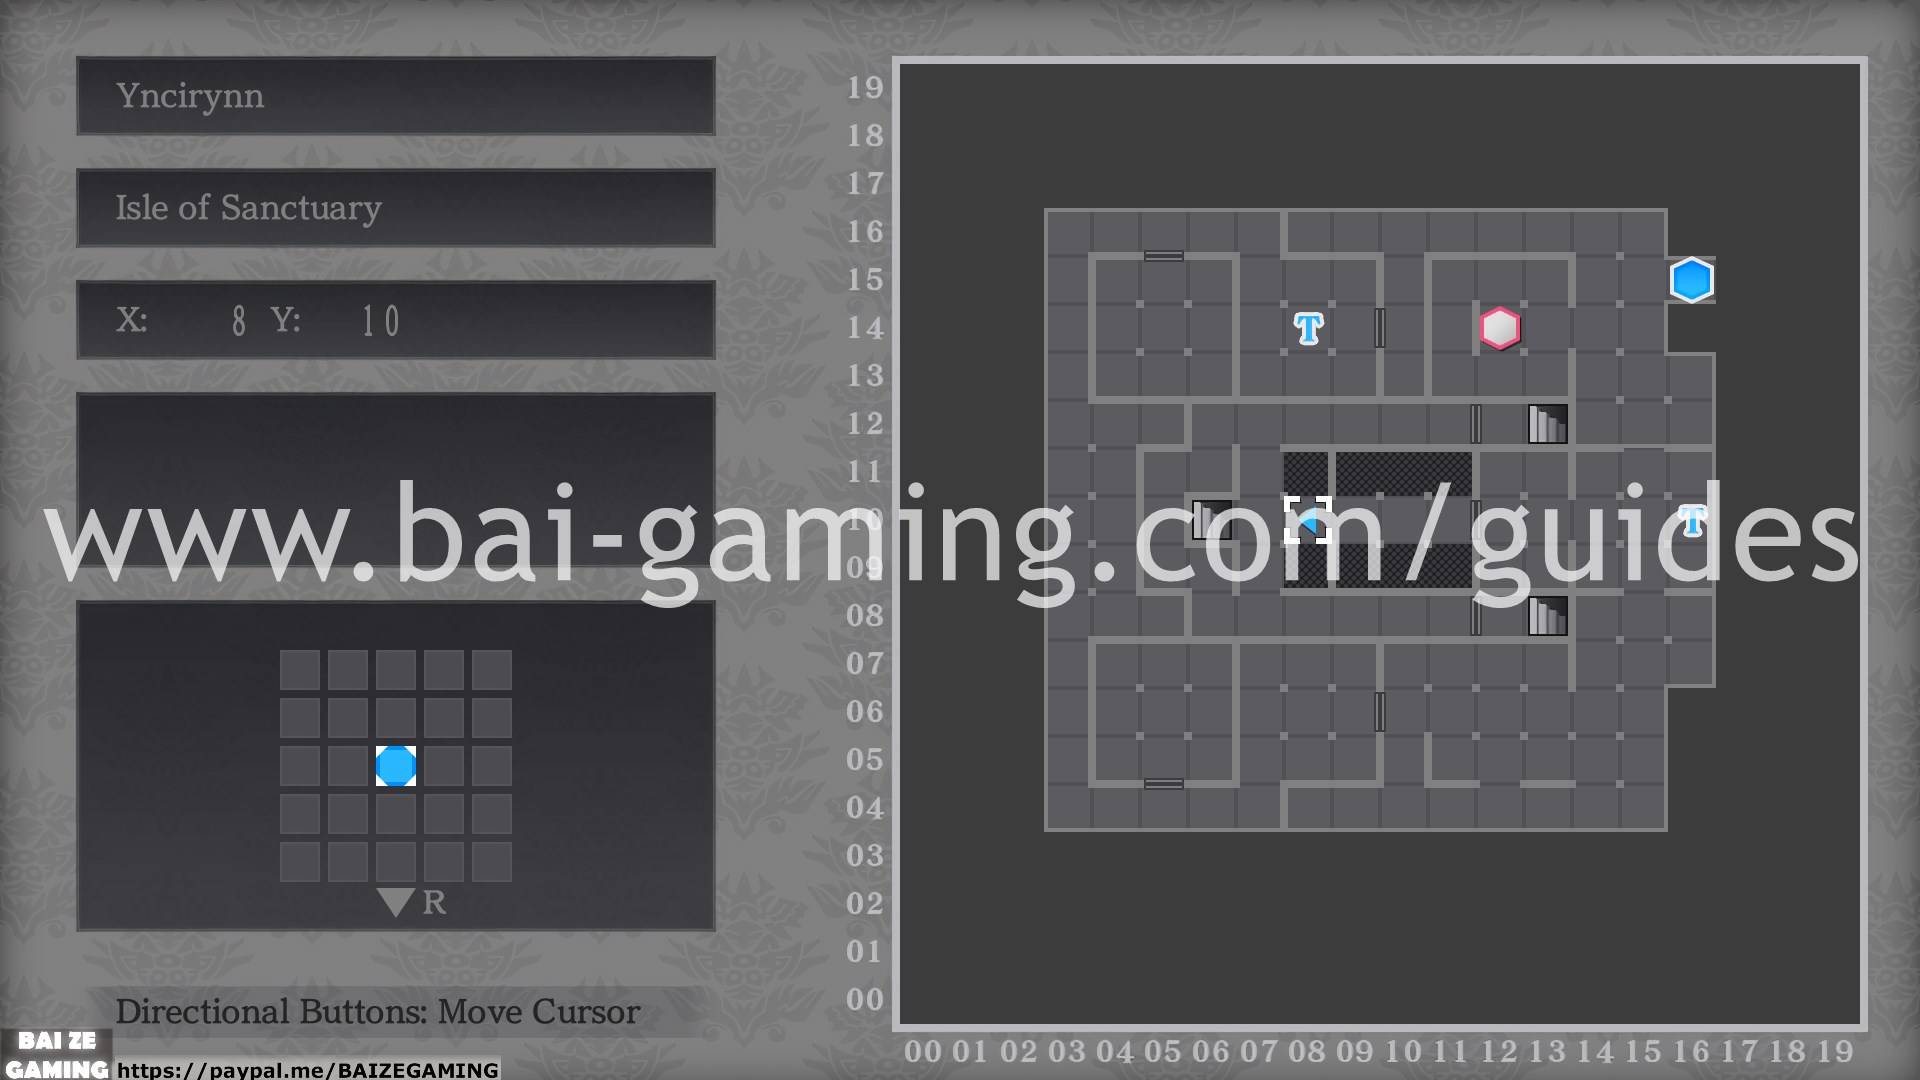
Yncirynn – Isle of Sanctuary
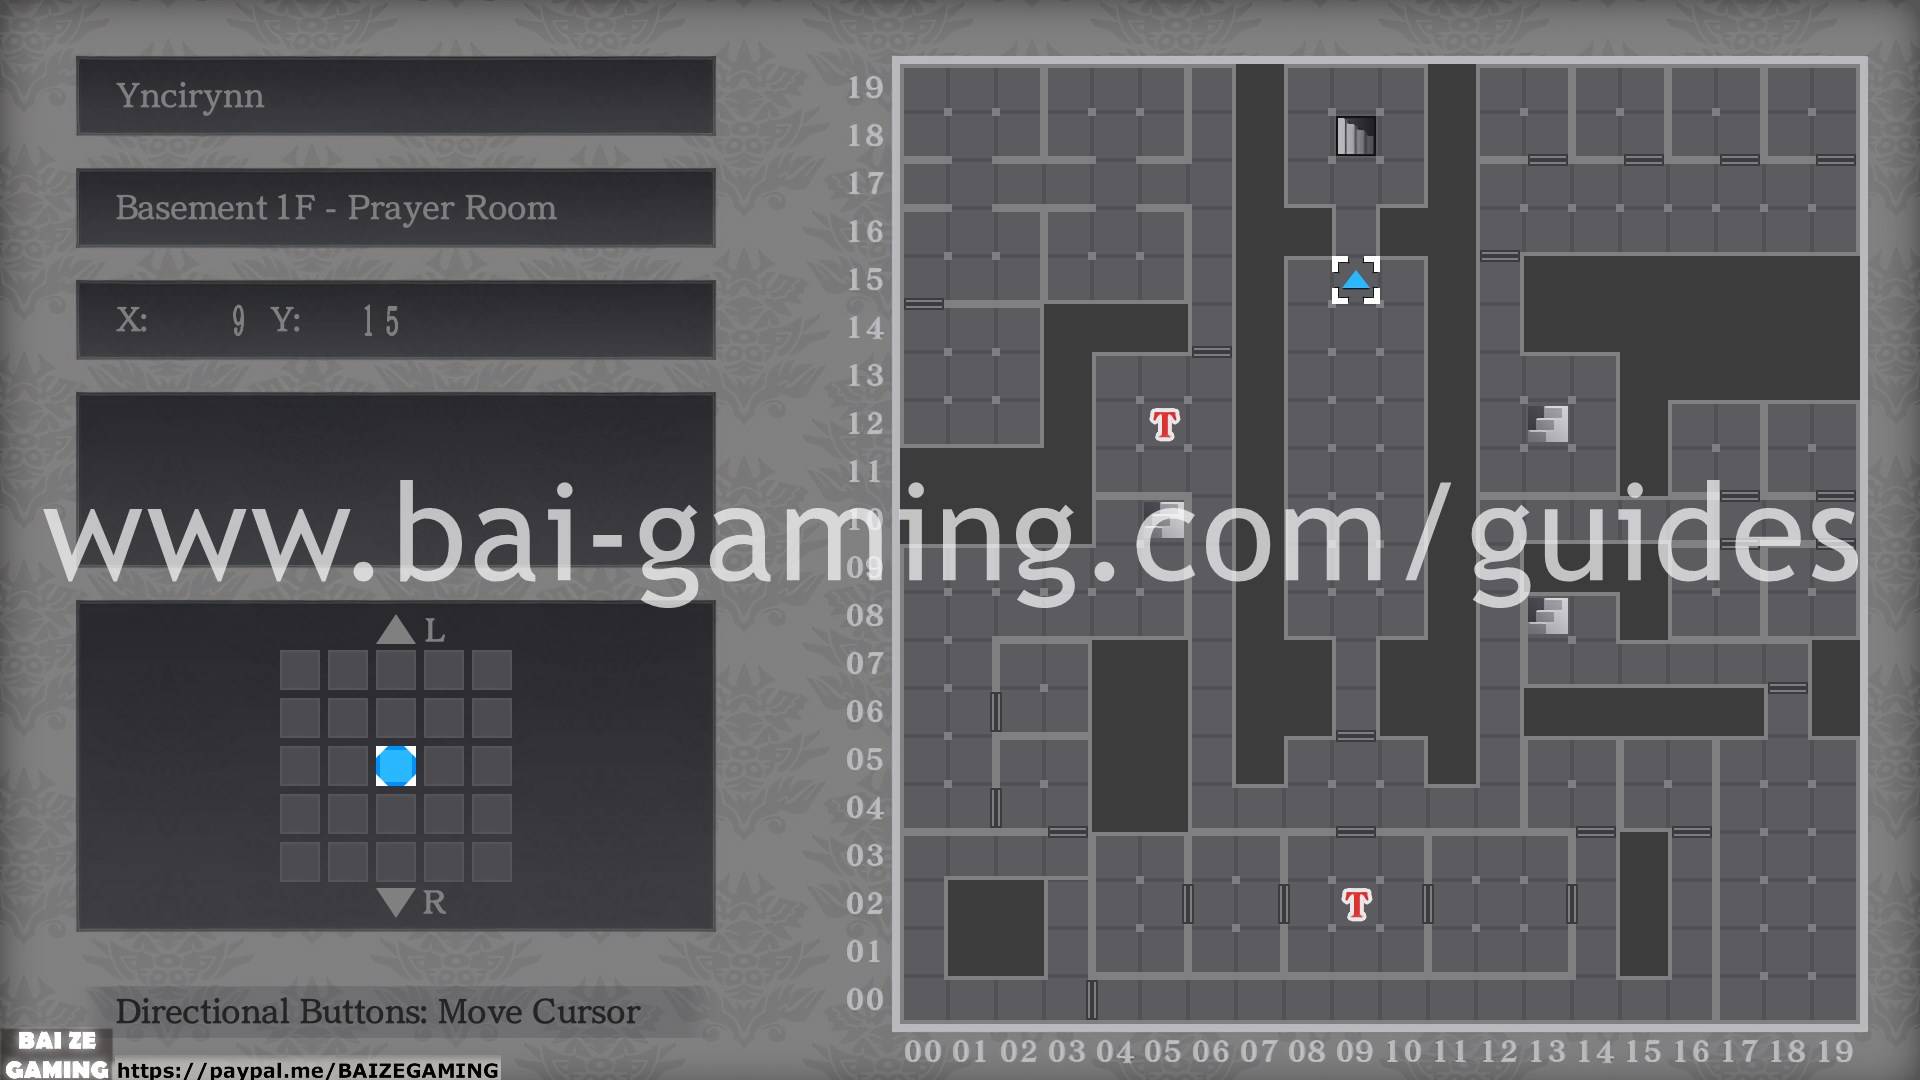
Yncirynn – Basement 1F – Prayer Room
Yncirynn – Basement 2F – Ritual Room

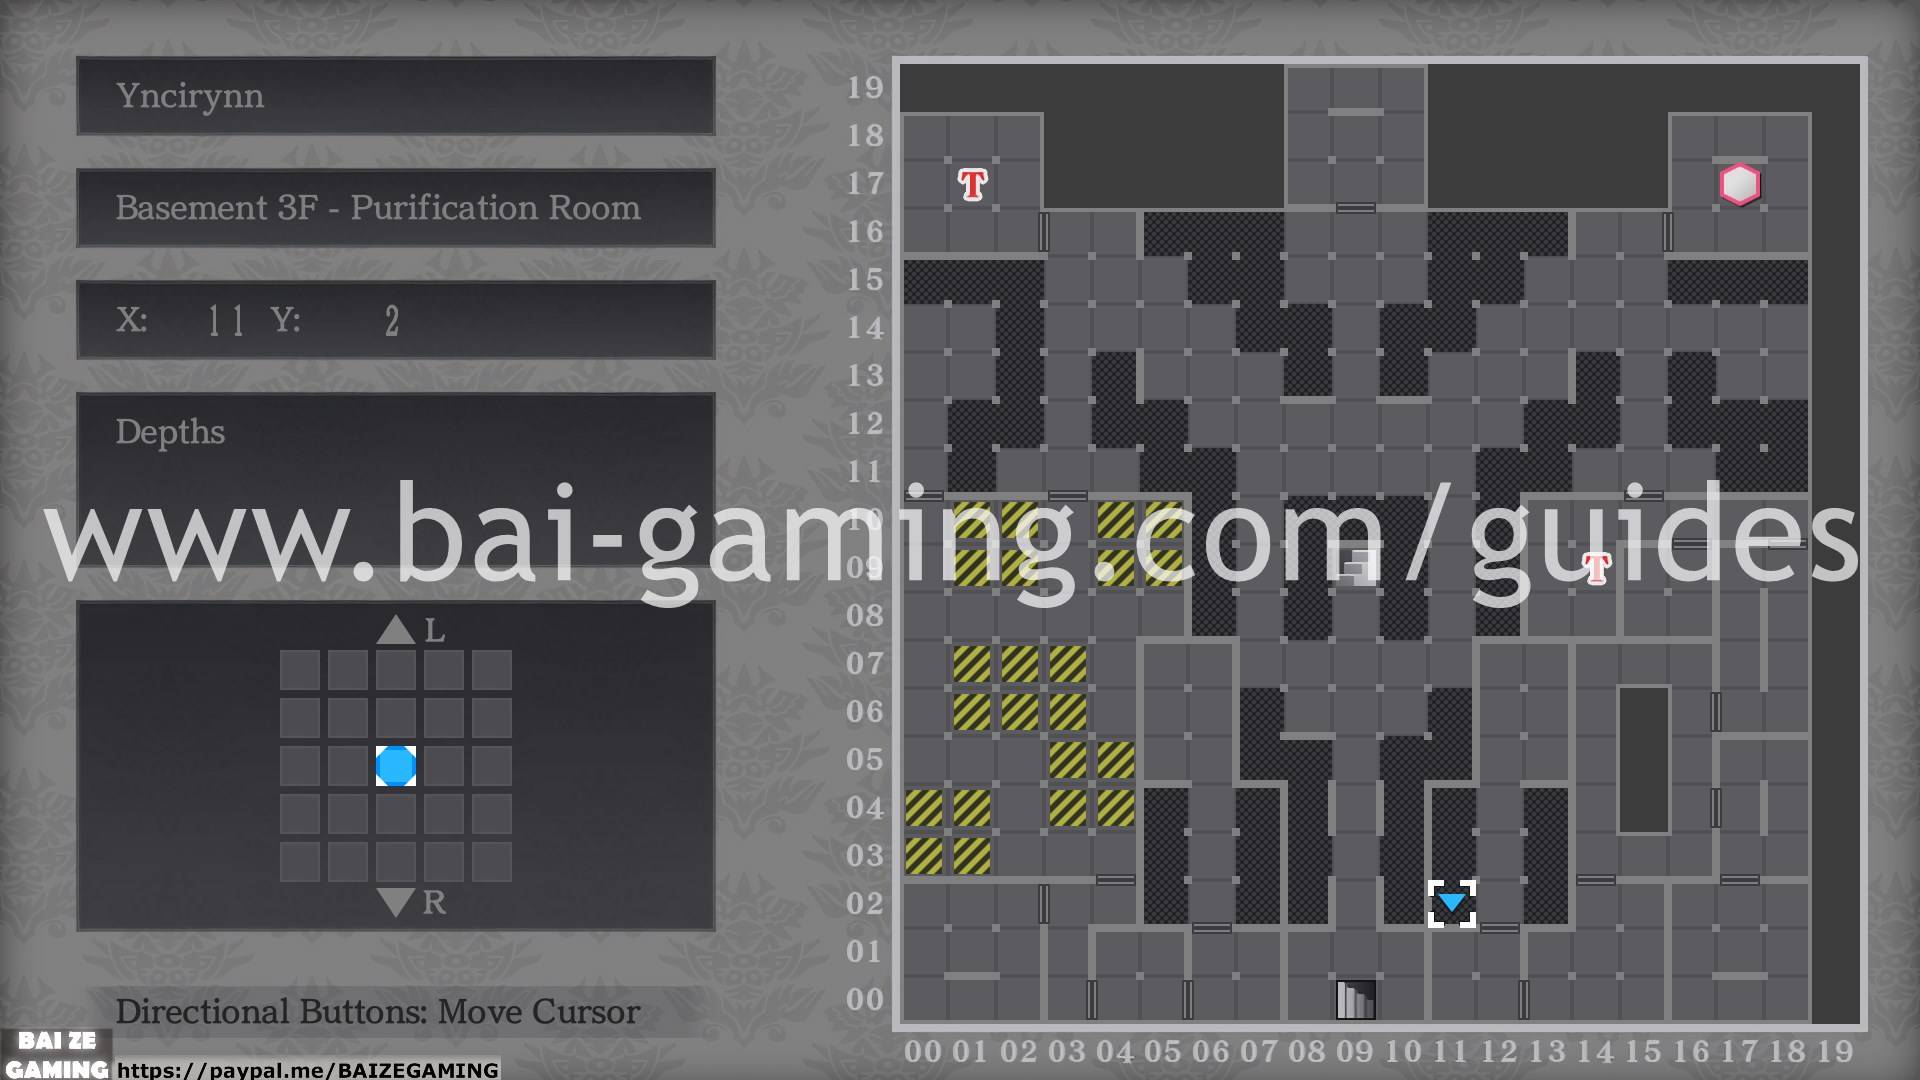
Yncirynn – Basement 3F – Purification Room
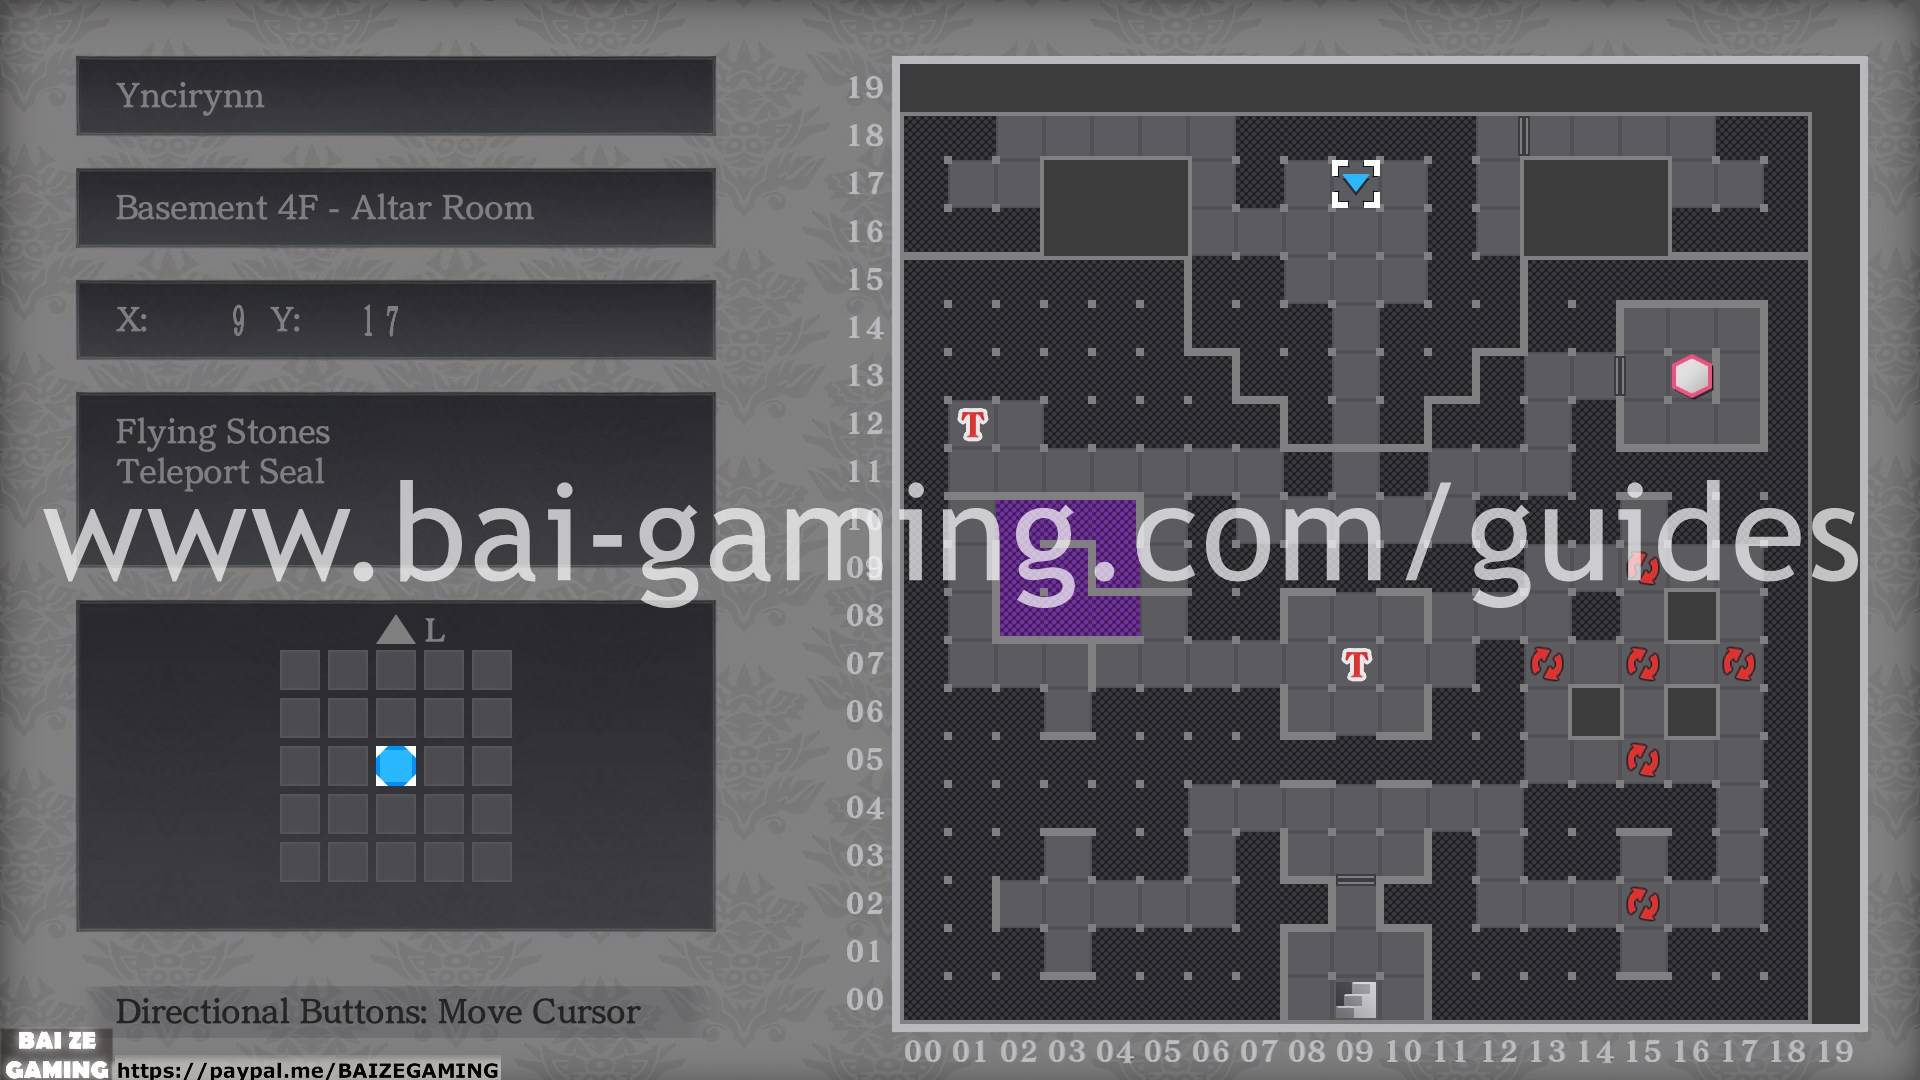
Yncirynn – Basement 4F – Altar Room
Yncirynn – Labyrinth of Mirrors – Sanctuary Hall
Esselgard
Esselgard – Fortress 2F – Southwest

Esselgard – Fortress 2F – Southeast
Esselgard – Fortress 2F – Northeast
Esselgard – Fortress 2F – Northwest
Esselgard – Fortress 1F – Southwest
Esselgard – Fortress 1F – Southeast
Esselgard – Fortress 1F – Northeast

Esselgard – Fortress 1F – Northwest
Esselgard – Fortress Basement – Southwest
Esselgard – Fortress Basement – Southeast
Esselgard – Fortress Basement – Northeast
Esselgard – Fortress Basement – Northwest
Esselgard – Labyrinth of Mirrors – Dueling Grounds
Great Tunnels of Balhael
Great Tunnels of Balhael – H Era Layer – 1st Mining Area
Great Tunnels of Balhael – H Era Layer – 2nd Mining Area
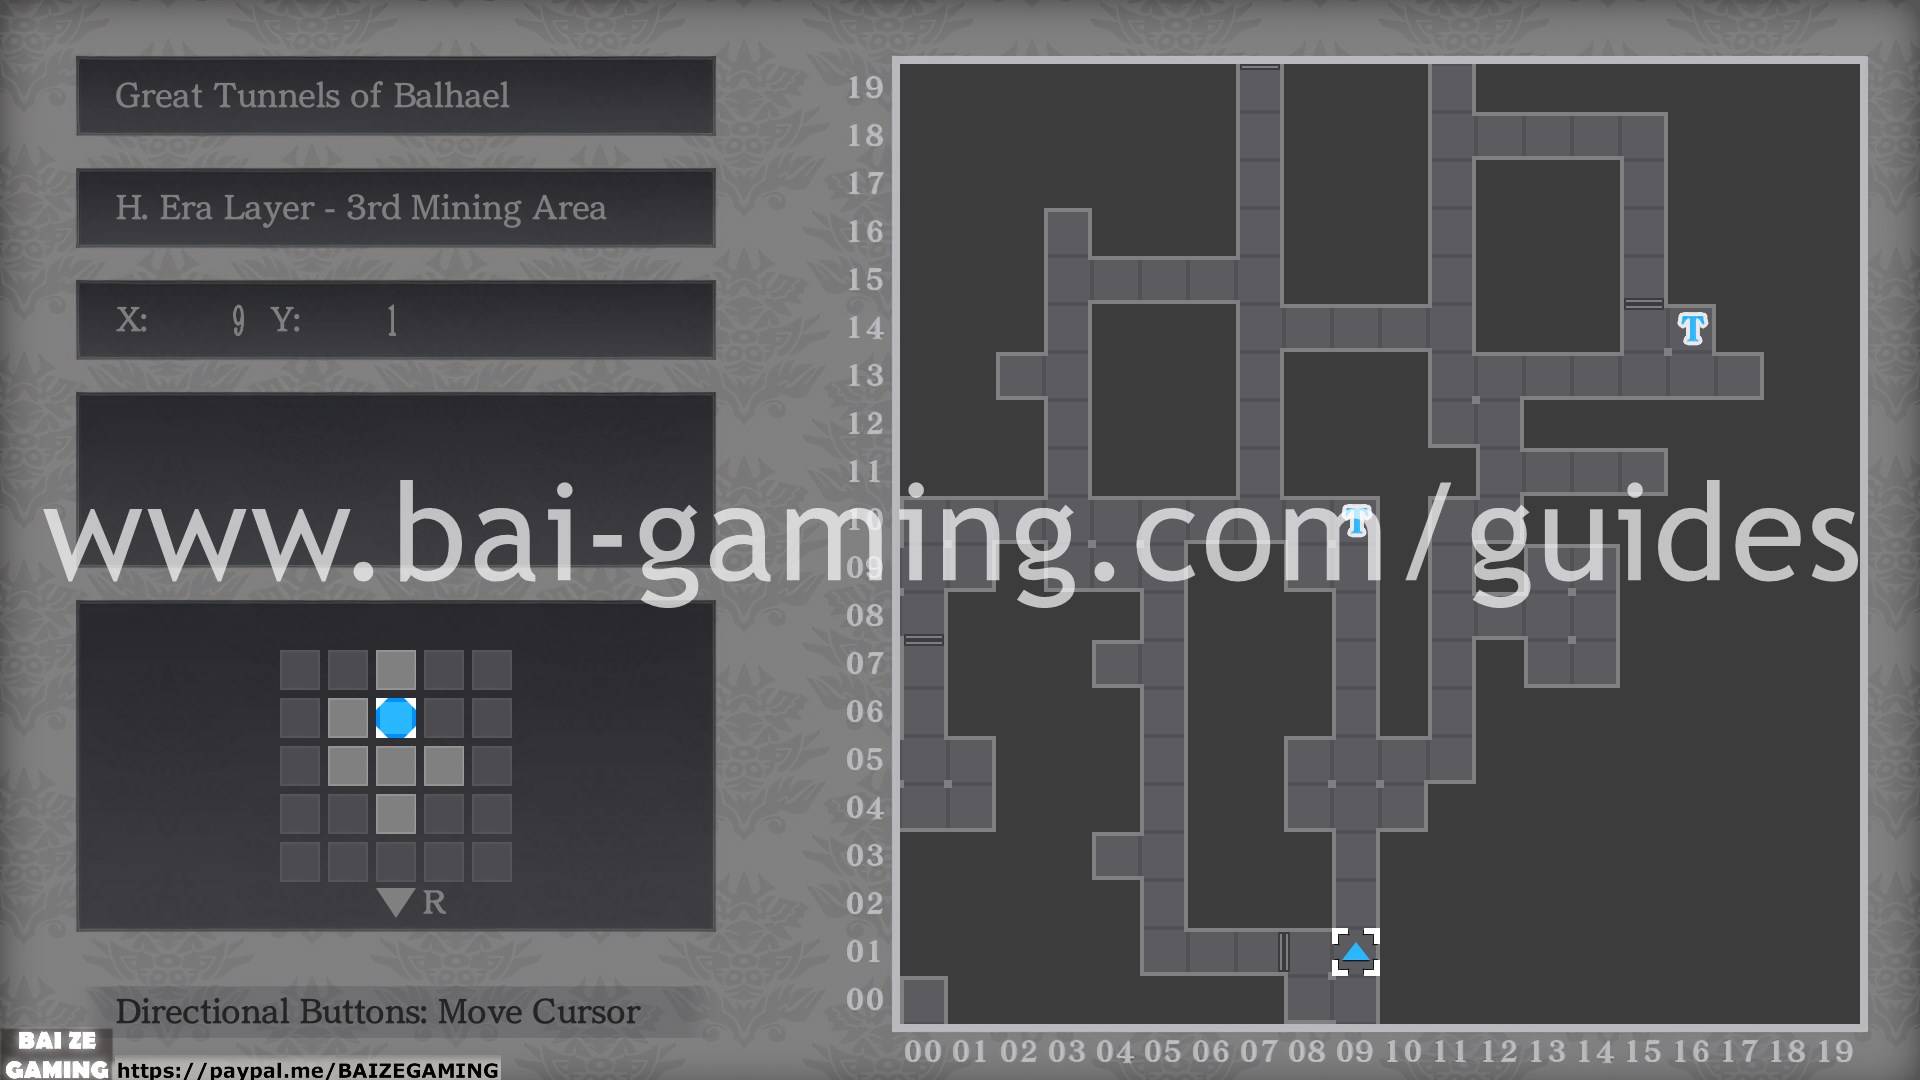
Great Tunnels of Balhael – H Era Layer – 3rd Mining Area
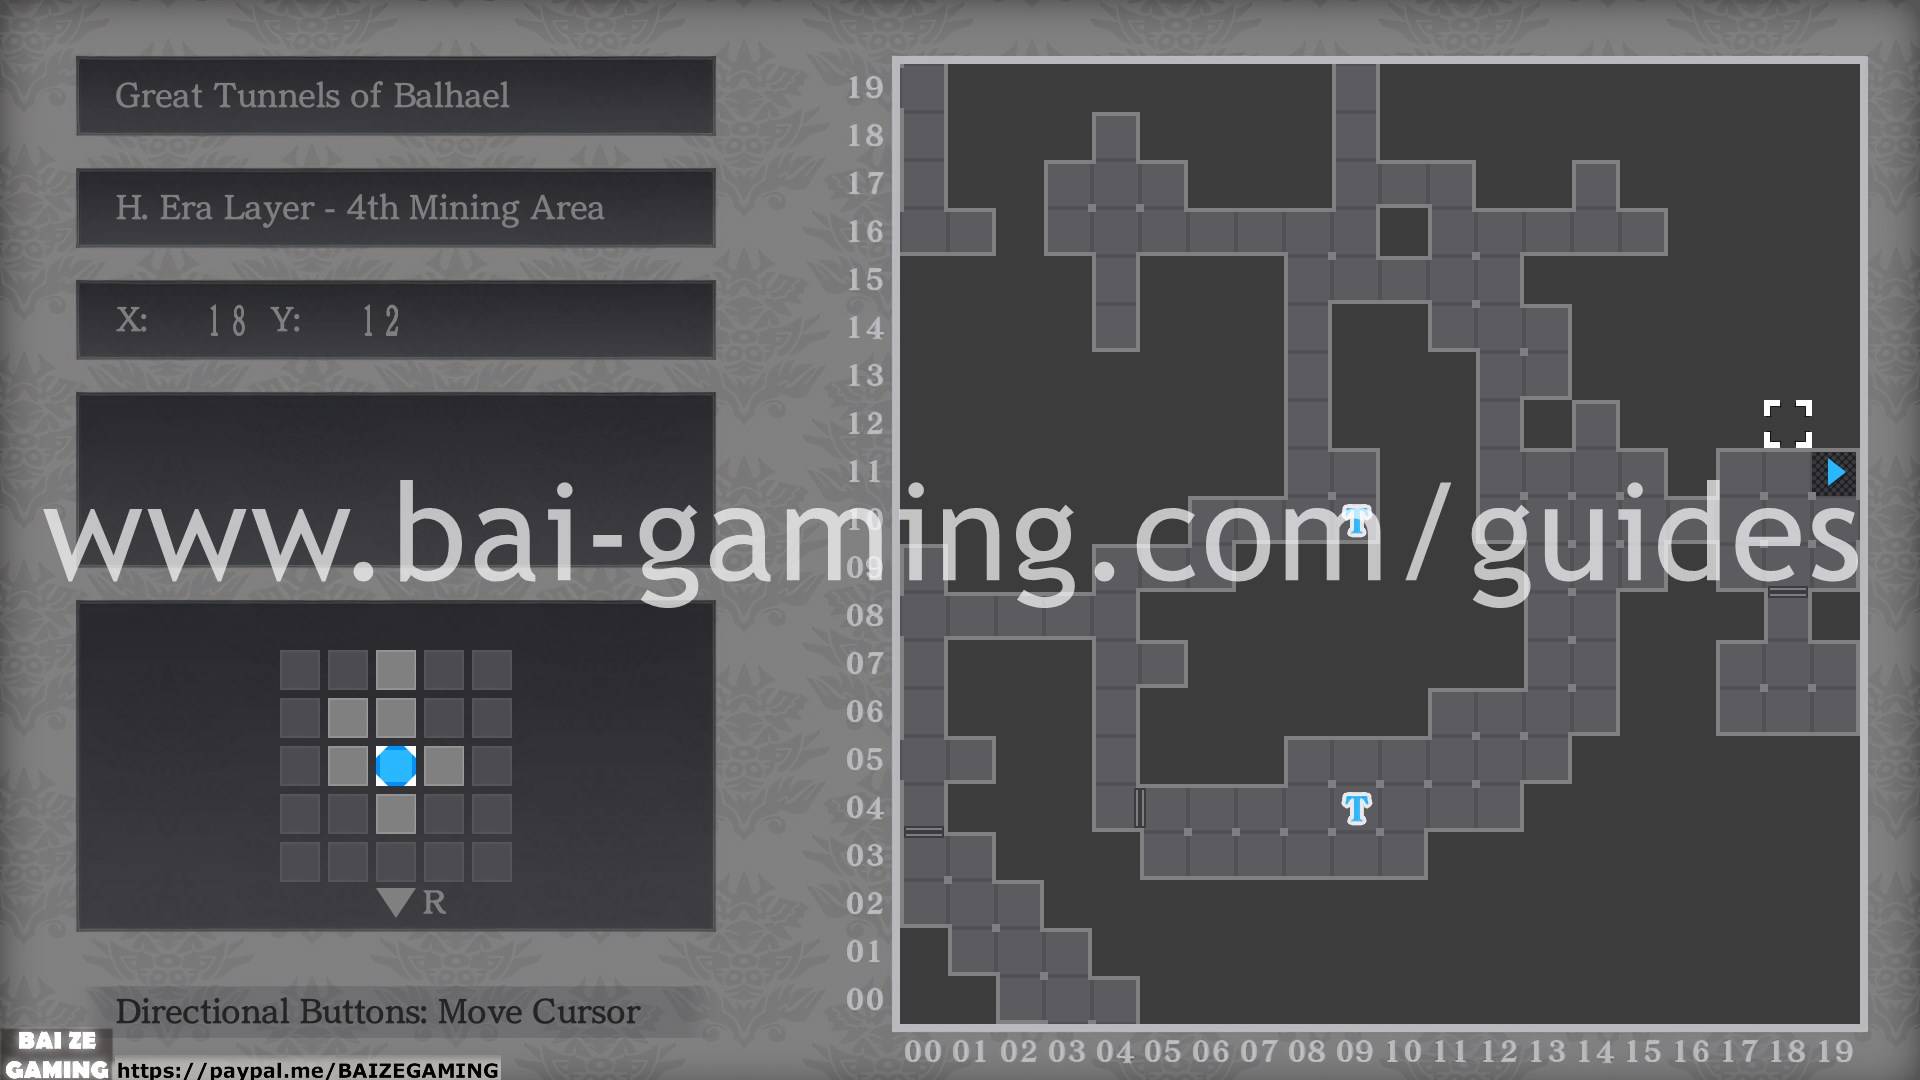
Great Tunnels of Balhael – H Era Layer – 4th Mining Area
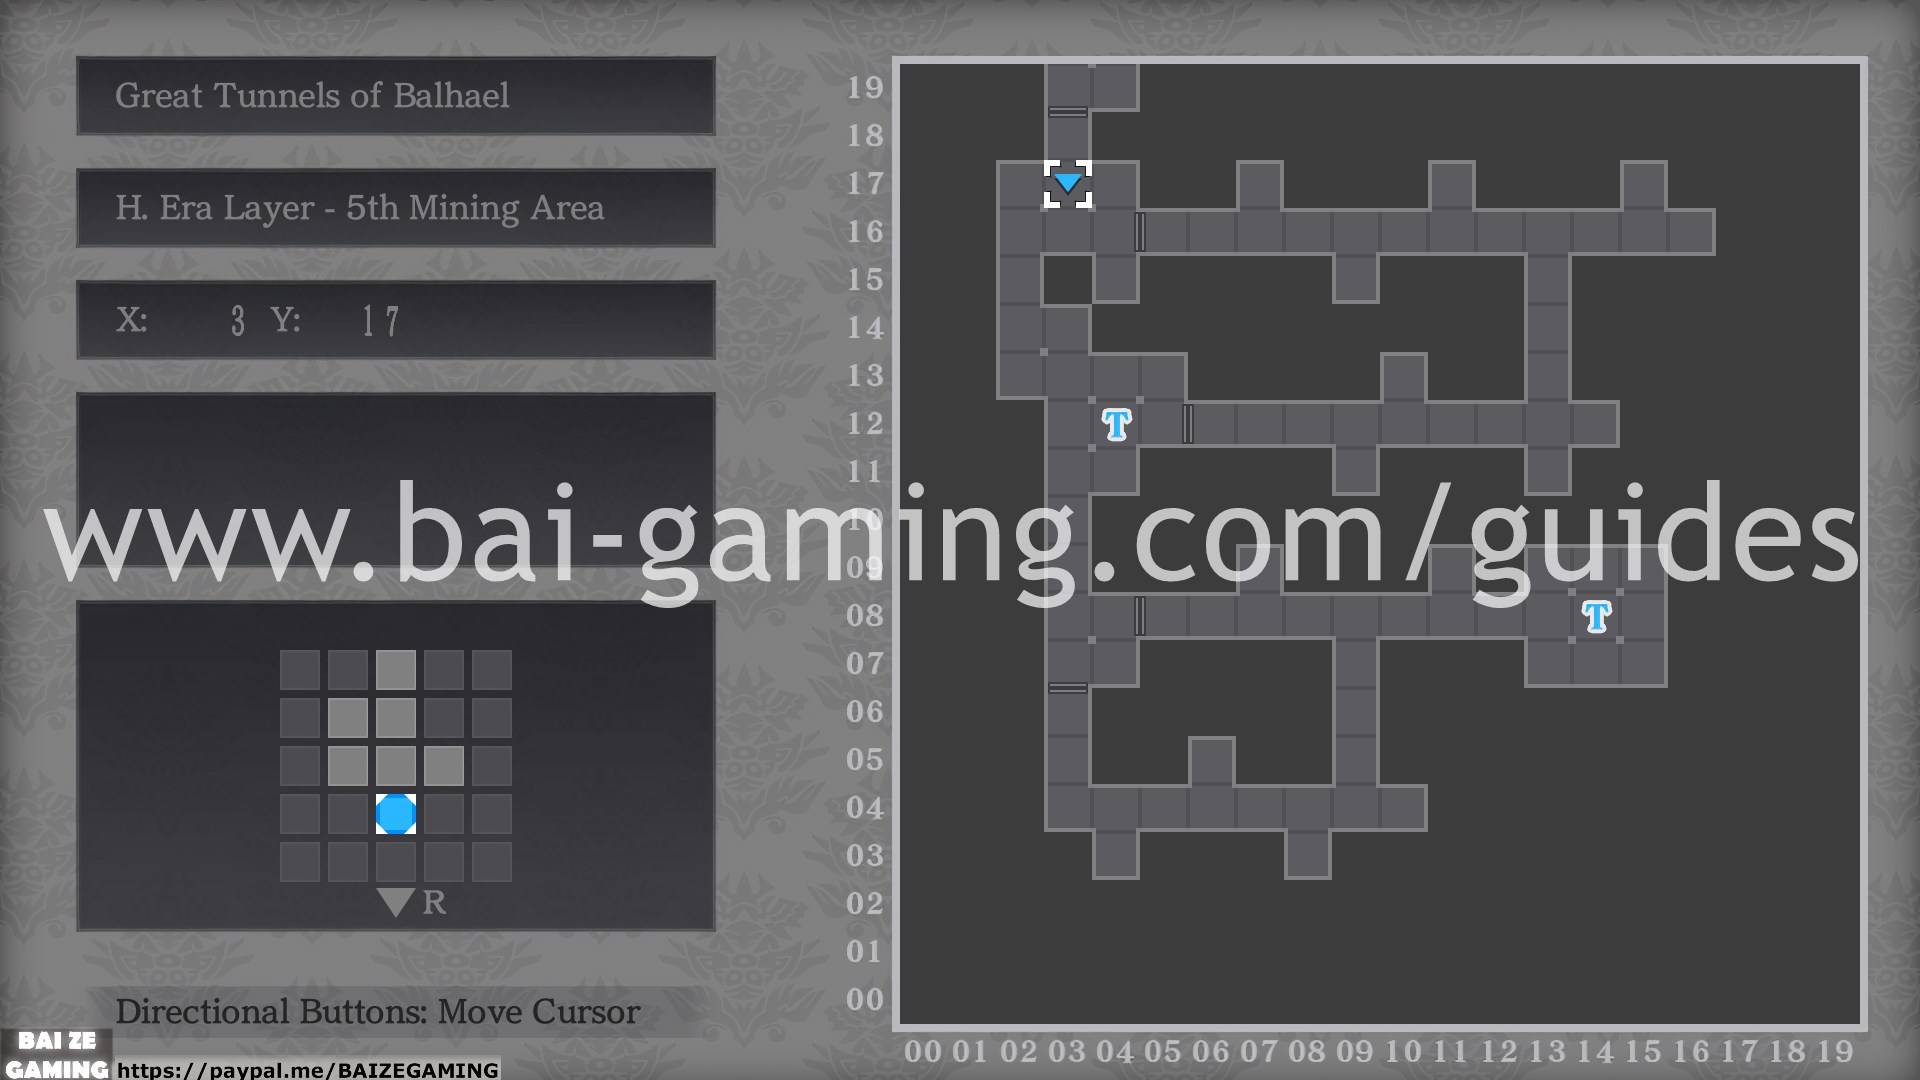
Great Tunnels of Balhael – H Era Layer – 5th Mining Area
Great Tunnels of Balhael – H Era Layer – 6th Mining Area
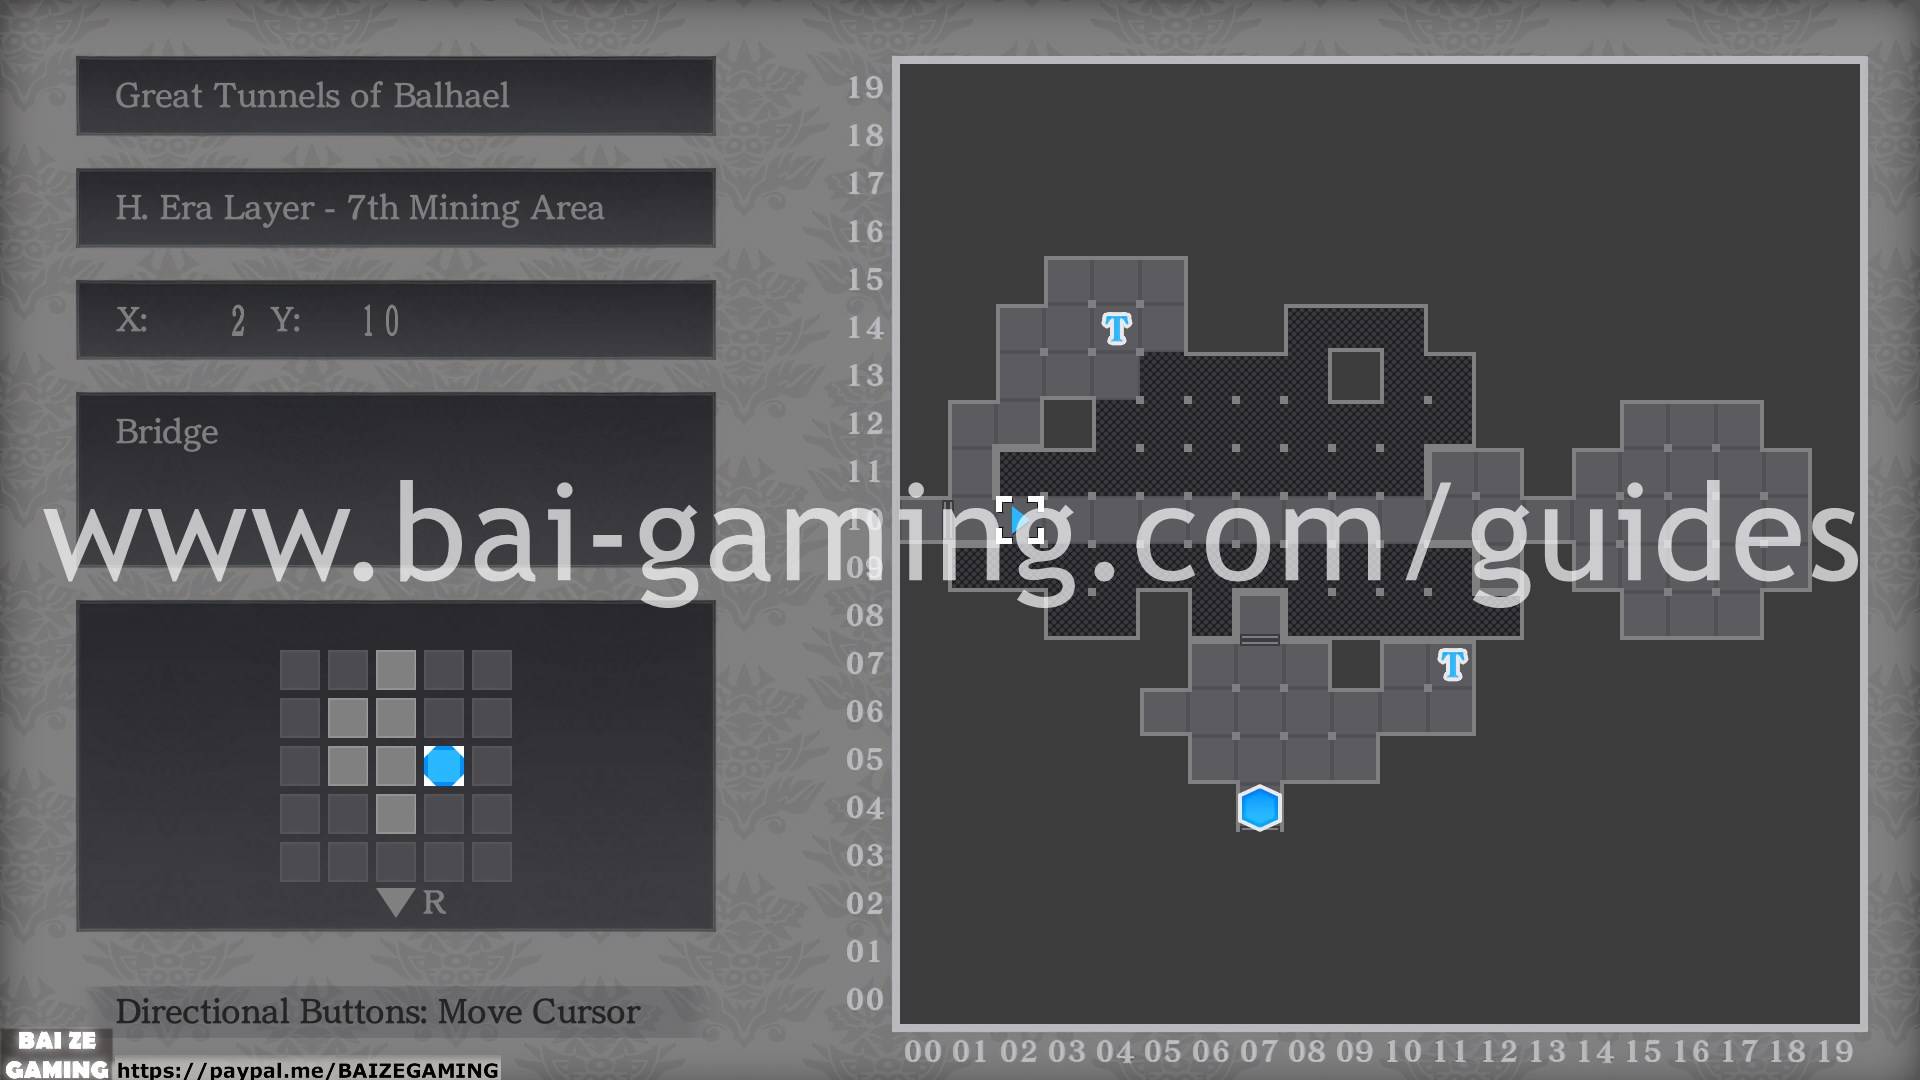
Great Tunnels of Balhael – H Era Layer – 7th Mining Area
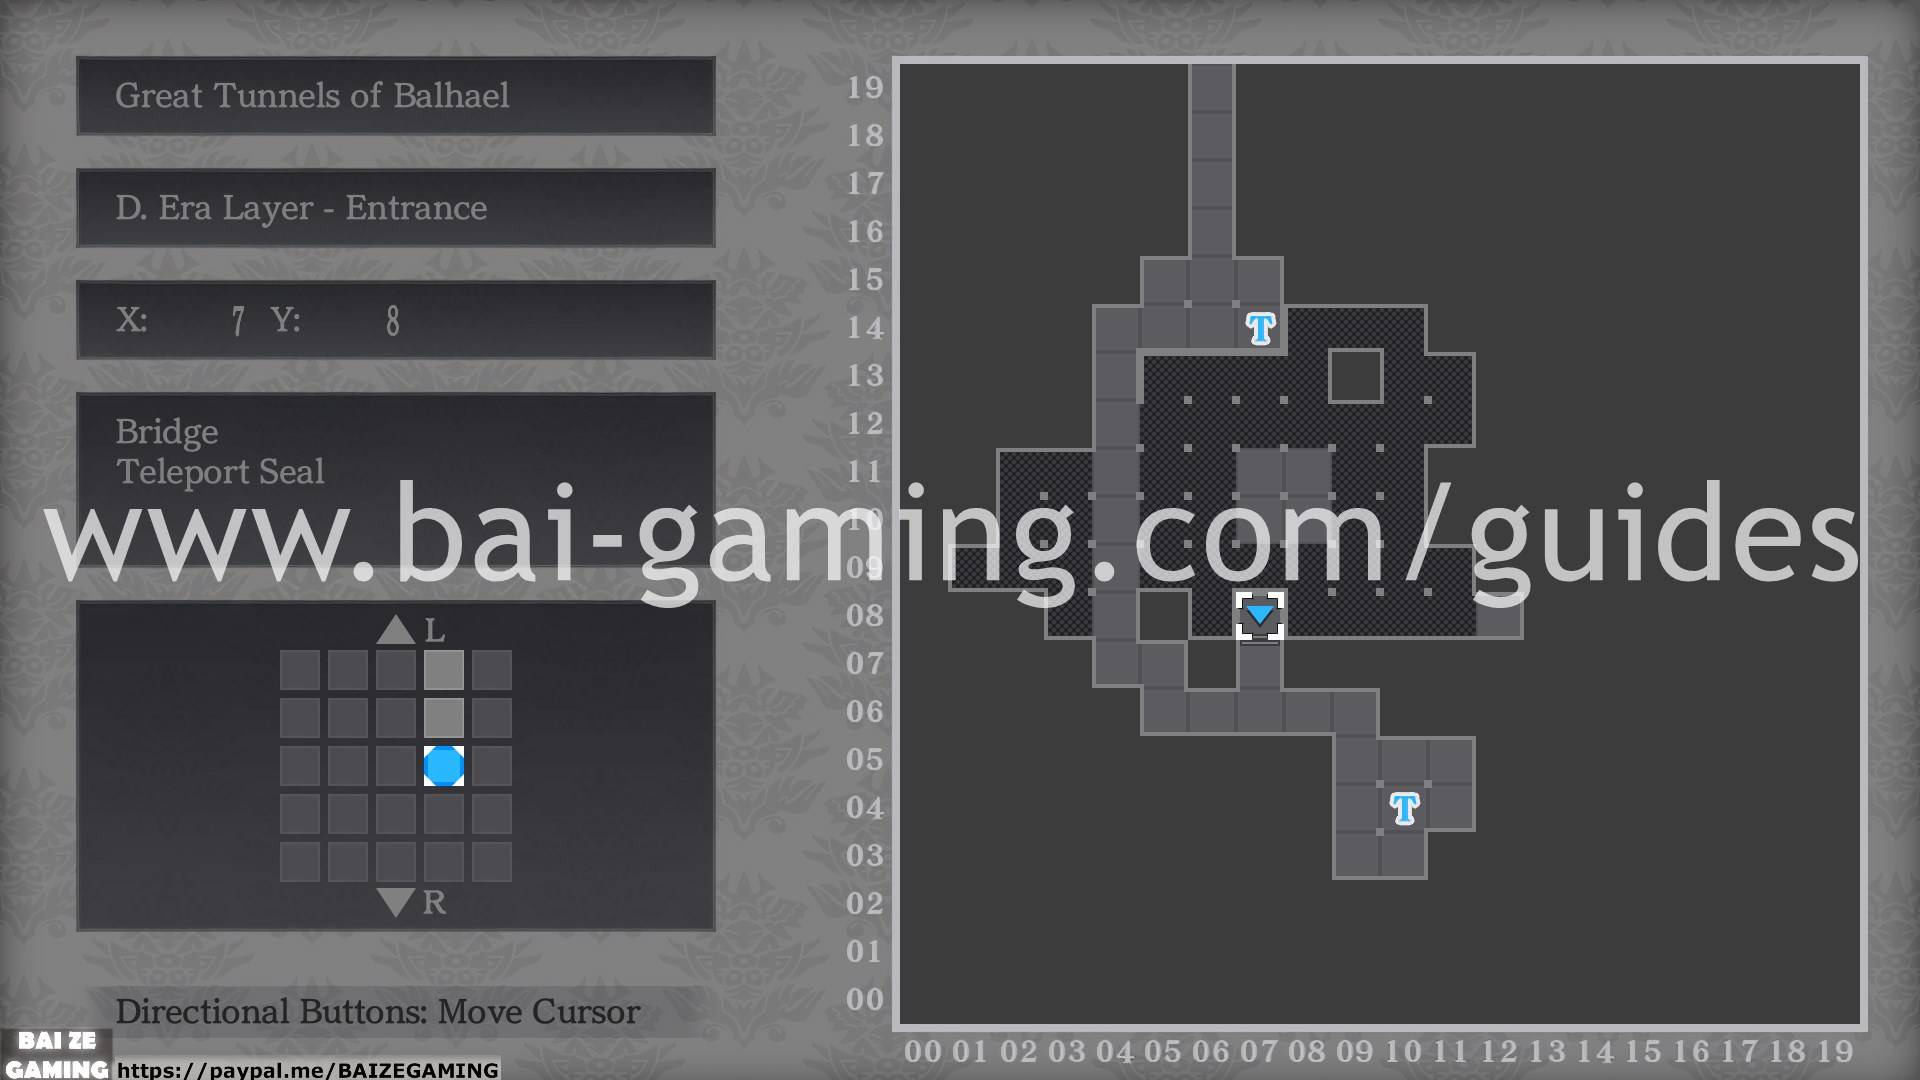
Great Tunnels of Balhael – D Era Layer – Entrance
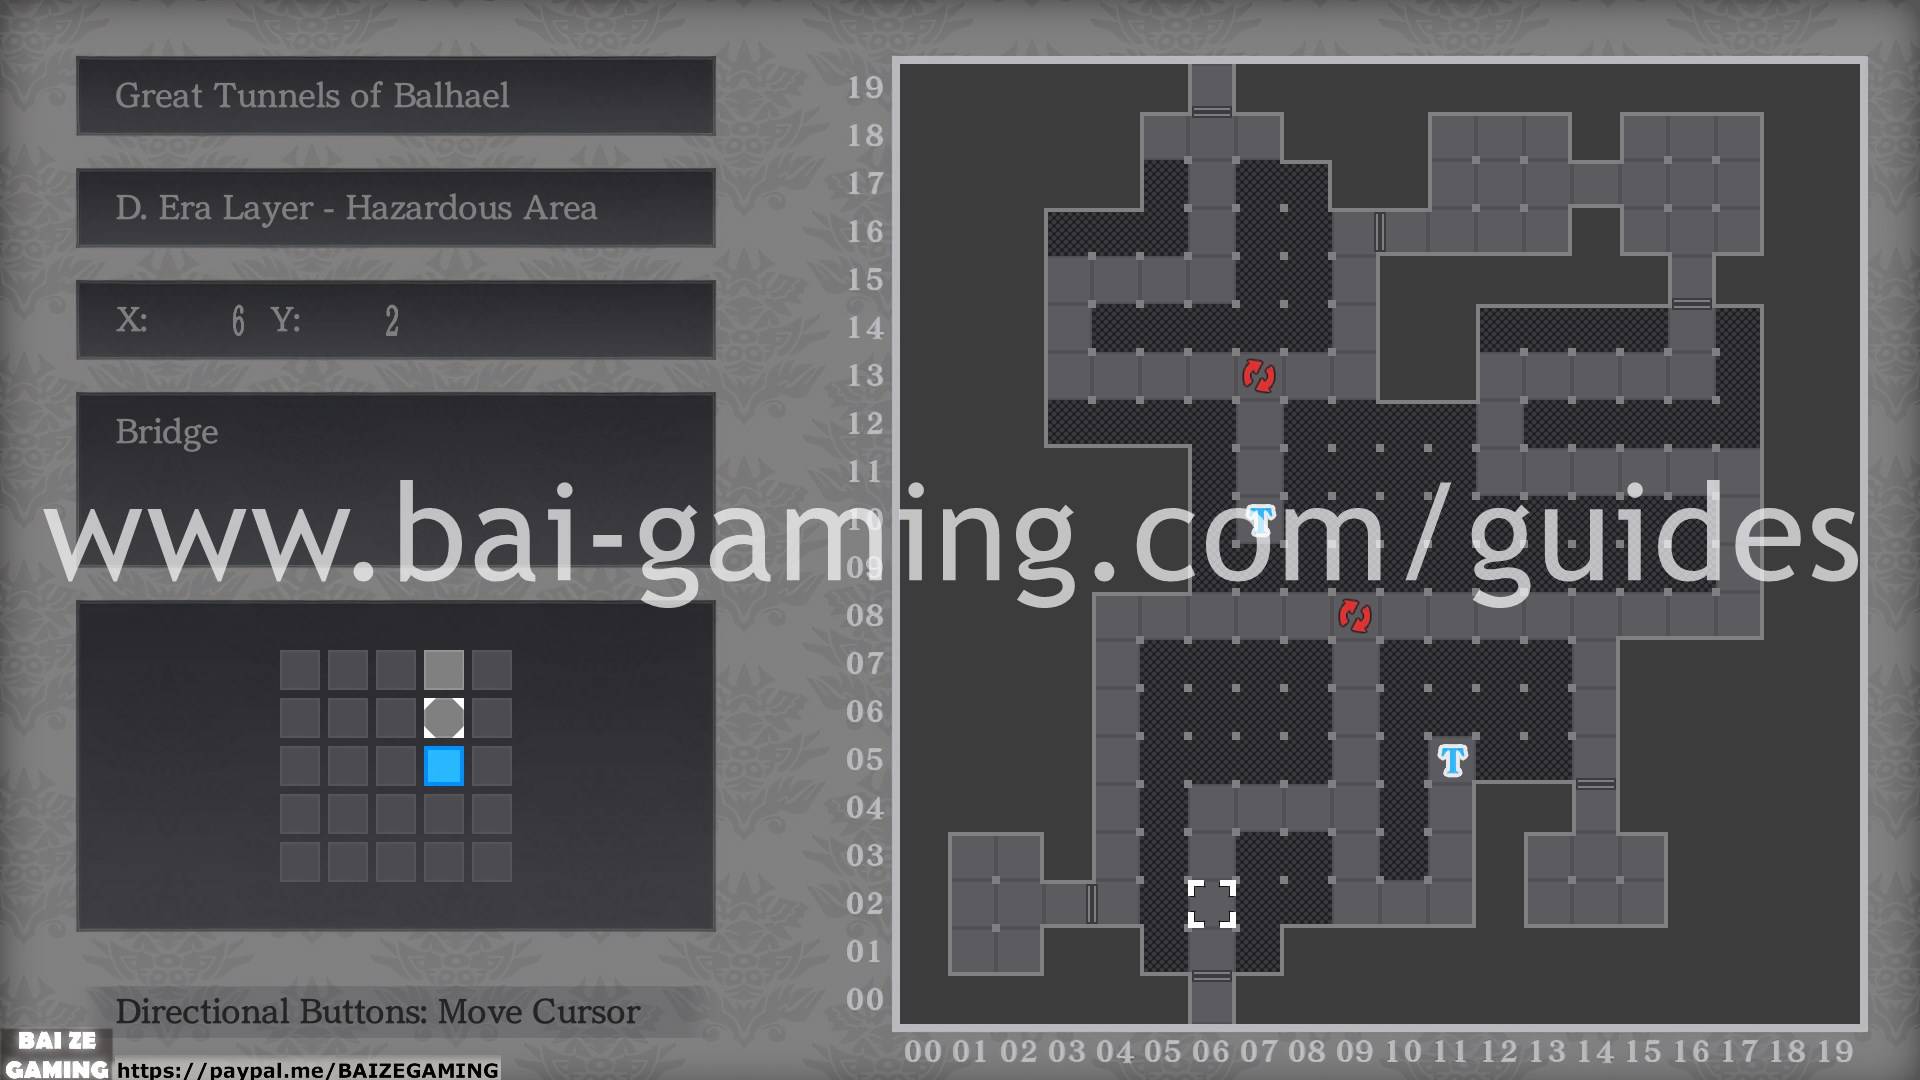
Great Tunnels of Balhael – D Era Layer – Hazardous Area
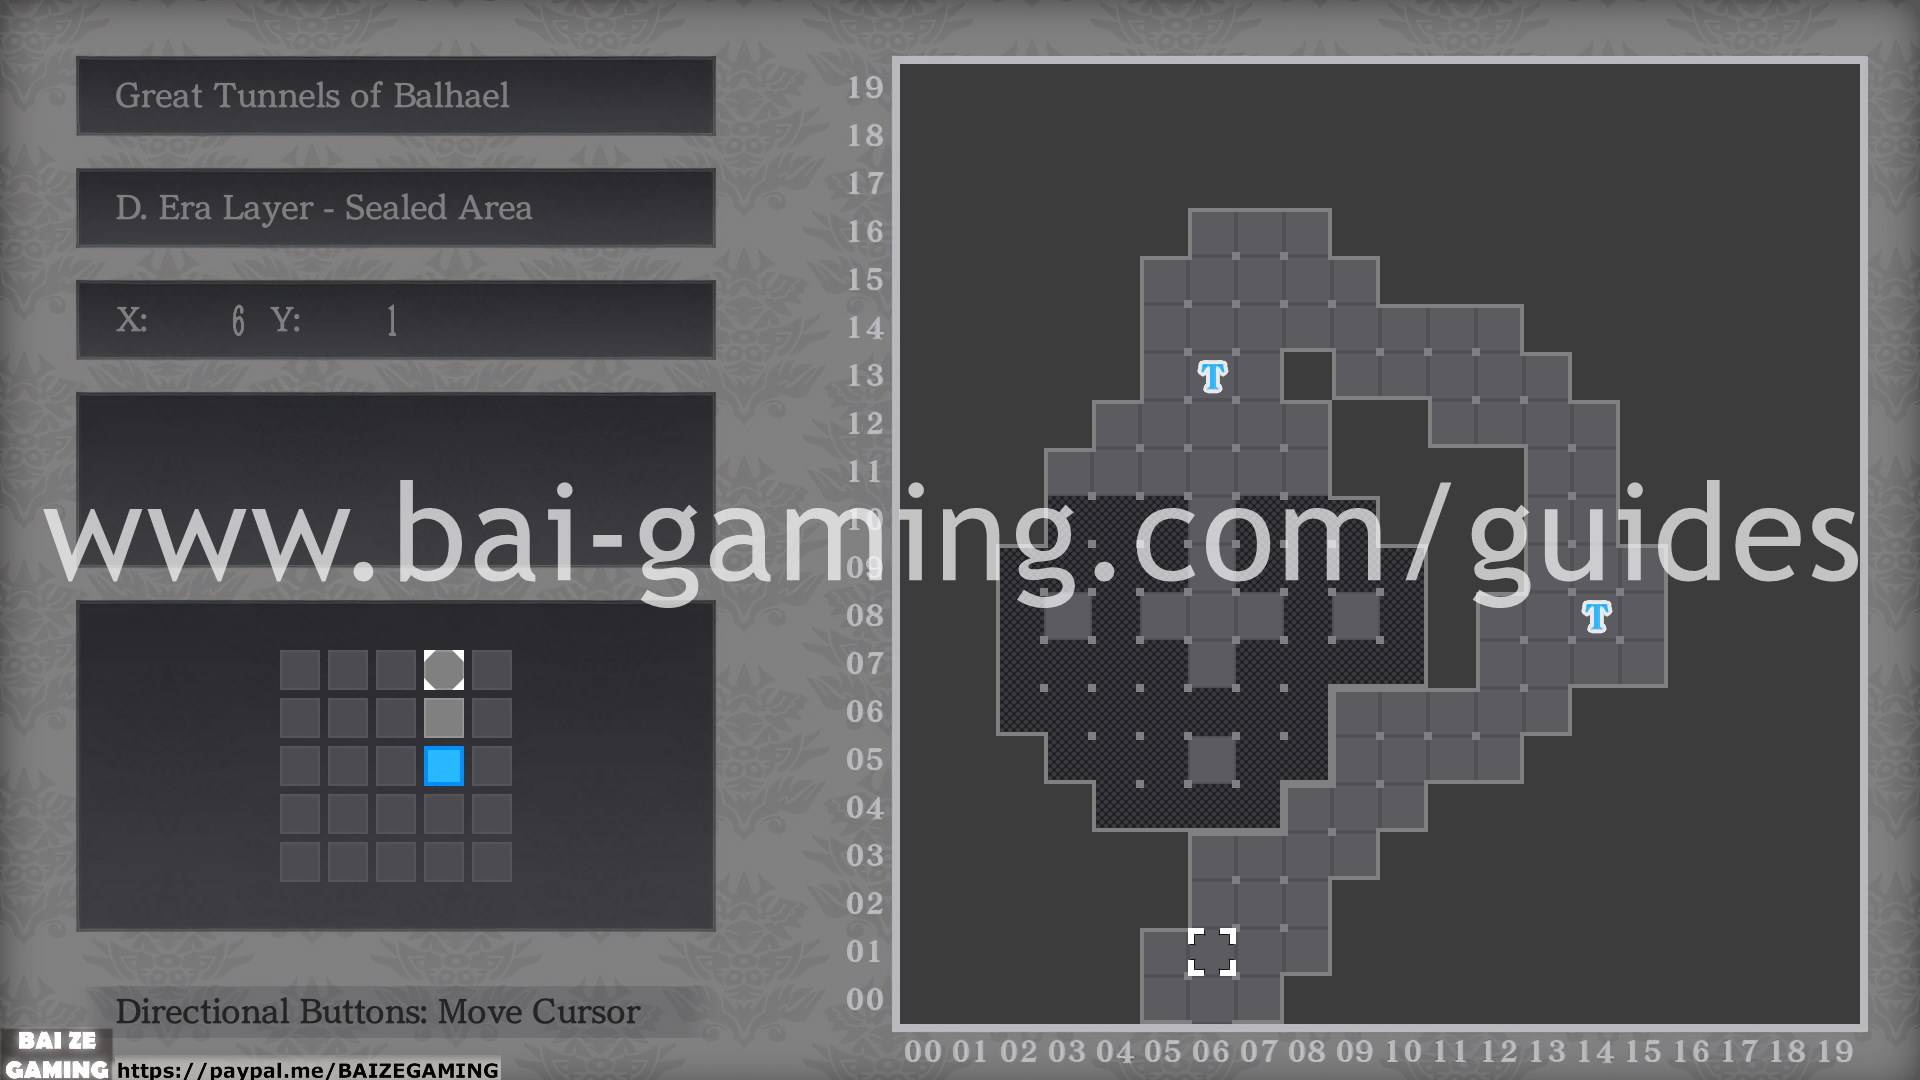
Great Tunnels of Balhael – D Era Layer – Sealed Area
Great Tunnels of Balhael – God Era Layer – Entrance
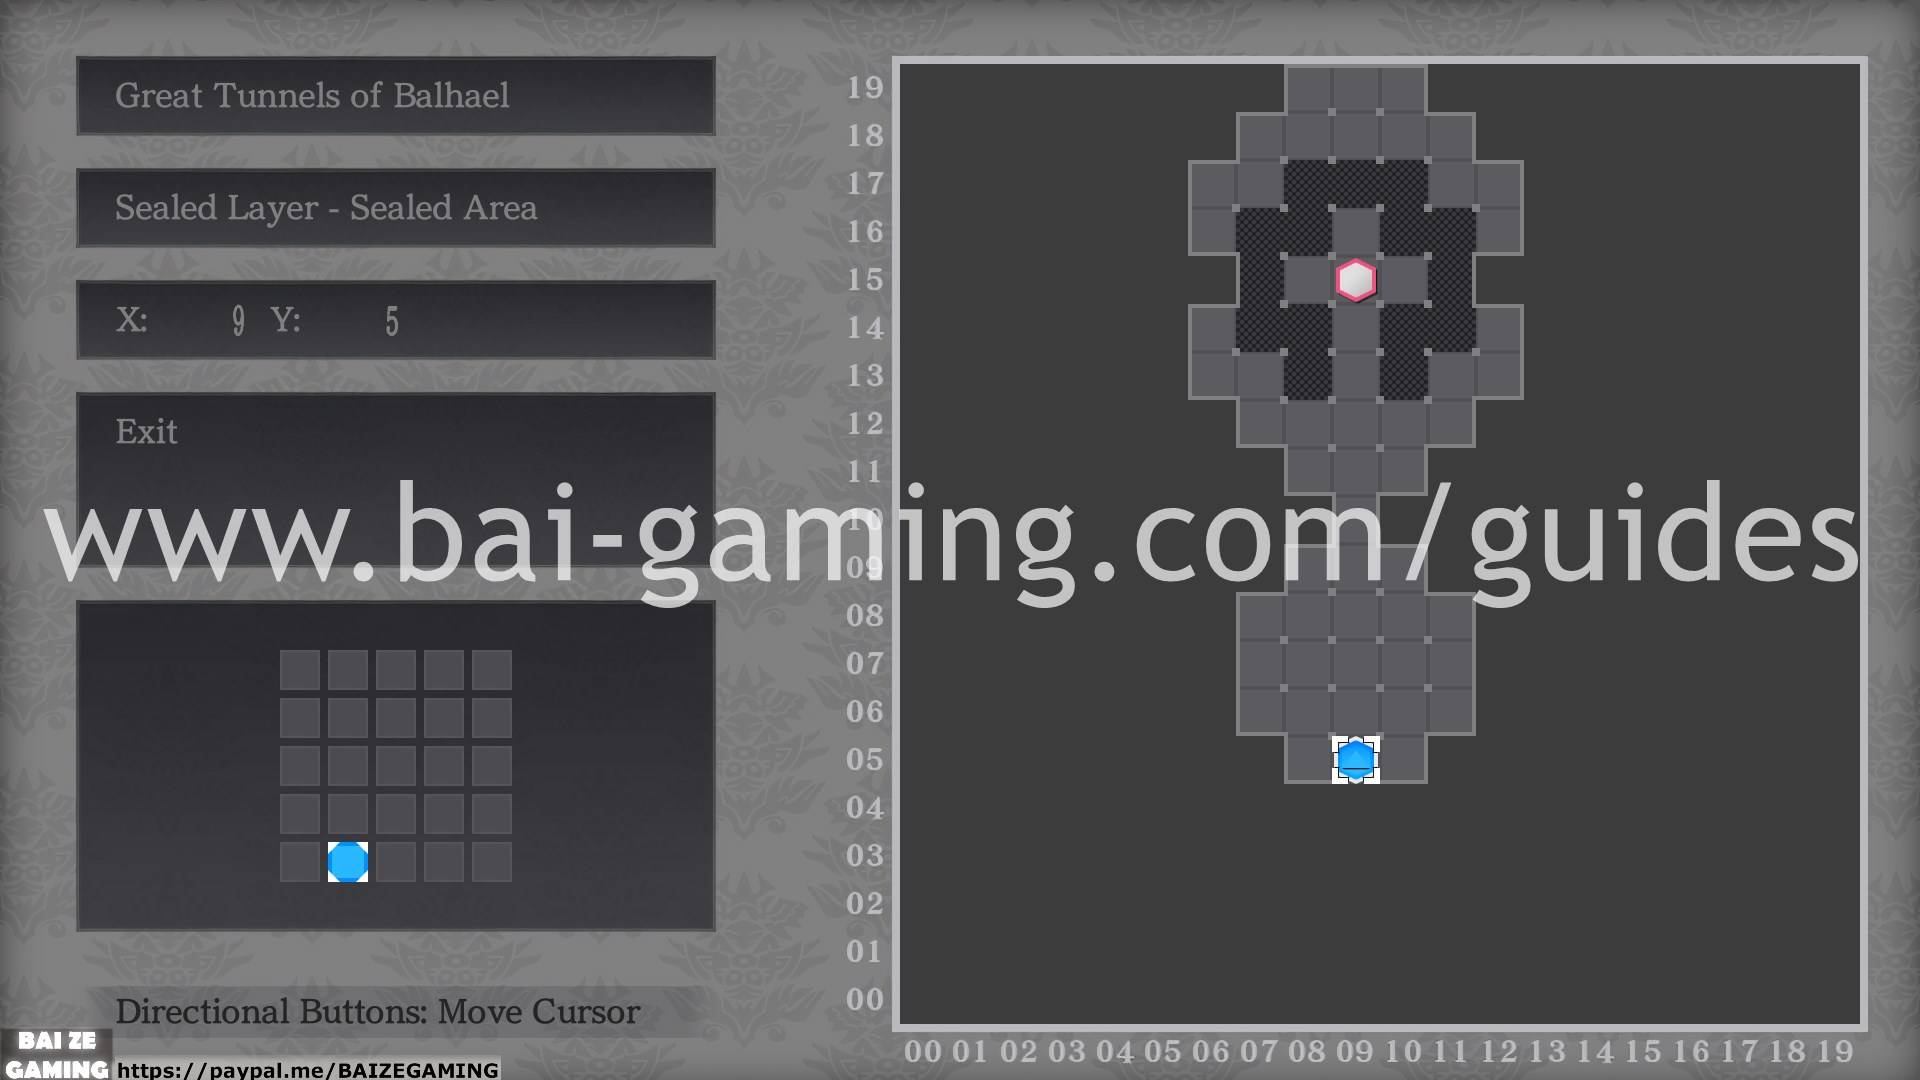
Great Tunnels of Balhael – Sealed Layer – Sealed Area
Great Tunnels of Balhael – Isle Era Layer – Hidden Area
Great Tunnels of Balhael – Labyrinth of Mirrors – God Era Layer – Cavern of Baal
Temple of Eslyn
- The maps aren’t “complete” because I didn’t want to go to all the arrows, it’s very time-consuming, but as I’ve filled it in, it has everything you need, I have all Trap “T” locations and it has the location of Charon’s second appearance and all of the treasure chests. The empty squares you see are just more arrows that transport you.
Temple of Eslyn – Isle of Mist Rapids
Temple of Eslyn – Priest Residential Area
Temple of Eslyn – Holy Grounds

Temple of Eslyn – Colonnade
Temple of Eslyn – Labyrinth of Mirrors – Seabed Ruins
Path of the Dead
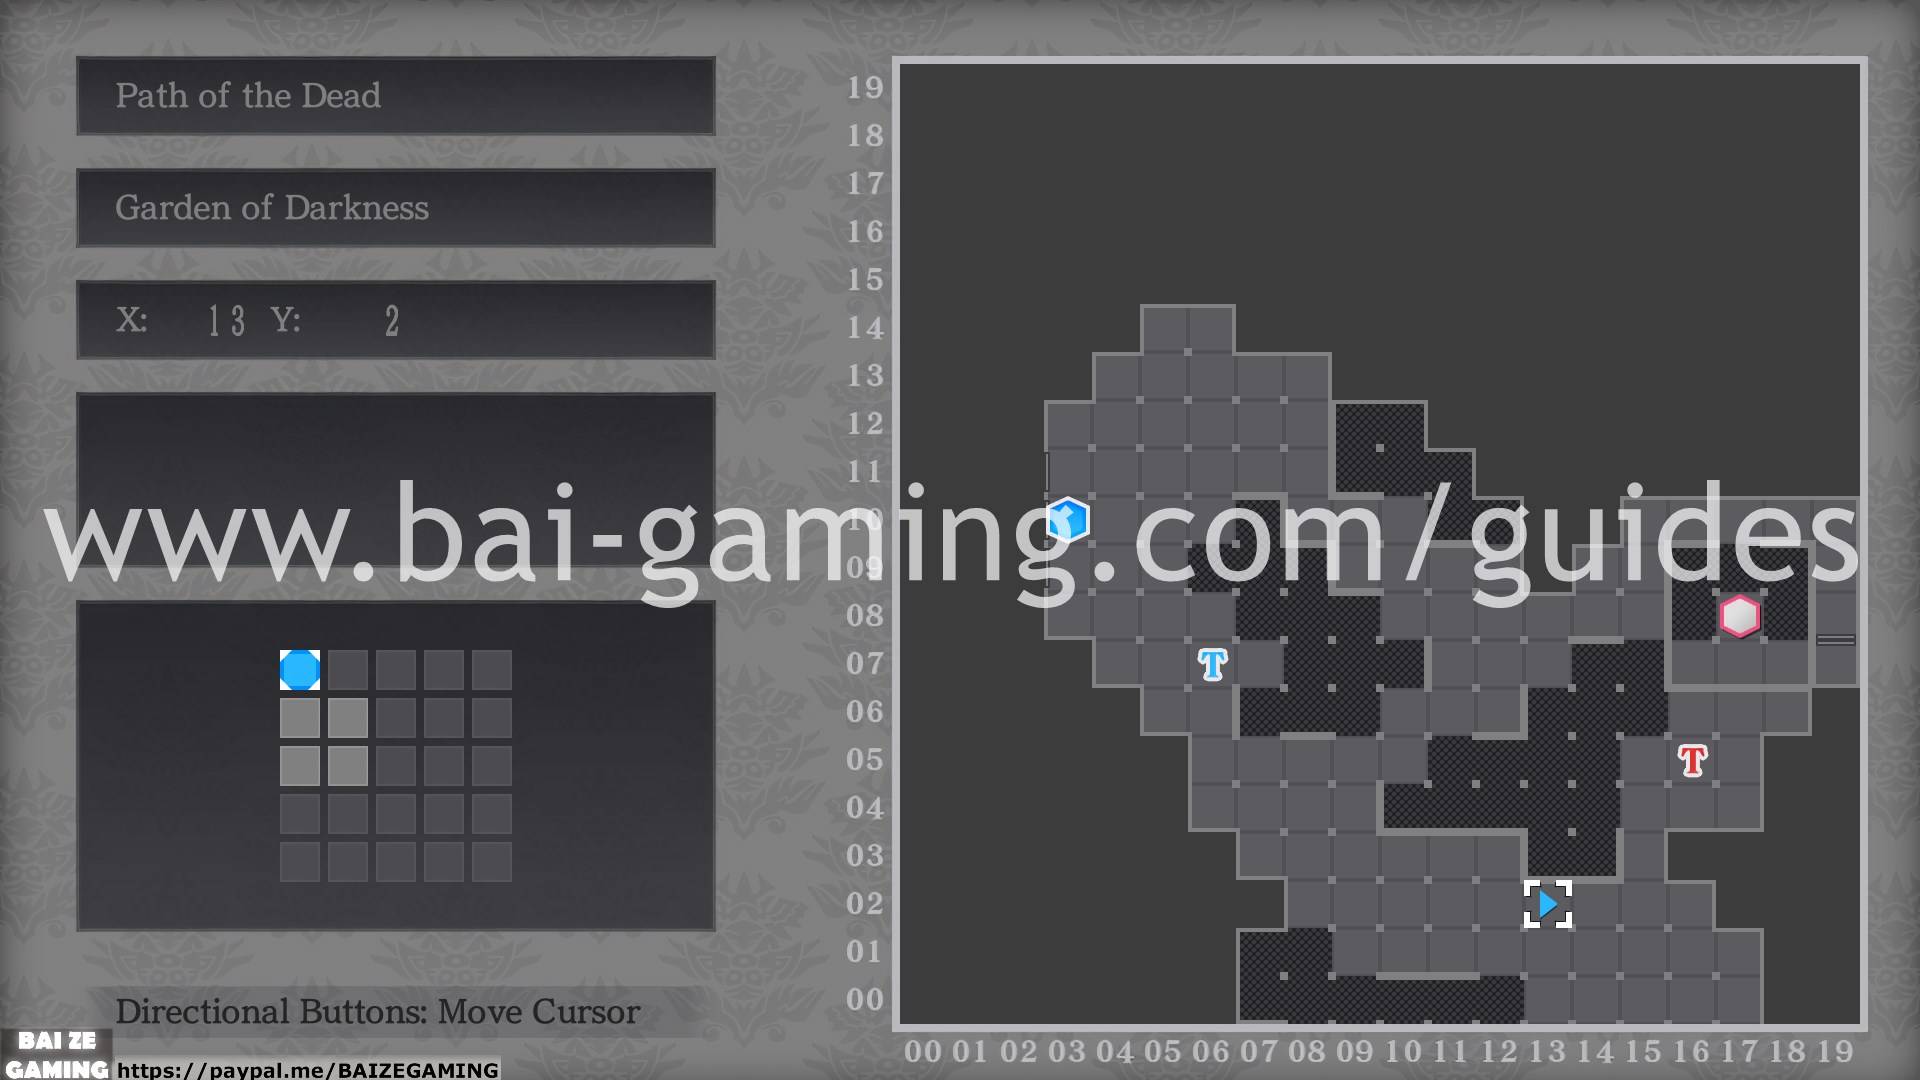
Path of the Dead – Garden of Darkness
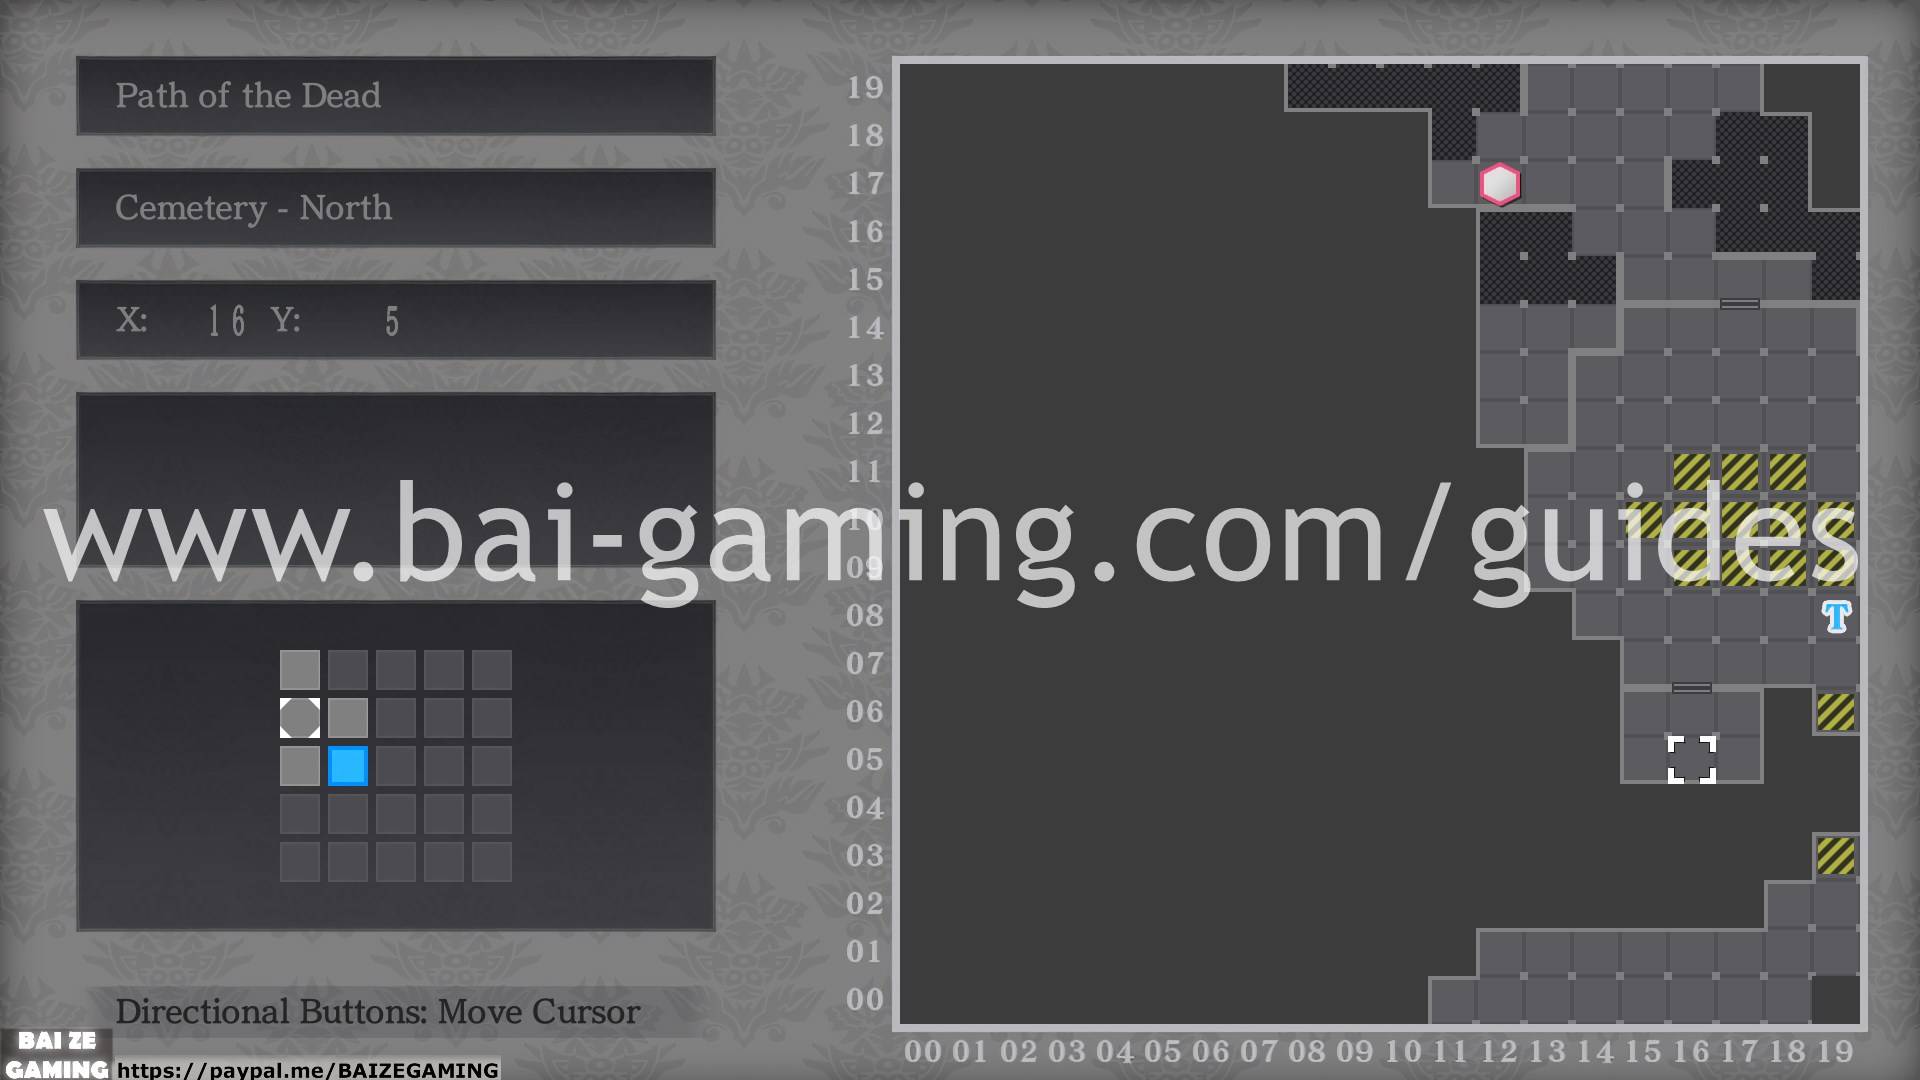
Path of the Dead – Cemetery – North
Path of the Dead – Cemetery – West

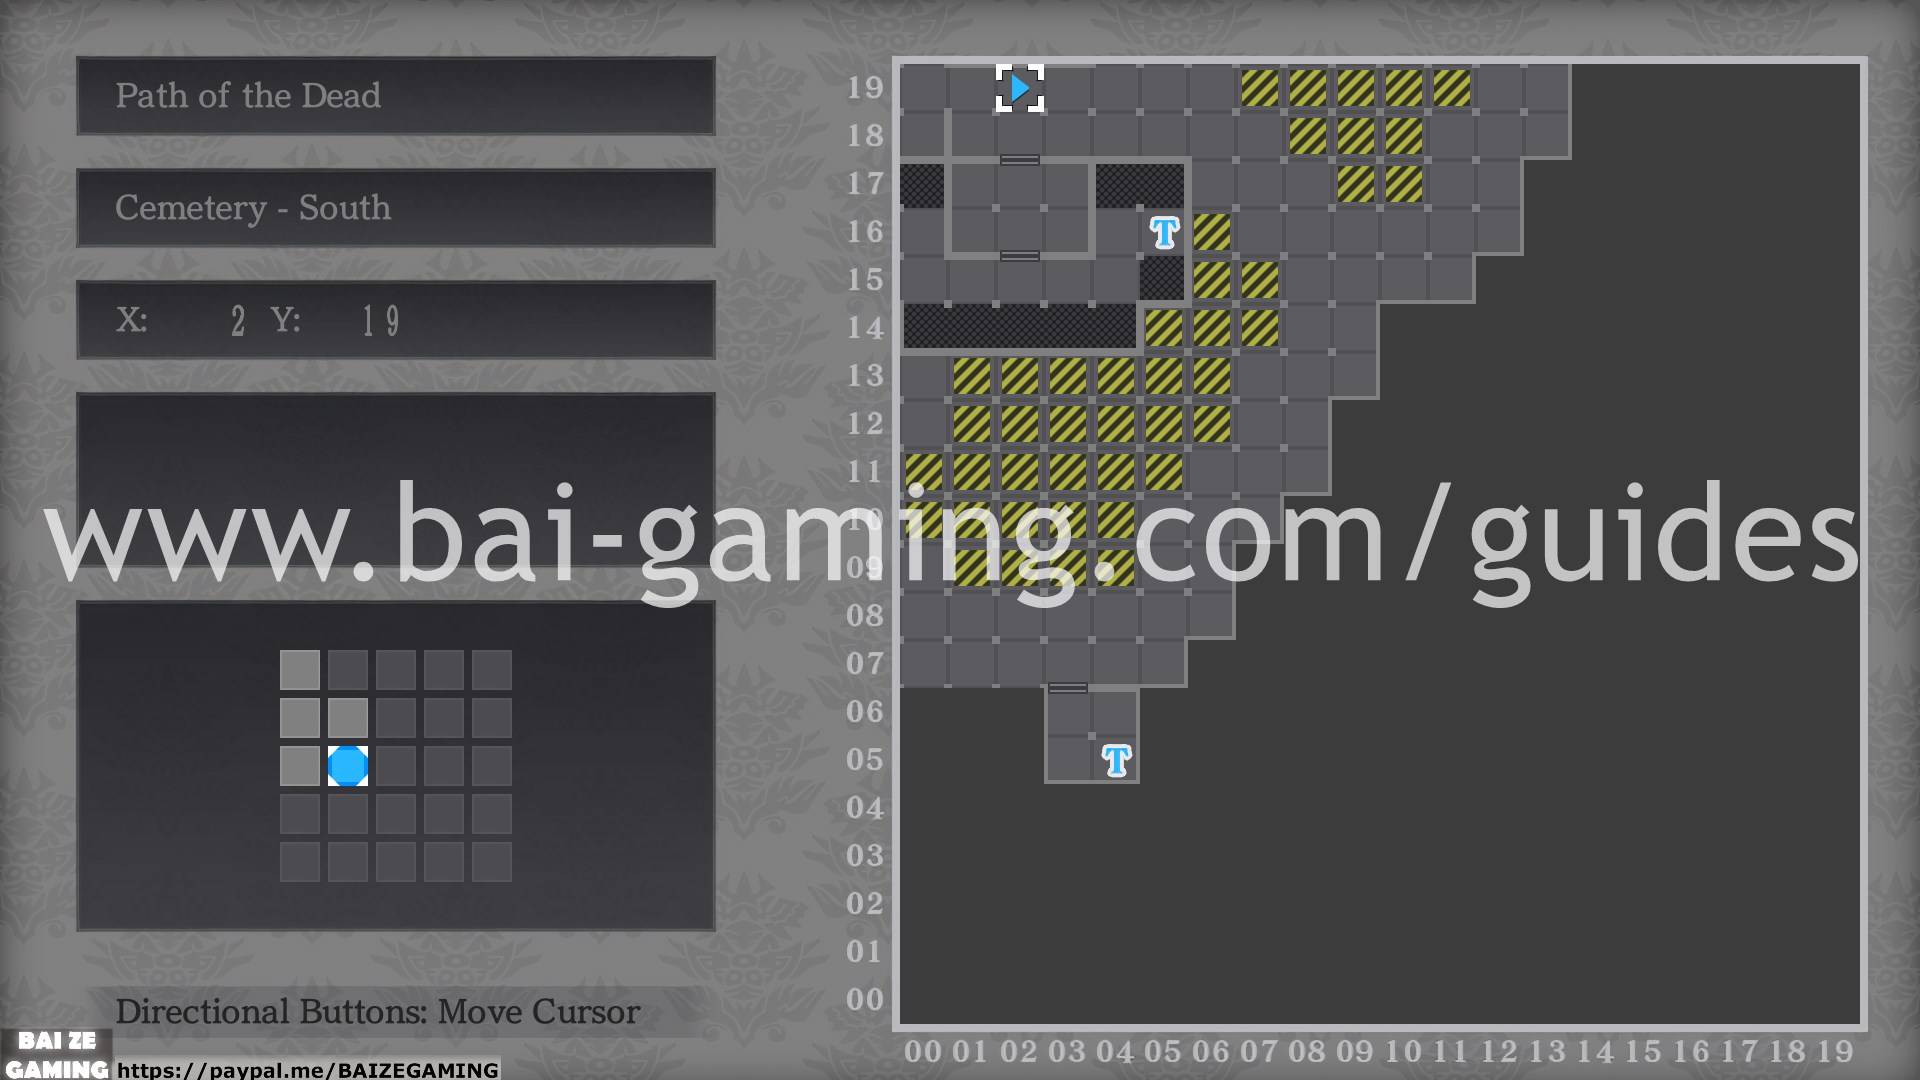
Path of the Dead – Cemetery – South
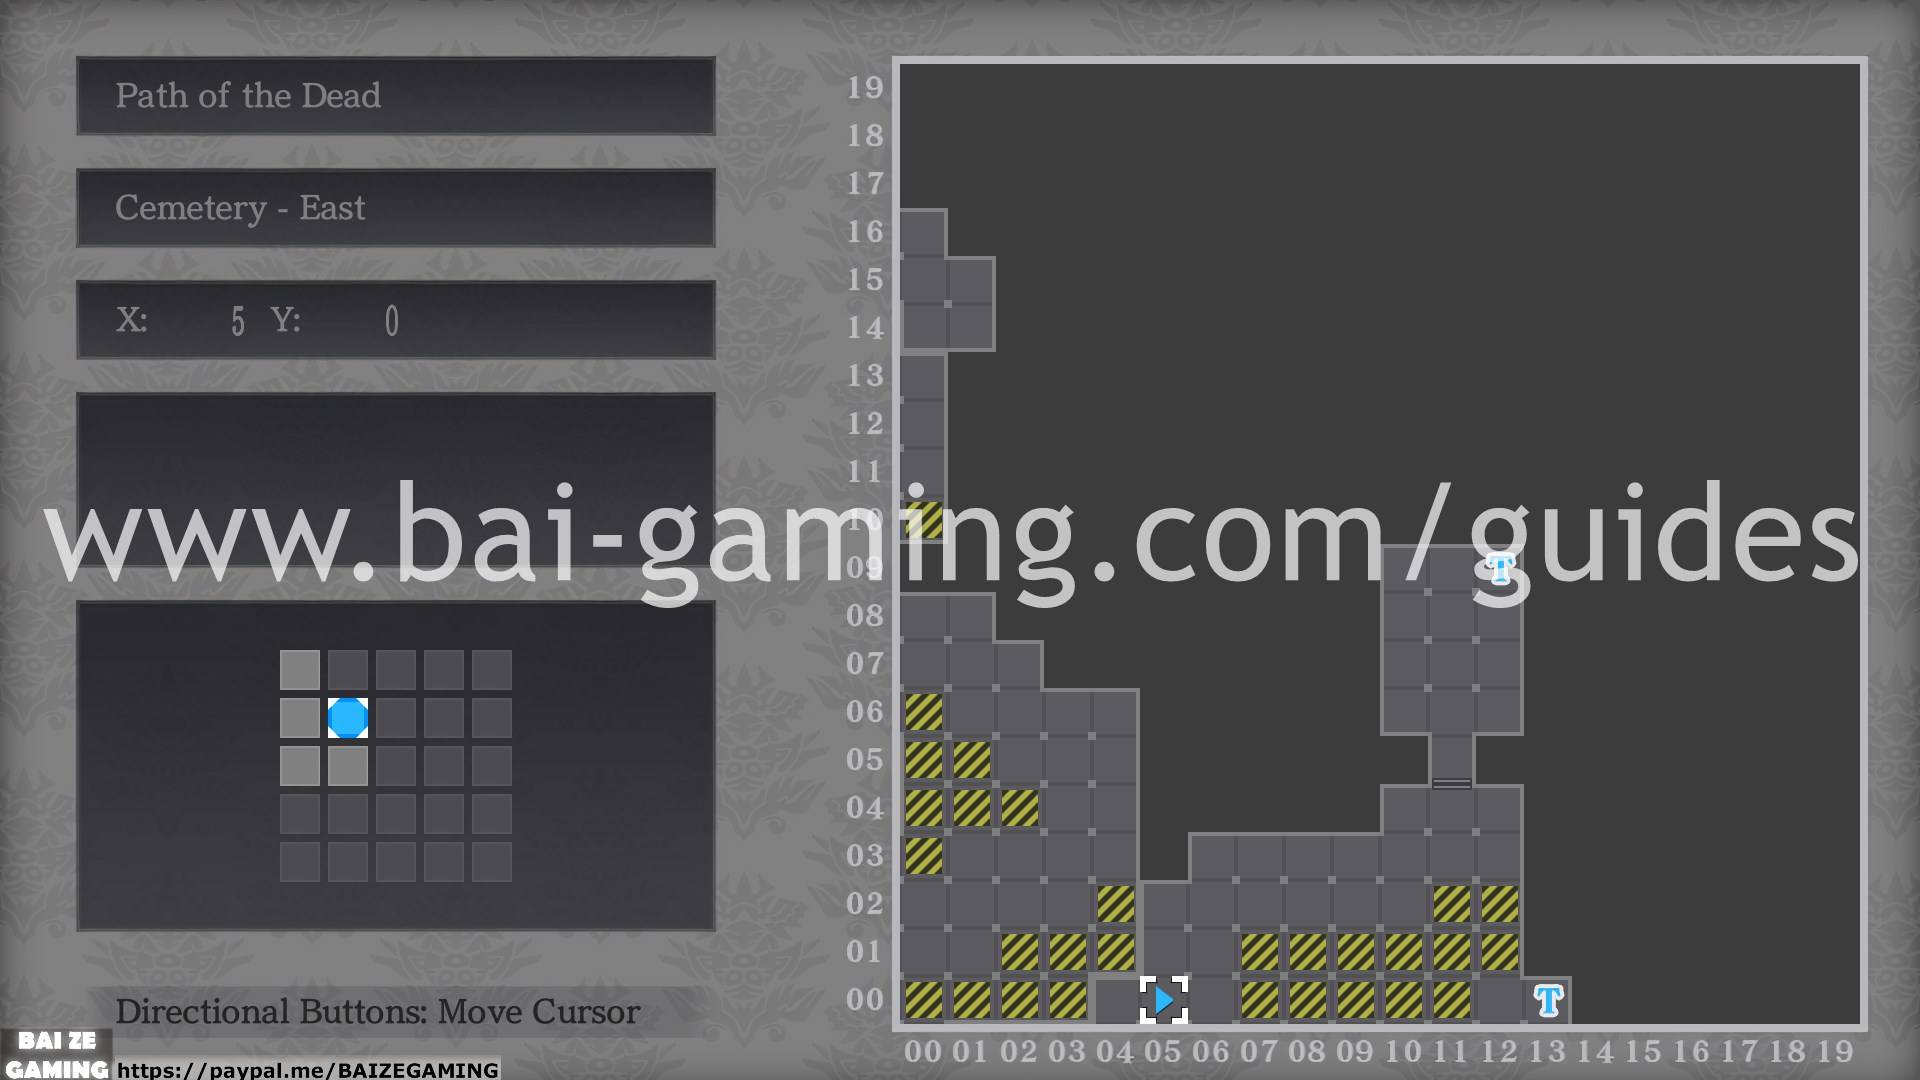
Path of the Dead – Cemetery – East
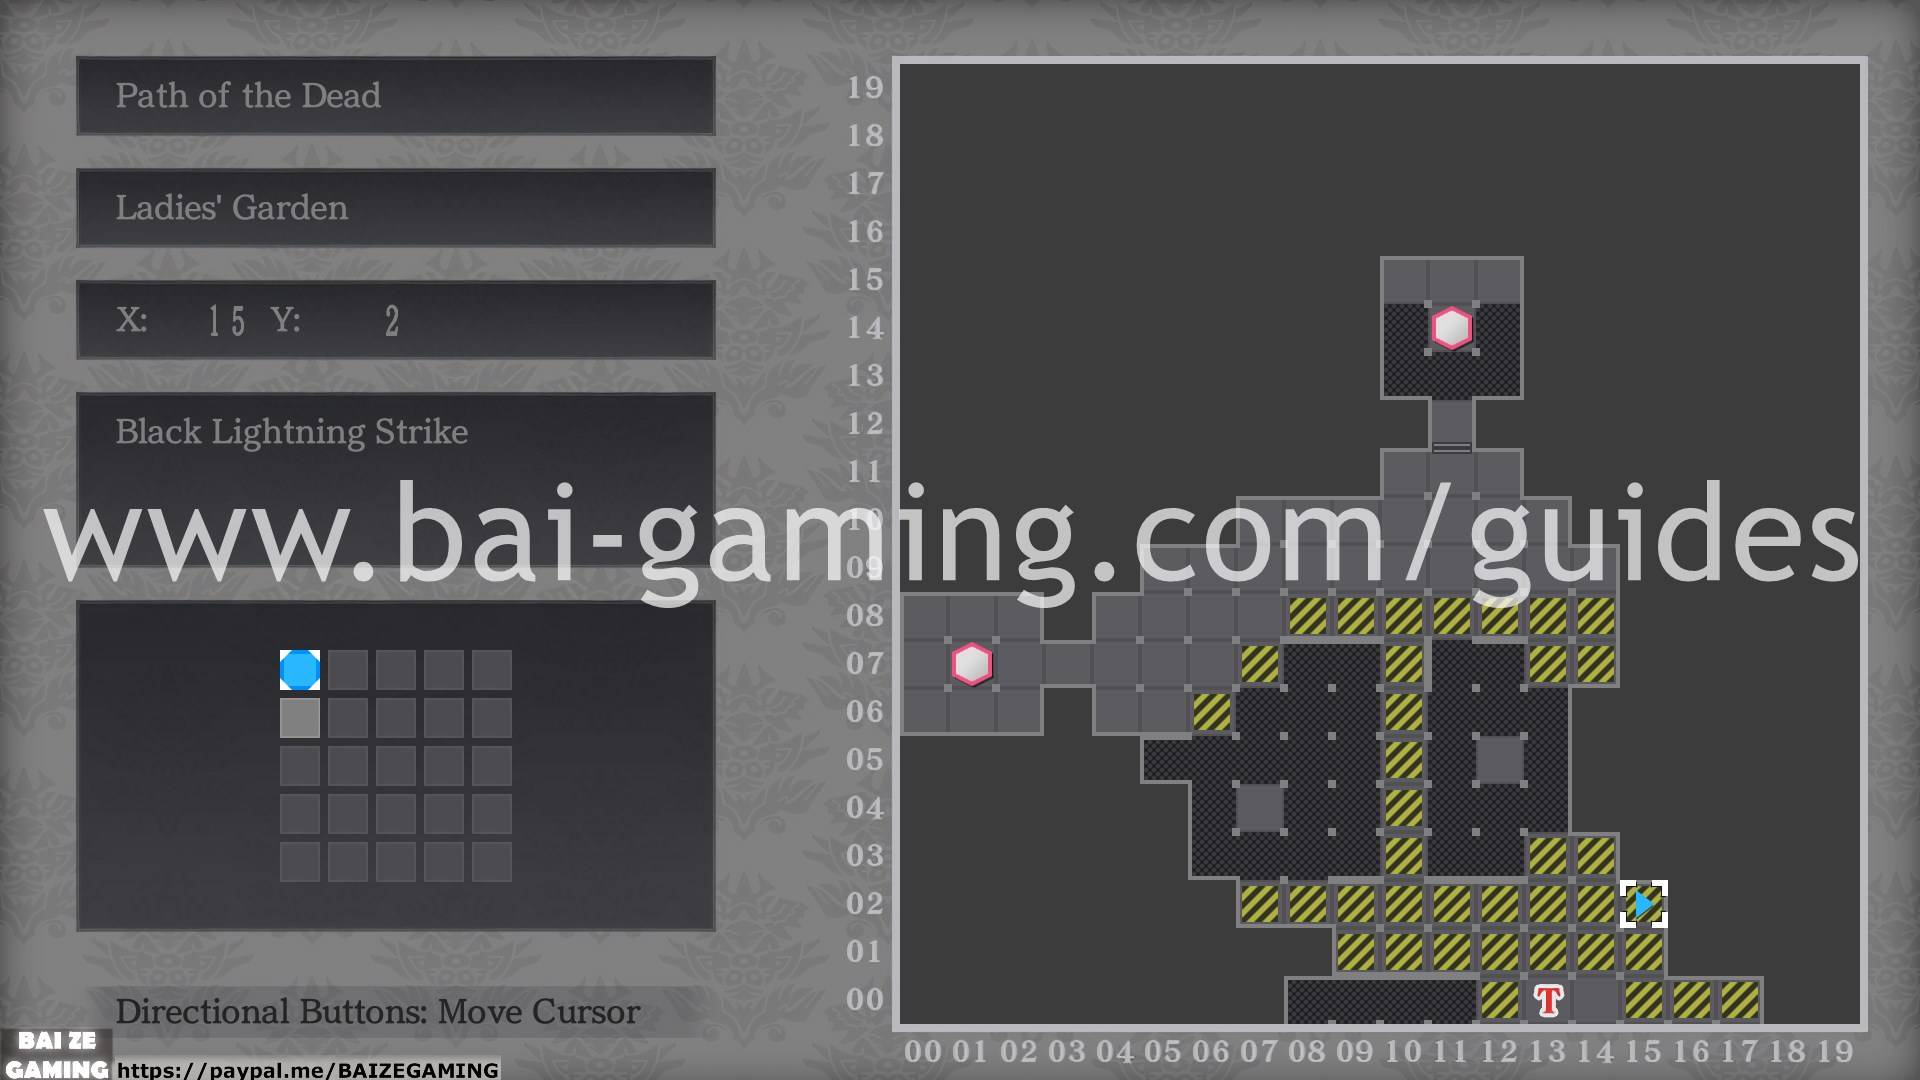
Path of the Dead – Ladies’ Garden
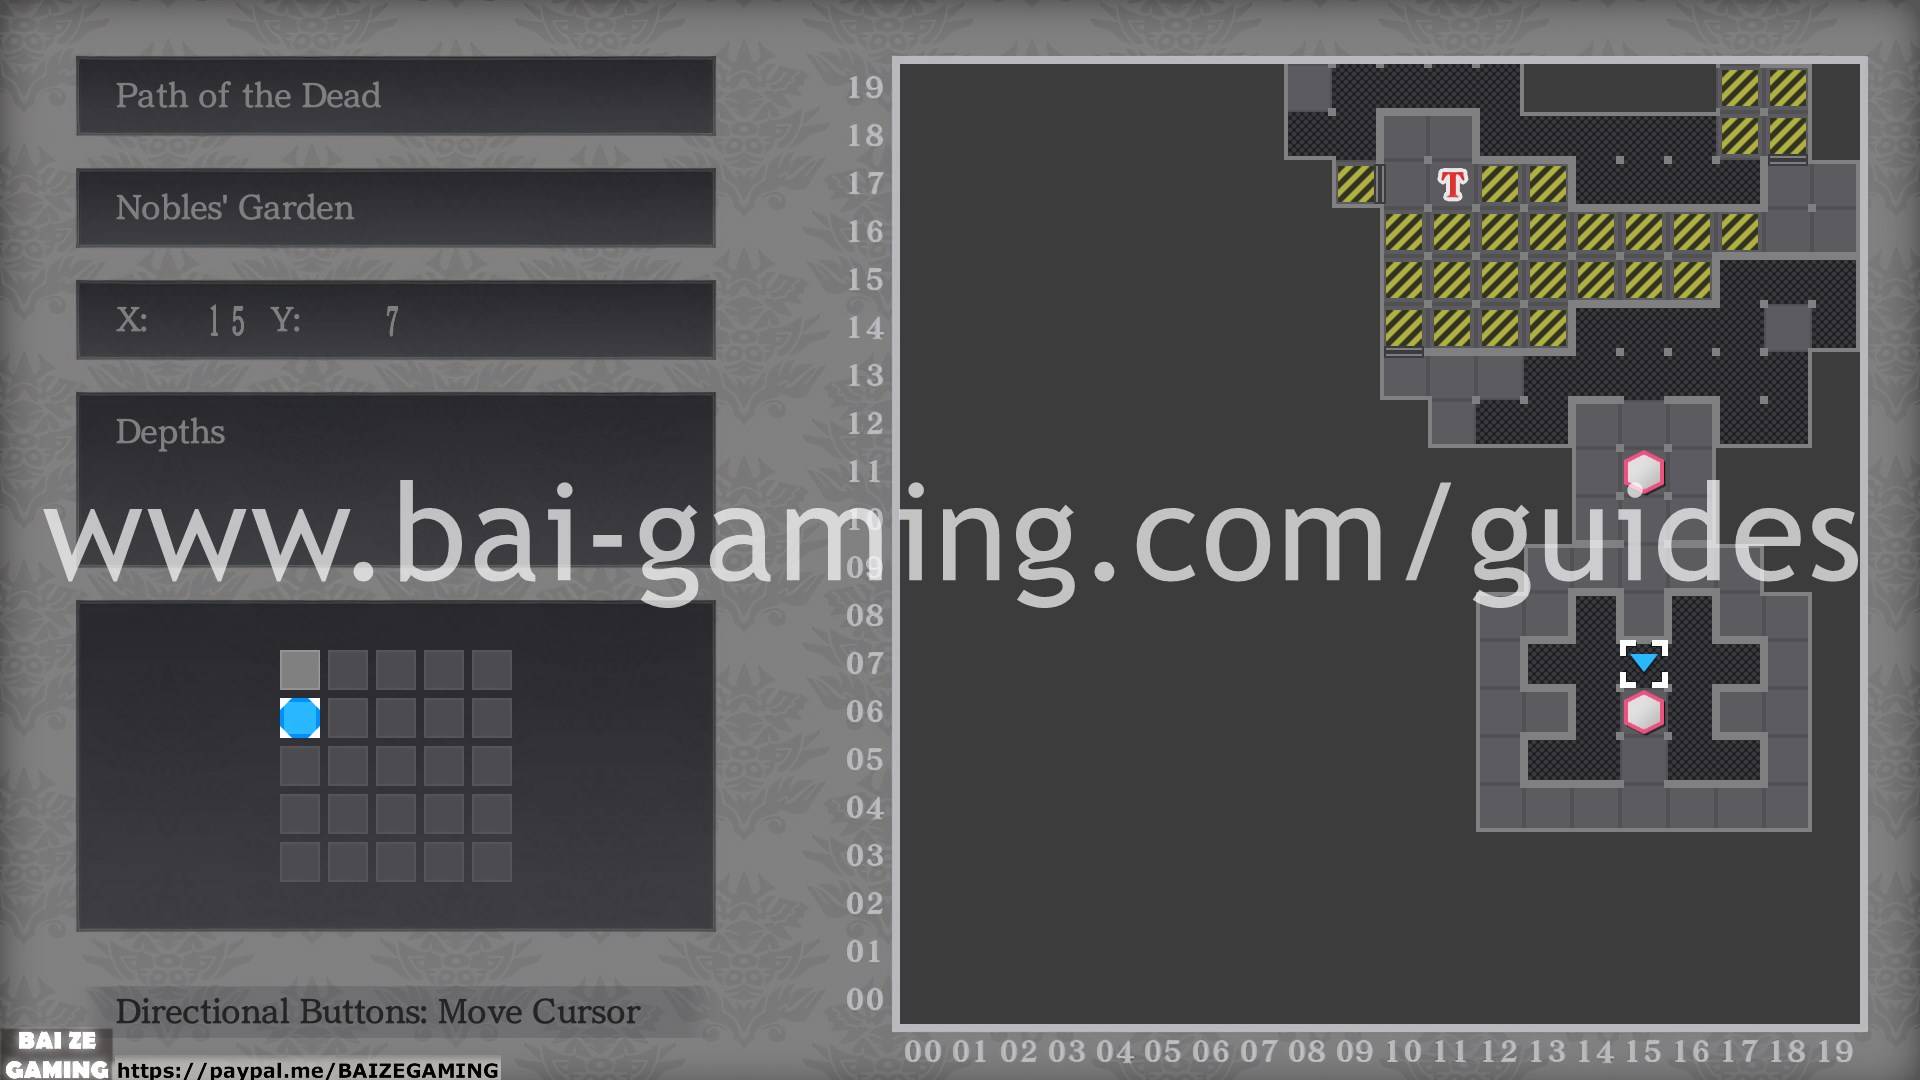
Path of the Dead – Nobles’ Garden
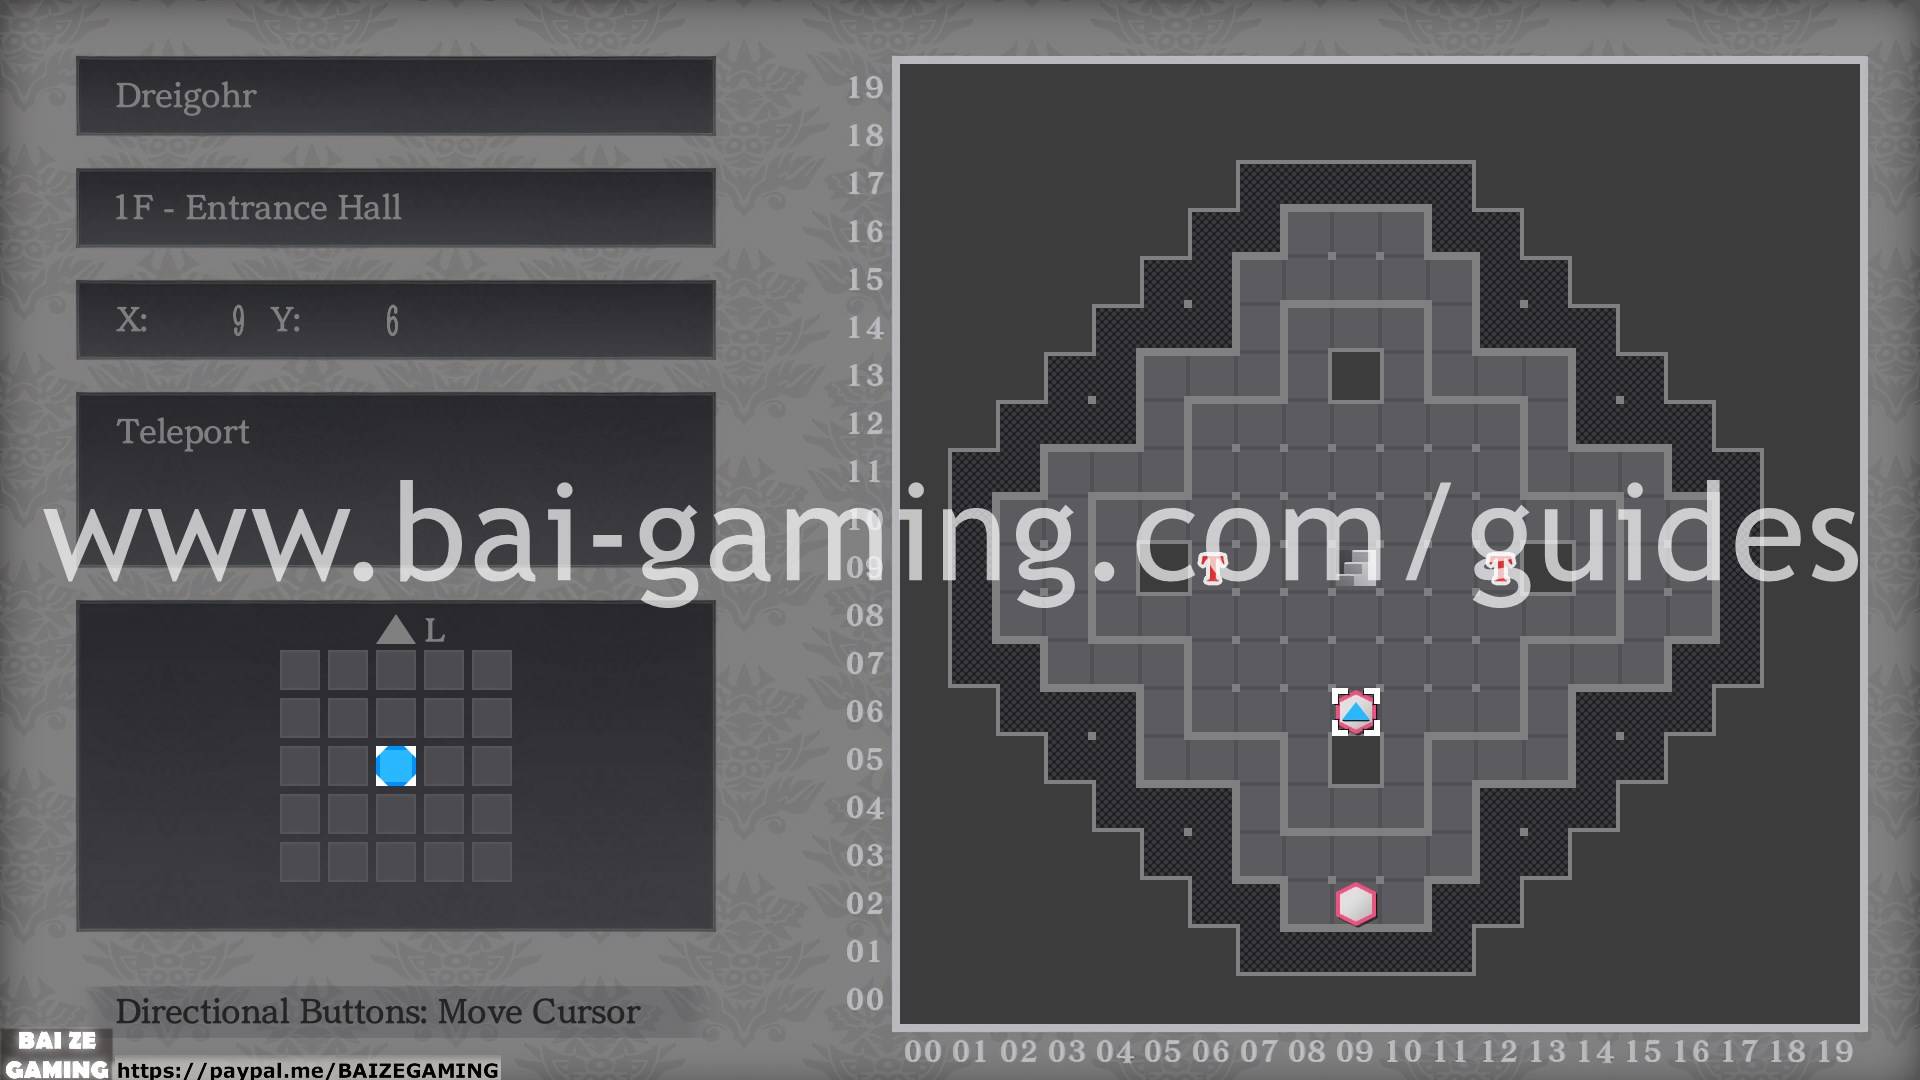
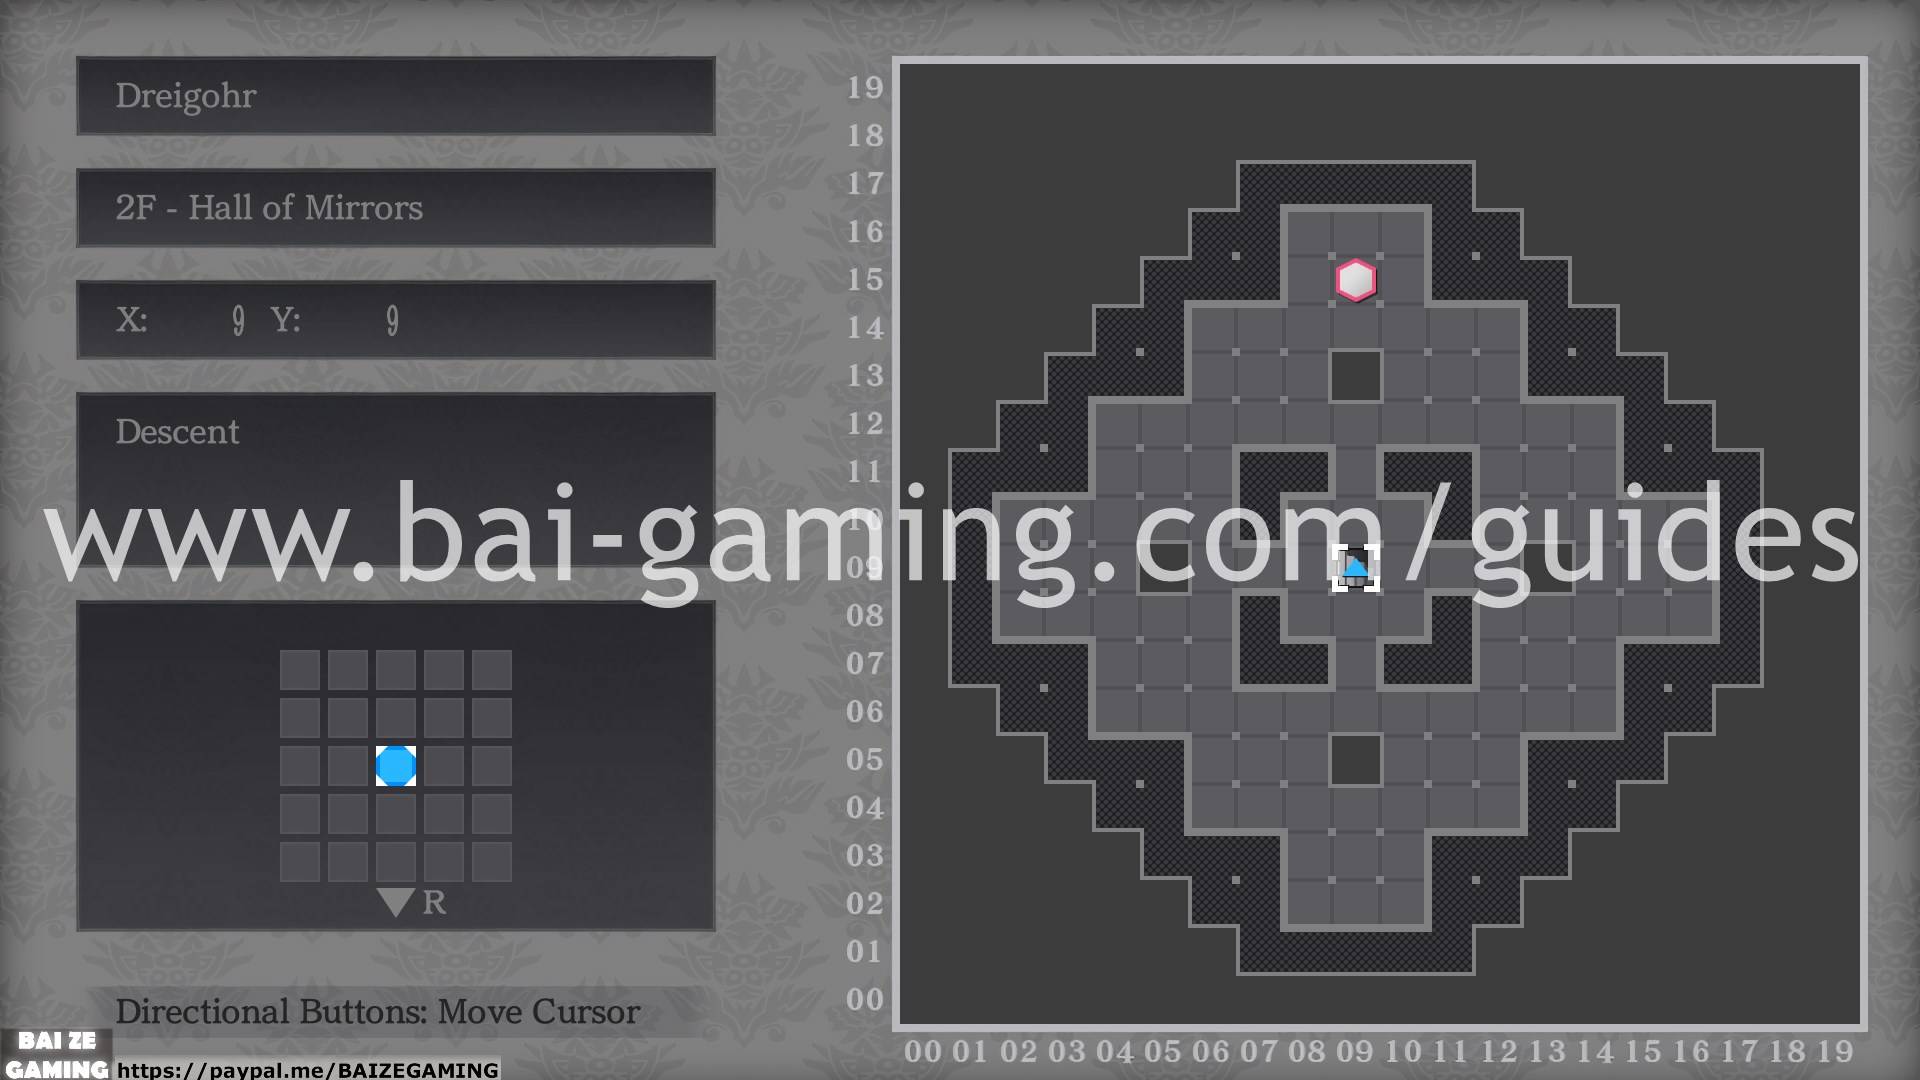
Dreigohr and Castle of the Dead
- Unfortunately, the “original dungeon” disappears when you complete it! I made these maps while doing postgame and since I beat the original Dreigohr dungeon a while ago, I cannot revisit it without replaying the entire game over again.
- However, I will be able to cover the “postgame version of Dreigohr” that replaces the “original final dungeon”.
- If you’re struggling with the original final dungeon, just go to each of the teleports in order like a clock, from 1:00 to 2:00, etc, all the way to 11:00. If you’re getting lost in these sections, save before entering teleports and pitfalls, it doesn’t take too long to get through it.
Dreigohr – 1F – Entrance Hall
Dreigohr – 2F – Hall of Mirrors
Castle of the Dead – 1F – Chamber of Purgatory
Castle of the Dead – 2F – Chamber of the Umbral King
Castle of the Dead – 3F – Chamber of the Death King