PC Building Simulator 2 – Guide on Getting 5 Star Reviews
These guides take a significant amount of time and effort to make, and anything that can be given is extremely appreciated.
BTC: 33iDpHvVwwcMyxhrv83rL75TXpmgBd72Xv
How to get 5 star reviews on customers’ PCs
To get 5 star reviews you often have to pick up on “hints” that the customer complains about. Usually it’s only one part that is causing the issue so you don’t need to waste your own money replacing all the parts.
If you want to see step-by-step all missions in the game, I recommend checking out my video below. Otherwise skip further below for the text guide.
How to repair broken PCs in general
- Broken part(s) – How do I fix PCs with broken parts?
- If you want a mindless solution that always works, take out the entire PC and all its parts, making note of all the names of the parts in it so you don’t forget which parts belong to which PC. With all the parts removed, check your inventory and it’ll show the Faulty and Broken parts. Buy new versions of those parts and re-build the PC. It’s slow, but this is always a guaranteed way to complete Broken Part Customer Requests.
- Otherwise, the first step is to check the email for any hints.
- One customer explained that pet hair went into the PSU. Another customer was a hairdresser and had their customers’ hair go into the PSU.
- Sometimes a customer will say they tried upgrading their own PC and mess up. One customer said they were forceful putting their RAM in. This means they broke the RAM as well as the entire motherboard by pushing it too hard.
- Sometimes they’ll just tell you the GPU or Air Cooler is broken.
- If you’re not sure where to start, try powering up the PC. Is it powered but has a black screen? It probably means the GPU is broken, get a new one and start up the PC. Check if the PSU is faulty/broken too.
- Did the PC power up to the desktop but it still has broken parts? Use the Thermal Scanner on your Tablet while in build mode with the PC. Do any parts look hot?
- If the motherboard is broken, often I’d see red spots on the motherboard.
- If the CPU cooler is broken it’ll look really red, but a yellow CPU and CPU cooler is normal because that area is always a bit hot.
- If the RAM is red it means those sticks are broken.
- If the GPU is red it’s broken, etc.
- If you tried using the Thermal Scanner and still getting nothing as red, you’ll have to just do trial and error.
- Sometimes the SSD in the other side of the case would be broken but looked normal.
- Sometimes it’s the HDD that is broken.
- At this point if it doesn’t give you the mission complete then start taking out everything and make note of the parts that were in the PC so you can put them back in after.
How to deal with specific customer requests
- I want my OS cloned to an SSD
- This one’s tricky but follow my steps exactly and it’ll always work.
- First, start up the PC. You can put your Software USB in. Do NOT PUT IN THE CLONING USB WHEH STARTING UP, it will mess up the OS.
- After the PC has booted to the OS, now you can put in the Cloning USB.
- Use the Software USB to run the Cloning Software
- When the Cloning Software is finished, restart the PC.
- You’ll get to a blue screen where you’re asked where to install the OS to. Make sure to select the SSD. When the PC finishes and boots up, you’re done. (If you’re not familiar with computers and don’t know the difference between HDDs and SSDs, check the menus for the names.)
- I think the most common mistake is starting the PC with the Cloning USB, it screws the whole process up.
- My PC is running too hot.
- Use USB to install Fan software, then increase all fans to “Performance” mode.
- My PC is too loud.
- Use USB to install Fan software, then increase all fans to “Eco” mode.
- I have a virus (or similar variants like “I clicked on something weird”, “My kid was messing with my PC”, and “My PC is running slow”)
- Use USB to install antivirus software, do a scan and clean up the viruses.
- I want stickers
- Go through the tabs and apply the kind of sticker they want to the PC case. Peely and Friends is in its own tab. Most of them are self-explanatory.
- The only one that was ambiguous to me was “bubbles”, if they want air bubbles then they’ll just say “bubbles”, and if they want comic book speech bubbles they’ll say “filled in bubbles”.
- I was once penalized because I didn’t put enough of the stickers the customer wanted. I think you need 3-5 stickers even if it’s an optional hint objective.
- They don’t grade you on where you put the stickers, so I just spammed 20 of the same sticker in one spot to make them happy.
- I want my PC case painted
- It’s self explanatory just paint the case.
- The only thing is always assume they want the glass painted as well unless they explicitly say “don’t paint the glass”.
- I want a certain theme on my PC case
- Click the printer and print the theme.
- Themes are always over the glass so make sure you apply the theme over the glass as well.
- Once I actually painted a theme on the PC case while I left the cover of the case in my workshop, it still painted the entire PC Case! When I put the PC cover back on it suddenly got painted.
- Watercool my CPU
- In the watercooling shop (not the normal shop) buy the CPU watercooler (called CPU blocks), a pump reservoir and a radiator. Instead of using a regular CPU cooler, you need to put the CPU block onto the CPU.
- You don’t need fans in watercooled PCs for this game, so take out case fans to make space for the reservoir and radiator and then connect the tubes. Add the coolant and watch it fill the tubes and then you’ll be able to turn on the PC after the loops are filled.
- Watercool my RAM
- In the watercooling shop buy Ram Heatsinks and Memory Blocks, as well as a pump reservoir and radiator if you don’t have it already in the PC. Then go to a watercooling bench in your workshop and select the memory and follow the steps. Then add it to the PC as you would normal RAM and attach it to the watercooling loop.
- Watercool my GPU
- Does the customer have a GPU that can be watercooled? If yes, buy a GPU Block in the watercooling shop that’s compatible.
- If not you have buy a GPU that can be watercooled. You can either buy a Watercooled GPU directly in the watercooling shop OR buy a regular GPU and buy a GPU Block and attach them to each other via a watercooling workbench.
- Then put the watercooled GPU into the PC Case and attach it to the watercooling loop.
- Watercool my motherboard
- Is the motherboard compatible with watercooling? If yes, buy a compatible Motherboard block. If not then buy a watercooling compatible motherboard and a Motherboard block.
- Then take the motherboard out of the PC or from the shop and go to the watercooling workbench and follow the steps to turn it into a watercooling motherboard.
- A CPU block is not required, it’s included in a watercooled motherboard, but you still need to get a pump reservoir and radiator.
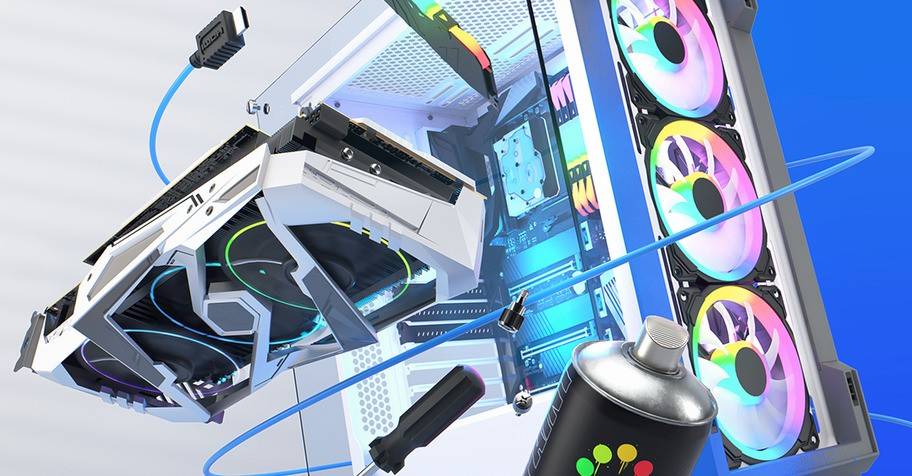
- I want RGB lights
- Look at how much budget you have.
- If they just want a cheap job, buy case fans that have RGB lighting, check the filters in the shop. Then remove their case fans and put in your own. Usually you can stick 3 case fans to the front of the case, take off the front case and the dust panel. Sometimes you can stick case fans to the top of the PC as well depending on the kind of case.
- If you’re doing a full PC build and have a big budget then make sure to instead buy RAM with RGB lighting – just buy 4 cheap sticks and they count as 4 separate RGB lights. Then buy RGB case fans if you still need more lighting. This is the easiest way to meet the required number of RGB components in the PC.
- Overclock the CPU to at least a certain amount of MHz
- If you have a budget, just buy a CPU that can has a boost and it should already be enough.
- If it’s not enough or if you’re given too low of a budget to buy a new CPU, then hold Delete key during the BIOS startup when turning on a PC, go to the CPU tab, and increase the Voltage slightly and increase the Ratio slightly.
- I’ve never had to increase the Base Clock but it’s an option as well.
- Also, for a higher chance of success easily use your USB to install the Fan program and turn all fans to Performance mode. This will help cool the PC and the CPU more which will in turn increase the chance of stability. Alternatively you can buy an AIO CPU Cooler if the case has sufficient space but I’ve never had to do so.
- To test if it’s stable use your USB and use OCCT software and Turn On – then see if the CPU Temp gets too high. (60-70 °C is normal during load, if it gets higher than that it’s not good.)
- If you’re too lazy to test, just save your game before sending the PC to the customer. Most of the time it’s fine if you made little voltage and ratio changes and you’ll get the 5 star review. If the PC doesn’t work for them then you’ll get a 1 star review and you’ll need to do the OCCT benchmarking. The key is to just make very tiny changes.
- I want my RAM latency changed. (Usually -2 or -3)
- You need to use software and do many benchmarks, but my simple solution was to just set all PC fans to Performance mode and go to the BIOS, hold Delete, go to the RAM tab and change the CL, TRCD and TRP values each by -2 or -3, depending on what the customer wants.
- Save before you ship the PC back to the customer and in all requests during my 20 hour playthrough I got 5 stars.
- If you get 1 star, then try changing Ram Voltage and running benchmarks, worst case check the budget and see if you can watercool the RAM.
- I want new parts and I heard bad things about used PC parts
- Just buy new parts and don’t use any used parts.
- Also, if they don’t mention used parts at all, then you can use used parts with no penalty for any request. Will your conscience bother you though?
- I want a certain part replaced
- You need to only replace that part with a new version of that part or a part that is better than it. There’s a parts Ranking on your Tablet you can use for this, but if it’s not a GPU, RAM or CPU then it’s going to be somewhat tricky to see what part is better. Let’s pose a question: How do you define what a better CPU Cooler or case fan is? It’s ambiguous sometimes.
- My solution was to always just immediately buy the exact same part again, so just type the exact name of the part in the shop.
- For this reason don’t sell parts before you’re finished the job because there’s no record of what the part was – there is a tab called PC Stats in the emails, but it gets updated whenever you make changes to the customer’s PC so if you sell the part it’s gone and the record will be gone too! They should’ve kept records that didn’t change in the emails!
- I have a cable missing, but I swear I connected all the cables? Or it keeps saying “PC Case unfinished” and “Missing Part”.
- If you get the “cable missing” message but you connected all the cables, it’s usually because the front panel of the PC Case is missing. This happened to me very frequently and I wouldn’t think of a front panel as cables.
- If it keeps saying the PC Case is “Unfinished” or “Missing Part”, check for anything you took out of the PC. Sometimes it includes small parts such as the PCI Lock or a dust panel (front or top of the PC case) that you need to put back in.
- If you get the Missing Part error message often, you need to make sure not to touch anything else in the PC. Just replace the bad part and leave everything else alone.
- I want to upgrade a certain part.
- Use the parts ranking app in the tablet if you want to confirm if a part is better than another.
- Alternatively, if you’re lazy or in a rush and if the client needs to upgrade only one part just look at the budget and buy the most expensive compatible part with the PC. Or if they want to upgrade two parts divide the budget between the two.
- Usually the GPU is the most expensive part, but sometimes high-end Ryzen CPUs can be pricey too.
- The customer wants 2, or 3 or even 4 GPUs. How do I fit them?
- 2 GPUs is easy, you can always fit any two of the same kind of SLI compatible GPUs together.
- If the GPUs are NOT SLI compatible (like the Nvidia 3000 series and above) then you can’t add two of them (they stopped compatibility for SLI for newer products in real life). Also you generally can’t mix and match different GPU series.
- My easiest solution for 2 GPUs that were powerful were 2 2080Ti’s.
- If they want 3 or 4 GPUs you’ll need to use 1080 or 1080Ti’s, those are the only GPUs thin enough to put so many of them. If you’re making a PC build with 3 or 4 GPUs you’ll need to add a powerful PSU otherwise you’ll get a blue screen.
- I want a certain 3DMark Score.
- Generally I upgrade the GPU first and the CPU second.
- Check how close you can get to the score. Is it close or not? Also, check which one has a lower FPS, is it the GPU or the CPU?
- Generally I get a 3080 and the most powerful Intel CPU and that gets the job done.
- Worst case I’ve upgraded the Intel CPU and it still wasn’t enough. You can try multiple GPUs, but I generally don’t make a PC build using multiple GPUs unless the customer specifically requires it.
- Sometimes you may need to swap out the entire motherboard for one that can support the newer AMD Ryzen CPUs, and if you have enough budget get an expensive one and be done with it.
- I’m getting clock_watchdog_timeout on a blue screen
- You forgot to add thermal paste or forgot to put a CPU cooler on top of the CPU!
- This is a very common problem in real life as well so always make sure to apply thermal paste when adding in a CPU cooler. When changing a CPU cooler in real life make sure to remove the old thermal paste using a solvent such as vinegar and then apply new thermal paste. (This game doesn’t feature CPU coolers with pre-applied thermal paste.)
- You forgot to add thermal paste or forgot to put a CPU cooler on top of the CPU!
- My PC is dusty
- In the Tools option when in Build Mode use the compressed air.
- You can clean out the PC easily, but if you’re not able to hit 100% try opening the other side of the case and cleaning that part out too. Change the camera angle too to help clean the corners of the PC.
Recent Posts


Thanks a lot for this guide, I kept getting 4 stars and started getting annoyed since I was sure I had everything they asked but now I see where I might have missed some steps, anyway, back to the grind, this game so much fun.
Glad it helped you out, enjoy the game!
Became annoyed when they stopped allowing me to get into BIOS with either the Del, or the F-2 key. Why does this happen?
Why is the text on the tablet garbled, whereas on the shop’s PC, it is clear?
I didn’t encounter the first issue. I definitely had the second issue with the tablet pc having bad text. There is a solution, if you use a bigger monitor with bigger resolution such as 4K (in real life not the game) the problem wasn’t as noticeable.
for second issue just turn off AMD FidelityFX in options and its fix your second issue
the Del/f-2 button happens to me when I click directly on the moniter instead of the table then the moniter.
the Del/f-2 button happens to me when I click directly on the moniter instead of the table then the moniter.
How can I complete this problem. MB ASUS ROG RAMPAGE VI APEX has 2 RAM slots on left and right side. The customer comes with 4 RAM, and he wants water cooled RAM so I’ve done the RAM, but I can’t install the water-cooled RAM on both sides. Need help please. Thank you.
Thanks for all the tips – esp the sticker ones. Talk about ambiguous..
I have a job that requires green cables – parts budget $10
Cables are $50 in shop, $100 in cable shop.
On top of that, I already had bought some green ones (my fav colour).
Even selecting green cables on another pc, and going back to the job, i can’t even enter build mode, getting a “this job requires a green coloured cable.”
So frustrating!